
The fastest way to clean ice off a sidewalk is to break it up mechanically with an ice chopper, then shovel it away, and apply an ice melt product to clear the remaining thin layer. For concrete, brick, or stone surfaces, the key is using the right de-icer and the right tools so you don’t crack the surface or kill nearby grass. This guide covers every method from basic shoveling to safe chemical options — so your sidewalk is clear and undamaged all winter long.
What You’ll Need
Tools
- Ice chopper or ice scraper bar
- Heavy-duty snow shovel or push shovel
- Stiff-bristle broom
- Garden sprayer or watering can (for liquid de-icers)
- Rubber-grip gloves
- Safety goggles (when chipping thick ice)
Materials
- Calcium chloride ice melt (safe to –25°F / –32°C) — gentlest on concrete
- Magnesium chloride — plant-friendly alternative
- Kitty litter or coarse sand — for traction on thin ice layers
- Rock salt / sodium chloride — budget option, use sparingly
- Warm water (for thin frost or light ice)
- Liquid de-icer spray (optional, for pre-treatment)
Safety and Precautions
- Wear non-slip footwear. Icy sidewalks are a slip hazard. Ice cleats or traction devices on your boots reduce fall risk dramatically.
- Protect your back. Use a wide-blade shovel and push snow rather than lifting when possible. Bend at the knees, not the waist, when lifting ice chunks.
- Don’t use hot water on frozen concrete. The sudden temperature change can cause thermal shock, cracking or spalling the surface — especially on older concrete.
- Keep de-icers away from plants and grass. Rock salt and calcium chloride can burn grass roots and kill ornamental plants. Create a barrier or sweep runoff away from garden beds.
- Never use metal tools on stamped or decorative concrete. Metal chippers can scratch or chip decorative finishes. Use a plastic ice scraper on these surfaces.
- Don’t chip ice that’s bonded to pavers. Aggressive chipping can dislodge paver joints or chip edges. Use de-icer to loosen before chipping.
- Read de-icer labels. Some products are not rated for colored concrete, pavers, or brick. Check the label before applying.
Step-by-Step: How to Remove Ice From a Sidewalk
Step 1 — Clear Loose Snow First
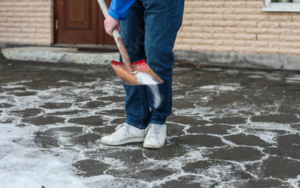
Before attacking the ice, remove all loose snow on top of it. Use a push shovel or broom to clear snow to the side of the walk. If you try to chip ice with snow on top, you lose visibility and waste energy. Getting down to the bare ice layer makes every next step more effective.
Tip: Clear snow before it compacts. Freshly fallen snow is 90% air and shovels easily. Wait 24 hours and the same snow compresses into a hard, heavy layer that’s much tougher to remove.
Step 2 — Score the Ice With an Ice Chopper
An ice chopper (also called an ice scraper bar) is a long-handled tool with a flat metal blade designed to break bonded ice. Use it to score lines across the ice sheet — first in parallel lines about 12 inches apart, then perpendicular lines to create a grid pattern. This breaks a solid ice sheet into manageable chunks rather than sending you slipping while pushing on an immovable slab.
For thick ice (1 inch or more), work your way across the surface systematically. Don’t just hack randomly — a grid pattern gives you the most leverage and fastest results. Once scored, slide your shovel under the chunks and pry them up. Toss ice chunks to the side, not back into your yard where they’ll re-freeze.
Step 3 — Shovel Up Broken Ice Chunks
After scoring, shovel up the loosened chunks immediately. A wide-blade push shovel works best for scooping ice pieces. If chunks are too large or heavy to shovel easily, break them up further with the ice chopper. Pile ice away from the sidewalk edge, ideally in an area where meltwater will drain away from your foundation.
Don’t pile ice next to driveways or garage entries — it will melt, run under the garage door, and refreeze overnight.
Step 4 — Apply Ice Melt to the Remaining Thin Layer
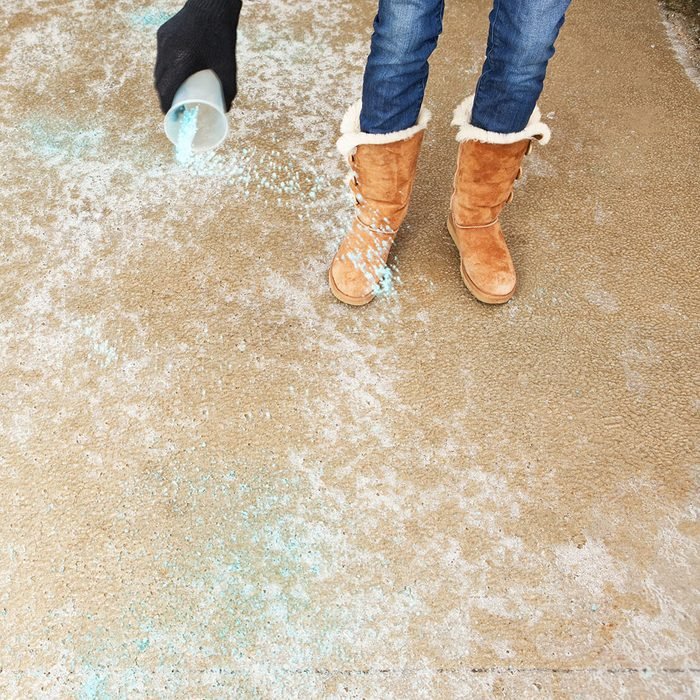
After shoveling, there’s almost always a thin, bonded ice layer left. This is where ice melt shines. Spread your chosen de-icer evenly across the surface. Use the recommended amount on the label — more is not better. Over-applying de-icer wastes product, harms concrete, and damages nearby grass.
Best de-icer options by surface:
- Concrete sidewalks: Calcium chloride or magnesium chloride. Both work at very low temps and are gentler on concrete than rock salt. Avoid sodium chloride (rock salt) on concrete less than 2 years old — it accelerates spalling.
- Brick or natural stone: Magnesium chloride is the safest. Avoid anything with urea (fertilizer) — it stains porous surfaces.
- Asphalt: Rock salt or calcium chloride both work fine. Asphalt is more cold-tolerant than concrete.
- Pavers: Use magnesium chloride or calcium chloride. Avoid sand-set pavers with rock salt — salt draws moisture into joints and can heave pavers in freeze-thaw cycles.
Allow 10–20 minutes for the de-icer to work into the ice layer. You’ll see the ice turn slushy — that’s the chemical reaction breaking the bond between ice and concrete.
Step 5 — Scrape and Sweep the Slush Away
Once the de-icer has turned the ice to slush, use your shovel to push the slush off the sidewalk. Follow with a stiff broom to sweep the surface clean. Don’t leave slush sitting on the walk — it will refreeze once temps drop.
If the slush is very watery, it may drain on its own. In very cold weather (below 15°F / –9°C), slush can refreeze almost instantly — work fast and sweep it to the grass or gutter immediately.
Step 6 — Add Traction If Ice Remains
If a thin layer of ice is still bonded and you can’t safely remove it right now (more de-icer needed, or temps too low for chemical products to work), add traction material to make the surface safe while the de-icer works. Kitty litter, coarse sand, or poultry grit all work well. They don’t melt ice but provide grip underfoot to prevent falls.
Avoid using fireplace ash — it turns into a slippery paste when wet. Don’t use sand on indoor entryways — it tracks in and scratches hardwood and tile floors.
Step 7 — Rinse the Surface After Ice Is Cleared
Once the ice is gone and temperatures are safely above freezing (35°F / 2°C or higher), rinse the sidewalk with water to remove de-icer residue, salt crystals, and sand. Left on the surface, calcium chloride residue absorbs moisture and can keep the surface slightly damp, which accelerates concrete surface degradation over time.
This step is especially important in spring after the last ice event of the season. A thorough rinse protects your concrete and prevents de-icer tracking into the house.
Pre-Treatment: Preventing Ice Bonding Before It Starts
The easiest ice to remove is ice that never fully bonded to the surface. Before a winter storm, apply a liquid de-icer or anti-icing spray to the clean, dry sidewalk. Liquid magnesium chloride or pre-mixed brine solution (salt water) creates a barrier between the concrete and the forming ice. This makes removal much easier — a pass with the shovel often clears the walk without needing to chip or apply additional de-icer afterward.
Pre-treatment works best when applied 30 minutes to 1 hour before precipitation begins. It’s not effective once heavy snow accumulation starts — snow insulates the treated surface and the anti-icing layer loses effectiveness. Many municipalities pre-treat roads with brine trucks before storms; the same principle works for residential sidewalks.
For an internal reference on similar surface maintenance, see our guide on how to clean concrete floors for tips on keeping concrete in top condition year-round.
What Temperature Do De-Icers Stop Working?
| De-Icer Type | Effective Down To | Safe for Concrete? | Safe for Plants? |
|---|---|---|---|
| Calcium Chloride | –25°F (–32°C) | Yes (use sparingly) | Moderate risk |
| Magnesium Chloride | –13°F (–25°C) | Yes | Low risk |
| Rock Salt (NaCl) | 20°F (–7°C) | No (causes spalling) | High risk |
| Potassium Chloride | 25°F (–4°C) | Yes | Moderate risk |
| Urea (fertilizer) | 25°F (–4°C) | Yes | Low risk |
Below –25°F, even the best chemical de-icers slow down significantly. At extreme temps, mechanical removal (chopping and shoveling) is your only reliable option.
Pro Tips and Common Mistakes
- Don’t wait for ice to thicken. A 1/4-inch ice layer is many times easier to remove than a 2-inch layer. Check your walk after every temperature drop and address ice early.
- Work with the freeze-thaw cycle. If daytime temps will rise above freezing, wait. Apply de-icer in the morning and let the sun and chemistry do the heavy lifting before you shovel in the afternoon.
- Use less de-icer than you think you need. The label dosage is designed for effective melting. Over-application doesn’t melt ice faster — it just wastes product and increases harm to surrounding soil and concrete.
- Keep a container of de-icer near the door. The biggest barrier to timely treatment is having to search for the bag in the garage. Keep a small bucket with a scoop right by the door for immediate use.
- Never mix de-icer products. Some combinations produce chemical reactions that can damage surfaces or reduce effectiveness. Stick to one product per application.
- Store de-icer in a sealed container. Calcium chloride absorbs moisture from the air and clumps badly if stored in an open bag. Transfer to a sealed bucket after opening.
- Don’t use a metal shovel on decorative concrete. Stamped, stained, or brushed finishes scratch easily with metal blades. Use a plastic shovel blade on these surfaces.
Troubleshooting Ice Problems
Ice Keeps Coming Back in the Same Spot
Recurring ice in one location usually means a drainage problem. Water is pooling in that spot from a gutter downspout, roof runoff, or a low point in the walkway. Address the drainage issue (extend a downspout, regrade the area, or seal a crack where water seeps under the walk) or the ice will return every time temps drop. A permanent fix is grading the area so water flows away from the walk rather than across it.
De-Icer Isn’t Working
If your de-icer isn’t melting ice, check the temperature. Rock salt stops being effective below 20°F (–7°C). Switch to calcium chloride if temperatures are in the single digits. Also check how much de-icer you applied — a thin sprinkle won’t do much on thick ice. Spread a full, even layer and give it 15–20 minutes to work.
Ice Bonded Extremely Tight — Won’t Budge
Black ice (a very thin, nearly transparent ice layer) bonds extremely tightly to concrete. Apply calcium chloride and wait 20 minutes before chipping. For thick bonded ice slabs, pour a very small amount of warm (not hot) water at the edges to start the de-bonding process, then chip the edges and work inward. Never pour large amounts of water — it refreezes and makes things worse.
Concrete Looks Damaged After Winter
White, flaky patches or pitting that appear after winter is called spalling — a sign of freeze-thaw damage, often worsened by de-icers. Repair minor spalling with a concrete resurfacer in spring. To prevent future damage, seal your concrete every 2–3 years with a penetrating concrete sealer. Sealed concrete resists moisture absorption and is far more resistant to freeze-thaw cracking. See our guide on how to clean epoxy floors for related surface maintenance tips.
Frequently Asked Questions
What is the safest ice melt for concrete sidewalks?
Calcium chloride and magnesium chloride are the safest de-icers for concrete. They work at very low temperatures and cause less surface damage than rock salt (sodium chloride). Avoid rock salt on concrete less than 2 years old — new concrete is especially vulnerable to salt-induced spalling. For older, sealed concrete in good condition, moderate rock salt use is acceptable.
Can I pour hot water on an icy sidewalk?
No. Pouring hot water on a frozen concrete sidewalk risks thermal shock, which can crack or spall the surface. It also creates a large amount of water that will refreeze once the temperature drops — potentially worse than the original ice. Warm water (not hot) can be used sparingly at the edges of bonded ice to start loosening it, but never as a primary ice removal method.
Is sand or kitty litter better for traction on ice?
Both coarse sand and kitty litter work well for traction. Coarse sand is more durable and cheaper in bulk. Kitty litter is more readily available and works in a pinch. Neither melts ice — they only provide grip. Cleanup after the ice melts is important with both, as sand washes into storm drains and excess clay litter can create muddy buildup. Avoid fine sand, which packs flat and provides minimal traction.
How do I prevent ice from forming on my sidewalk in the first place?
Pre-treat with a liquid anti-icing product (magnesium chloride solution or commercial brine spray) before a storm hits. Apply 30–60 minutes before precipitation begins. Also ensure proper drainage — water that pools on sidewalks is a primary cause of ice formation. Fix any low spots or drainage issues in fall before winter arrives. Sealing concrete in the fall also reduces moisture absorption that contributes to surface ice formation.
How long does it take for ice melt to work?
Most granular ice melt products start working within 5–10 minutes of application. Full effect on a 1-inch ice layer typically takes 15–30 minutes at temperatures above 15°F (–9°C). At very low temperatures (below 0°F / –18°C), even fast-acting calcium chloride can take 30–45 minutes. Spreading the de-icer evenly and thin speeds things up — clumped piles dissolve slower than an even distribution.
Conclusion
Cleaning ice off a sidewalk safely comes down to three steps: break it up mechanically, shovel it away, and finish with the right de-icer for your surface type and temperature. Don’t wait for ice to build up — catch it early, use the correct product, and protect your concrete with annual sealing. For year-round surface care, check out our guide on how to clean galvanized steel and our full library of home maintenance guides at GuideGrove.
