
What You’ll Need
- Mild dish soap
- Warm water
- Rubber conditioner (303 Aerospace Protectant, Armor All Rubber Protectant, or similar)
- Silicone spray lubricant
- Petroleum jelly (Vaseline — for small, non-critical rubber parts)
- White vinegar (for mold on rubber)
- Baking soda (for deodorizing rubber)
Why Old Rubber Degrades
Natural and synthetic rubber contains plasticizers and oils that keep it flexible and pliable. Over time, these compounds evaporate or oxidize due to UV exposure, heat, ozone exposure, and age. When the plasticizers are gone, rubber dries out, becomes stiff, cracks, and develops a white chalky “bloom” on the surface. The good news: the degradation process is slow and can be significantly slowed or partially reversed with proper cleaning and conditioning. The bad news: once rubber has cracked through, no amount of conditioning will restore its function — replacement is needed.
Safety and Precautions
- Never use petroleum-based products on rubber. Gasoline, petroleum solvents, and some lubricants swell and degrade rubber. Use only rubber-safe products: silicone lubricants, rubber conditioners, or petroleum jelly (which, despite its name, is safe for rubber at low concentrations).
- Avoid bleach on most rubber. Bleach accelerates rubber oxidation and brittleness. For mold on rubber, diluted white vinegar is a safer disinfectant.
- Don’t use silicone sprays on rubber mats that are used as traction surfaces. Silicone makes rubber very slippery — a safety hazard for floor mats and bath mats. Use non-silicone rubber conditioner on traction surfaces.
- Test all conditioning products on a small area first. Some rubber types (EPDM, neoprene, silicone rubber) respond differently to various conditioners.
Step-by-Step: How to Clean Old Rubber
Step 1 — Dust and Brush Off Loose Debris
Before any wet cleaning, brush off loose dirt, dust, and debris from the rubber surface with a dry soft brush. Old rubber is often brittle — excessive scrubbing without lubrication can crack fragile aged rubber. A light dry brush or rinse with water is sufficient to remove loose surface contamination.
Step 2 — Wash With Mild Soap and Warm Water
Mix a few drops of mild dish soap in warm water. Using a soft cloth or soft-bristle brush, wash the rubber surface gently in circular motions. Dish soap cuts through grease, grime, and surface oxidation effectively. For rubber seals and gaskets in equipment, this washing removes accumulated grime and dried lubricants that accelerate deterioration. For floor mats and large rubber items, a pressure washer or garden hose works well — keep pressure moderate on aged rubber.
Step 3 — Remove White Bloom or Oxidation
The chalky white film on aged rubber (“bloom” or oxidation) requires slightly more work than soap alone. For most rubber surfaces, scrubbing the bloomed area with a baking soda paste (baking soda + water to a thick consistency) using a soft brush removes the oxidized layer effectively. Rinse completely after.
Alternatively, for larger items like rubber weather stripping and door seals, 303 Aerospace Protectant or rubber rejuvenator applied to the surface and worked in with a cloth removes bloom while simultaneously conditioning the rubber.
Step 4 — Rinse and Dry Thoroughly
Rinse all soap and cleaning product residue with clean water. Dry with a clean cloth or allow to air dry fully before conditioning. Applying rubber conditioner to a wet surface dilutes it and reduces effectiveness.
Step 5 — Apply Rubber Conditioner or Restorer
This step is critical for old, dried rubber. Apply a rubber conditioner — 303 Aerospace Protectant is the most widely recommended option for rubber restoration — to the clean, dry surface. Work it in with a cloth in the direction of the rubber grain if visible. Allow it to absorb for 15–20 minutes, then buff off the excess. The conditioner replaces lost plasticizers and creates a UV-protective layer that slows future degradation.
For rubber O-rings, gaskets, and seals: petroleum jelly (Vaseline) applied sparingly in a thin coat is an excellent conditioner for rubber parts that see non-petroleum fluid contact. It keeps the rubber supple and creates a better sealing surface.
For rubber weather stripping and door seals: silicone spray applied after cleaning lubricates and conditions simultaneously, preventing the rubber from sticking to the door frame and cracking at contact points. Don’t use petroleum-based WD-40 — use specifically silicone-based lubricant.
Cleaning Rubber by Specific Item Type
Rubber Door Seals and Weather Stripping
Clean with warm soapy water and a soft brush. Rinse, dry, and apply a silicone-based rubber protectant or 303 Aerospace Protectant. Do this twice a year — spring and fall — to prevent the seal from drying, cracking, and failing to seal the door against air and water infiltration. A well-maintained door seal also prevents squeaking and doors sticking in cold weather.
Rubber Floor Mats
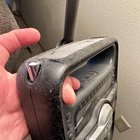
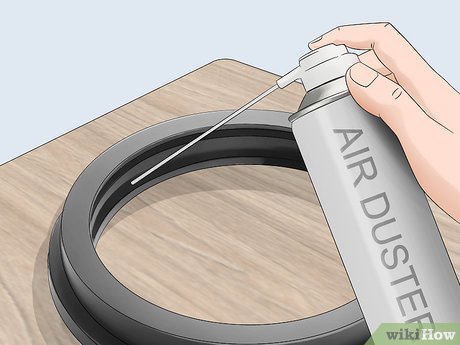
Wash with warm soapy water and a stiff-bristle brush. Power wash for heavy grime. Allow to dry fully before replacing in the vehicle or home — rubber mats trap moisture underneath and can cause mold growth under the mat and damage to the floor below. Apply a non-slip rubber protectant (not silicone) to restore the appearance.
Rubber Tool Handles and Grips
Wipe down with a damp cloth and mild soap. For tacky or sticky aged rubber grips (a common problem with old power tool handles), clean thoroughly, allow to dry, then apply a small amount of silicone lubricant with a cloth. Wipe off excess — you want the grip to feel smooth but not slippery. If the rubber is melting or decomposing into a sticky black residue, it’s past recovery — the grip should be replaced or wrapped with electrical tape or grip tape.
Rubber Gaskets and O-Rings
Clean with mild soap and water. Dry completely. Apply petroleum jelly or a silicone grease sparingly to condition the rubber and improve sealing. Check the seal for cracking or deformation — a rubber gasket with deep cracks or flat spots won’t seal properly regardless of conditioning. Replacement is needed when visible structural damage is present.
How to Remove Mold From Rubber
Mold on rubber (common on rubber shower components, window seals, and washing machine door gaskets) should be treated with a diluted white vinegar solution — not bleach:
- Mix equal parts white vinegar and water in a spray bottle
- Spray the molded areas and let sit for 10 minutes
- Scrub with a toothbrush or small brush
- Rinse thoroughly with clean water and dry
- Apply rubber conditioner after the mold treatment to restore the cleaned rubber surface
For severe black mold staining that has penetrated rubber (common in washing machine door seals), diluted bleach (1 tablespoon per cup of water) applied briefly may be needed. Rinse very thoroughly and condition after — bleach accelerates rubber degradation, so minimize contact time.
Pro Tips and Common Mistakes
- Never use WD-40 on rubber. The petroleum-based carrier in WD-40 degrades rubber over time. Use silicone spray or rubber-specific conditioners instead.
- 303 Aerospace Protectant is the gold standard for rubber conditioning. Widely used by marine, automotive, and RV enthusiasts for rubber seals and exterior rubber parts — it provides UV protection and plasticizer replenishment simultaneously.
- Condition rubber before it gets brittle. Preventive maintenance on rubber is far more effective than attempting to restore already-brittle, cracked rubber. Condition rubber components twice a year as part of routine home maintenance.
- Some sticky old rubber cannot be cleaned — it must be replaced. When natural rubber ages to the point of decomposing into a sticky residue (sometimes called “off-gassing”), it’s past recovery. Replace it — trying to clean decomposing rubber is a messy, futile effort.
Frequently Asked Questions
Can I restore hard, brittle rubber?
Mildly stiff rubber that hasn’t yet cracked can be partially restored with rubber conditioner. Clean thoroughly, then apply a generous coat of 303 Aerospace Protectant or rubber rejuvenator. Allow to absorb for 24 hours. For rubber that’s already cracking or extremely hard, the polymer chains have broken down too severely for conditioning to restore function — replacement is the only practical solution.
How do I make old rubber soft again?
The most effective method is applying a plasticizer-containing rubber conditioner (303 Aerospace Protectant, Armor All Rubber Protectant) to a thoroughly cleaned rubber surface. For severe stiffness, apply multiple coats over several days, allowing each coat to fully absorb. A warm (not hot) environment during conditioning helps the plasticizers penetrate. Don’t expect miracles on 30-year-old hardened rubber — improvement is possible, but completely reversing severe hardening is not achievable.
Is WD-40 safe for rubber?
WD-40 is not recommended for rubber. Its petroleum-based formula swells and degrades natural rubber over time. While a single application won’t cause immediate failure, repeated use on rubber seals, gaskets, and weather stripping will accelerate deterioration. WD-40 Specialist Silicone Lubricant (a separate product in WD-40’s line) is rubber-safe — but the original WD-40 Multi-Use Product should be avoided on rubber.
How do I remove white residue from rubber?
White residue on rubber is “bloom” — oxidized plasticizers that have migrated to the surface as the rubber ages. Clean with a mild soap and water wash, then scrub with a baking soda paste for persistent bloom. After cleaning, apply rubber conditioner — this replenishes plasticizers and prevents new bloom from forming for several months. Regular conditioning prevents bloom entirely.
How do I clean black rubber weather stripping on windows and doors?
Wipe with warm soapy water and a soft cloth or brush, rinse clean, dry, and apply a rubber seal conditioner or 303 Aerospace Protectant. For mold in window seal channels (very common), use the diluted vinegar spray method described above. Clean the seal channels (the grooves the rubber sits in) as well as the rubber itself. Condition twice a year — in spring and fall before the temperature extremes of summer and winter.
Conclusion
Cleaning and conditioning old rubber extends its useful life significantly. The process is simple: mild soap wash, remove oxidation bloom with baking soda or conditioner, rinse, dry, and apply a quality rubber conditioner or silicone lubricant. Do this twice a year on rubber door seals, weather stripping, and outdoor rubber components. For related maintenance guides, check out our articles on how to clean old tools and how to clean neoprene at GuideGrove.
