
To clean Karndean flooring, sweep or vacuum daily to remove grit, then damp mop with a pH-neutral floor cleaner diluted in warm water. Karndean is a luxury vinyl tile (LVT) product with a polyurethane wear layer — it’s durable, waterproof, and low-maintenance, but it needs the right cleaners. Harsh chemicals, steam mops, or abrasive scrubbers will strip the protective layer and dull the finish permanently. This guide covers daily care, deep cleaning, stain removal, and how to restore shine when Karndean starts looking dull.
What You’ll Need
- Soft-bristle broom or microfiber dust mop
- Vacuum cleaner with hard floor setting (no beater bar)
- Microfiber flat mop
- pH-neutral floor cleaner (Karndean recommends their own Karndean Clean, or use a vinyl-safe neutral cleaner)
- Warm water
- Two buckets (one for solution, one for rinsing)
- Karndean Refresh or similar LVT floor polish (for restoring sheen)
- Clean microfiber cloths
- Soft-bristle brush (for grout line areas)
Safety and Precautions
- Never use a steam mop on Karndean. Steam heat damages the adhesive bond and can cause planks to lift, warp, or separate. Karndean explicitly voids its warranty for steam mop damage.
- Avoid solvent-based cleaners. Acetone, paint thinner, or solvent-based products dissolve the wear layer and permanently damage the surface. Even nail polish remover can damage Karndean if spilled and left.
- Don’t use abrasive scrubbers or steel wool. These scratch the wear layer, creating dull patches that cannot be repaired without professional refinishing.
- Avoid bleach and ammonia-based cleaners. These strip the protective finish and can discolor the floor.
- Never flood the floor. Even though Karndean is waterproof on its surface, excess water can work into seams and reach the subfloor, causing subfloor damage or causing glue-down planks to lift.
- Use felt pads under furniture. Metal legs and chair casters scratch and dent the wear layer. Apply self-adhesive felt pads to all furniture legs.
Step-by-Step: How to Clean Karndean Floors
Step 1 — Daily Dry Cleaning: Sweep or Dust Mop
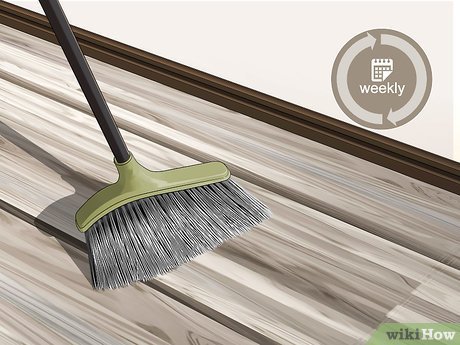
Every day — or whenever the floor looks dusty — sweep with a soft-bristle broom or run a microfiber dust mop across the surface. Grit and fine sand particles are the number one enemy of LVT finishes. When walked on, tiny particles of grit act like sandpaper on the wear layer, causing micro-scratches that accumulate into a dull, hazy appearance over time. A daily sweep takes 2 minutes and dramatically extends the life of the finish.
If vacuuming, use the hard floor setting (soft brush roll only). Never use a vacuum with a rotating beater bar on Karndean — it will scratch the surface.
Step 2 — Prepare Your Cleaning Solution
Fill one bucket with warm water and add the recommended amount of pH-neutral floor cleaner per the product instructions. For Karndean’s own Karndean Clean, the ratio is typically a capful per gallon of water. Don’t add more cleaner thinking it’ll clean better — excess cleaner leaves a residue film that makes the floor look dull and feels tacky. Fill a second bucket with clean warm water for rinsing.
Water temperature matters: use warm, not hot. Hot water doesn’t clean LVT better and can soften the adhesive in glue-down installations over time.
Step 3 — Damp Mop the Floor
Dip your microfiber flat mop into the cleaning solution, then wring it out thoroughly until it’s barely damp — not dripping. A wet mop leaves standing water on the surface; you want just enough moisture to lift dirt and grime without flooding seams.
Mop in the direction of the planks or tiles. Work backward from the far end of the room toward the exit so you don’t walk on the clean floor. Change the cleaning solution when it looks dirty — mopping with dirty water pushes grime around instead of removing it.
Step 4 — Rinse Mop Passes (If Using Soapy Cleaner)
After mopping with the cleaning solution, do a second pass with a mop dampened in clean water only. This picks up any cleaner residue that would otherwise leave a dull film on the surface. This step is especially important if you used more cleaner than recommended, or if the floor felt tacky after previous cleanings — residue buildup is a very common reason Karndean floors look dull despite regular cleaning.
Step 5 — Let the Floor Air Dry
Allow the floor to air dry before walking on it. Because you used a barely damp mop, Karndean should dry within 5–10 minutes in normal indoor conditions. Don’t use towels or cloths to speed-dry — this can redistribute fine particles and create light scratches. In humid conditions, open windows or run a fan to speed drying.
Step 6 — Deep Clean Monthly
Once a month (or when the floor looks dingy despite regular damp mopping), do a deeper clean. Use Karndean’s Clean product at full strength in a small bucket, applied with a cloth or soft brush to problem areas — particularly around kitchen appliances, near entry doors, and along baseboards where grime accumulates. Work in small sections, scrub lightly, then wipe clean with a damp cloth.
For grout line areas (if you have a tile-style Karndean layout), a soft-bristle brush run along the recessed grout lines removes embedded dirt that a flat mop misses.

Step 7 — Restore Shine With Karndean Refresh
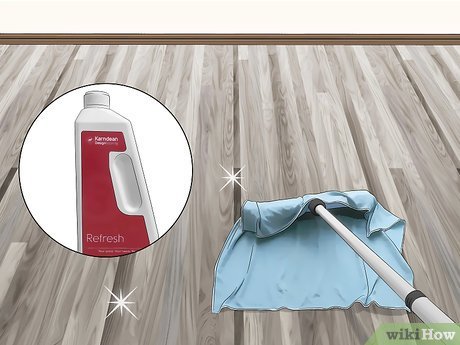
Over time, even properly maintained Karndean floors develop a satin-to-matte appearance as the factory topcoat wears down in high-traffic areas. Karndean makes a product called Karndean Refresh — a thin floor polish designed specifically for their LVT products. Apply it every 3–6 months (or when the floor looks dull) after a thorough cleaning session.
Apply Refresh in thin, even layers using an applicator mop. Let each coat dry fully (typically 30 minutes) before applying a second coat. Two thin coats are better than one thick coat. Don’t apply too much — buildup creates a yellowed, plastic-looking finish over time. Strip old Refresh with Karndean Remove before reapplying if you notice heavy buildup.
Stain Removal Guide for Karndean
| Stain Type | Removal Method | Avoid |
|---|---|---|
| Food and drink spills | Wipe immediately with damp cloth; mild cleaner for sticky residue | Abrasive scrubbers |
| Scuff marks | Rub gently with a pencil eraser or a microfiber cloth; Karndean Clean for stubborn scuffs | Steel wool, magic eraser |
| Grease or cooking oil | Dish soap diluted in warm water, applied with a soft cloth | Solvent cleaners |
| Ink or marker | Small amount of isopropyl alcohol (70%) on a cotton swab, work from outside in | Acetone, nail polish remover |
| Nail polish | Non-acetone nail polish remover on a cotton swab; test in hidden area first | Acetone-based removers |
| Rust stains | Karndean Clean or a vinyl-safe rust remover; do not scrub | Steel wool, bleach |
| Dried paint | Carefully scrape with a plastic scraper; warm water to soften; mild cleaner to finish | Metal scrapers |
Pro Tips and Common Mistakes
- Use a walk-off mat at all entry points. Most floor damage comes from grit tracked in from outside. A quality doormat (indoor and outdoor) captures the majority of damaging particles before they reach the floor.
- Don’t use “mop and shine” combination products. Products that claim to clean and add shine in one step leave a waxy buildup on LVT surfaces that dulls the floor over time and is difficult to strip.
- Replace chair casters with soft rubber or LVT-safe casters. Hard plastic office chair casters are notorious for scratching vinyl floors. Replace them with soft rubber casters designed for hard floors.
- Clean spills immediately. Karndean is waterproof, but acidic spills (wine, juice, vinegar) left on the surface can dull the wear layer over time. Wipe up spills as soon as they happen.
- Never drag furniture across Karndean. Always lift furniture or use furniture sliders. Dragging even light furniture can leave deep gouges.
- Don’t use rubber-backed rugs on Karndean. Rubber backs can react with LVT wear layers over time and leave permanent yellow or brown staining. Use rugs with felt or non-rubber backing.
Frequently Asked Questions
Can I use a Swiffer WetJet on Karndean?
The Swiffer WetJet cleaning solution contains surfactants and conditioning agents not recommended for LVT. The product isn’t pH-neutral enough for regular Karndean use and can leave a residue that dulls the finish. A plain microfiber damp mop with a dedicated vinyl-safe cleaner is a better choice. The Swiffer dry sweeper (without solution) is fine for dust removal.
Why does my Karndean floor look dull after cleaning?
Dullness after cleaning is almost always caused by cleaning product residue buildup. Over time, even small amounts of leftover cleaner build up on the surface and create a hazy film. To fix it, mop the floor with clean water only (no cleaner) several times in a row to strip the residue. If the floor still looks dull, apply a thin layer of Karndean Refresh after the floor is completely dry and clean.
What is the best cleaner for Karndean flooring?
Karndean’s own Karndean Clean is specifically formulated for their floors and is the safest option. Alternatives include Bona Hard Floor Cleaner, Method Hard Floor Cleaner, or any pH-neutral vinyl floor cleaner. The key is pH-neutral, no wax, no oil soap, no bleach. Check the product label — if it says “leaves a shine” or “conditions,” it’s likely leaving a wax or oil residue that will build up on Karndean.
How often should I use Karndean Refresh?
Karndean recommends applying Refresh every 3–6 months in normal residential use. In high-traffic areas like hallways and kitchens, you may need it more frequently. Signs it’s time: the floor looks dull in traffic paths but shiny in low-use areas, or the floor feels slightly rough rather than smooth. Always clean thoroughly before applying Refresh — polish over dirt locks in the grime.
Can Karndean flooring be damaged by sunlight?
Prolonged direct sunlight can cause slight color fading in Karndean floors over many years, just like most flooring products. For south-facing rooms with large windows, use UV-filtering window film or curtains during peak sun hours to minimize long-term fading. Karndean’s glue-down products have better UV stability than floating LVT, but neither is completely UV-immune.
Conclusion
Cleaning Karndean flooring is straightforward: sweep daily, damp mop with a pH-neutral cleaner weekly, and restore the finish with Karndean Refresh every few months. Avoid steam mops, harsh chemicals, and abrasive scrubbers, and your Karndean floor will stay looking sharp for years. For more LVT and luxury vinyl care guides, check out our articles on how to clean LVP flooring and how to clean epoxy floors at GuideGrove.
