
Installing a pre-hung door — interior or exterior — follows the same core process: set the unit in the rough opening, shim it plumb and level, nail it, and trim it out. The differences are significant, though. Exterior doors require weatherproofing, a threshold, and a structural-grade installation. Interior doors are lighter, need no waterproofing, and focus on smooth swing and clean trim. This guide covers both, side by side, so you can do either one with confidence.
What You’ll Need
Tools (Both Door Types)
- Tape measure
- 4-foot level
- Hammer or finish nailer (16-gauge)
- Circular saw or miter saw
- Drill and bits
- Utility knife
- Cedar shims
- Pry bar
- Safety glasses and gloves
Additional for Exterior Doors
- Self-adhering flashing tape
- Metal threshold (if not included with door)
- Exterior silicone caulk (100% silicone or polyurethane)
- Metal drip cap (for the head)
- Fiberglass insulation batt (for gap filling)
- 3-inch structural screws (for hinge jamb reinforcement)
- Backer rod
Materials (Both Door Types)
- Pre-hung door unit (door slab + jamb assembled)
- 8d finish nails
- 3-inch wood screws (for hinge reinforcement)
- Interior casing trim
Safety Precautions
Pre-hung exterior doors are heavy — solid-core or steel exterior doors weigh 80–150 pounds. Always have at least one helper for lifting and positioning. Interior hollow-core doors are lighter (20–40 lbs) but still awkward to maneuver alone in a tight stairwell or hallway. Wear work gloves — door frame edges and metal thresholds are sharp. When using a nail gun, never bypass the safety tip, and keep hands clear of the nailing path.
Common Principles for Both Door Types
Regardless of whether you’re installing an interior or exterior door, the same fundamentals apply. First, always shim and plumb the hinge jamb before setting the latch jamb. Second, drive nails or screws through shims — never through the jamb face without a shim behind it (this bows the jamb). Third, the reveal gap between the door slab and jamb on all three sides should be consistent — approximately 1/8 inch. And fourth, check diagonal measurements across the door opening after shimming to confirm the frame is square before permanently fastening.
How to Install an Interior Pre-Hung Door
Interior pre-hung doors are typically hollow-core or solid-core slabs in a thin wood jamb. They’re lighter, faster to install, and require no weatherproofing. The trickiest part is usually getting the frame plumb in walls that aren’t.
Step 1: Prepare the Rough Opening
Check the rough opening for plumb and square. Measure width and height — the rough opening should be door width + 2 inches and door height + 2 inches. Remove any existing casing, door stop, or old jamb material. Check the floor across the opening for level — if the subfloor is out of level, you’ll need to account for it in shimming the door jamb.
Step 2: Set the Door Unit in the Opening
With a helper, lift the pre-hung unit into the rough opening from one side (either side — interior doors can be set from either face). Rest the bottom of the jamb on the finished floor or subfloor. Center the unit in the opening so the jamb face is flush with the finished wall surface on both sides. If the wall is thicker or thinner than the jamb width, you’ll need to add jamb extensions (thin wood strips) to fill the gap.
Step 3: Shim and Plumb the Hinge Jamb
Place your level against the hinge jamb. Insert cedar shims behind the jamb at the top, middle (opposite the center hinge), and bottom of the hinge side. Adjust until the hinge jamb reads plumb. Drive a single 8d finish nail through the jamb and shim at each location to temporarily hold it while you check the rest of the unit.
Step 4: Check the Head Jamb and Adjust the Latch Side
Open the door slightly and look at the head jamb — it should be level and parallel to the top of the door slab (equal reveal across the top). Adjust shimming if needed. Then close the door and look at the reveal between the door slab and the latch jamb — it should be a consistent 1/8 inch from top to bottom. Shim the latch jamb to achieve this reveal, then temporarily nail it.
Step 5: Permanently Fasten the Jamb
Drive two 8d finish nails at each shim location on both jamb sides: one nail near the door stop and one near the outer edge. At each hinge location, drive a 3-inch structural screw through the hinge jamb and shim into the rough framing — this carries the door’s weight and is critical for long-term smooth operation.
Step 6: Trim Shims and Install Casing
Score and snap shims flush with the jamb face using a utility knife. Install the door stop if it’s not already attached (on some pre-hung units, the stop is nailed separately). Cut and nail interior casing trim at a 3/16-inch reveal from the jamb edge on both sides of the wall. Set all nail heads below the surface with a nail set. Test the door swing — it should open and close smoothly and latch cleanly.
How to Install an Exterior Pre-Hung Door
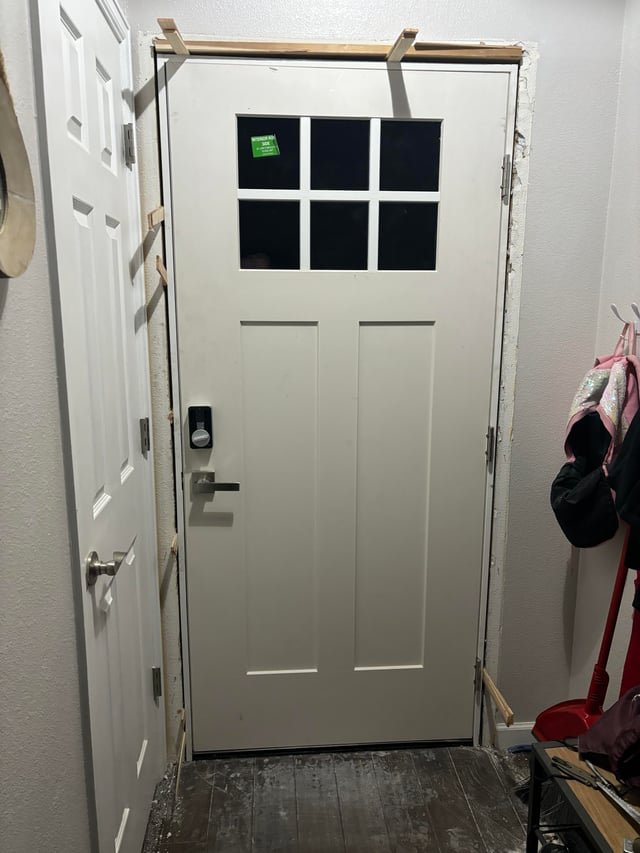
Exterior doors require all the same steps as interior doors, plus flashing, weatherproofing, a threshold, and heavy-duty fastening at the hinge side. The waterproofing steps are not optional — water infiltration around exterior doors is a leading cause of rot, mold, and structural damage.
Step 1: Prepare and Flash the Rough Opening
Remove the old door or prepare the new rough opening. Inspect the rough sill for rot — replace any soft wood with pressure-treated lumber before proceeding. Apply self-adhering flashing tape to the sill first, wrapping it up each side 8 inches. Then flash the side jamb areas, overlapping the sill flashing. Install metal drip cap flashing at the top of the opening and lap housewrap over it. This sill-up, sides-second, head-last sequence ensures water sheds outward at every seam.
Step 2: Apply Sill Pan Caulk
Run two 3/8-inch beads of exterior silicone caulk on the sill flashing across the full width of the opening. The door sill (the threshold frame) will sit in this caulk, sealing the gap between the door unit and the rough opening below. This is essential — it’s the primary defense against water getting under the door.
Step 3: Set the Door Unit in the Opening
With at least one helper, lift the door unit and position it in the rough opening from the exterior side. Lower the sill into the caulk and press it gently home. The door’s exterior casing or nailing fin should rest against the exterior wall sheathing. Do not fully press it in until it’s roughly level.
Step 4: Shim, Plumb, Level, and Square — Same as Interior
Follow the same shimming and plumbing process as for an interior door: plumb the hinge jamb first, then level the head, then set the latch jamb for a consistent 1/8-inch reveal. Check diagonal measurements. At the hinge jamb, use 3-inch structural screws at each hinge location, penetrating 1.5 inches into the king stud or rough framing — not just the drywall. Exterior doors carry far more load and stress than interior doors, and the hinge fastening must be structural.
Step 5: Fasten the Nailing Fin or Exterior Casing
If the door unit has a nailing fin (a thin perimeter flange), drive corrosion-resistant nails through it into the rough framing every 12–16 inches around the perimeter. If the door has a traditional exterior casing instead of a nailing fin, face-nail the casing into the framing with 16d galvanized siding nails.
Step 6: Weatherproof the Exterior
Apply flashing tape over the nailing fin on the sides and top (not the bottom — weep drainage). Lap housewrap over the sides of the door. Apply exterior silicone caulk around the full perimeter of the door frame where it meets the siding, leaving the very bottom corners open for weep drainage. Install backer rod in any gaps larger than 1/4 inch before caulking. Never skip the weep drainage gaps at the bottom corners.
Step 7: Install the Threshold
Most pre-hung exterior doors include an adjustable threshold — a metal or composite sill with a rubber or vinyl seal that contacts the door bottom. If not included, purchase one sized to the door width. Install the threshold with screws into the subfloor and sill, sealing under it with a bead of sealant. Adjust the threshold height so the door weatherstrip compresses slightly when the door is closed — tight enough to seal, but not so tight it makes the door hard to close.
Step 8: Insulate, Finish Interior, Install Hardware
Fill gaps between the door frame and rough framing with fiberglass batt insulation (not expanding spray foam — it can bow the frame). Install interior casing on both sides, install the deadbolt and door handle, and test the lock multiple times. For lock installation tips, see our guide on How to Change Door Locks.
Interior vs. Exterior Door: Key Differences at a Glance
| Feature | Interior Door | Exterior Door |
|---|---|---|
| Door material | Hollow-core or solid-core wood | Steel, fiberglass, or solid wood |
| Jamb width | Matches wall thickness (4-9/16 in. typical) | Matches wall thickness (4-9/16 in. typical) |
| Weatherstripping | None required | Required on all four sides |
| Threshold | None | Required |
| Flashing | None | Required (sill, sides, head) |
| Fastener requirement | Standard finish nails OK | 3-inch structural screws at hinges required |
| Weight | 20–60 lbs (hollow/solid-core) | 80–150 lbs (steel/fiberglass) |
| Install time | 1–2 hours | 3–5 hours |
Pro Tips and Common Mistakes
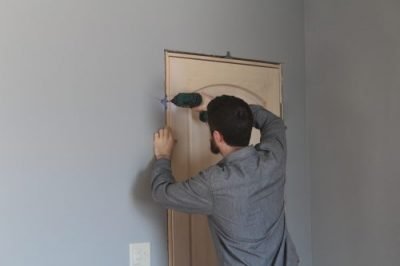
- Always shim at hinges, not just top and bottom: A door shimmed only at the ends will bow inward at mid-height under load. Shim behind every hinge.
- Don’t use spray foam around exterior door frames: Expansion foam can push a shimmed frame out of plumb. Use fiberglass batt insulation instead.
- Exterior door hardware must be rated for exterior use: Interior-grade door knobs and locks corrode rapidly when exposed to weather. Use hardware explicitly rated for exterior exposure.
- Check the door swing direction before ordering: Pre-hung doors come in left-hand and right-hand swing versions. Stand inside the room — if the hinges are on the left, it’s a left-hand swing door. See our guide on How to Determine Door Swing to confirm before purchasing.
- Paint or prime all six faces of a wood door before installation: Painting only the visible faces leaves the top and bottom edges bare — moisture enters through bare wood and causes warping. Seal all six faces before hanging.
Troubleshooting
The Door Swings Open or Closed by Itself
The hinge jamb is not plumb — it’s leaning slightly, and gravity is pulling the door toward the low side. Loosen the jamb nails at the top or bottom of the hinge side, adjust the shim, re-check plumb, and re-nail. Even a 1/8-inch deviation from plumb over 80 inches of height is enough to cause self-swing.
The Door Rubs on the Threshold or Floor
The door bottom is too low relative to the floor. If installed over carpet, the installer may not have accounted for carpet thickness. Adjust the hinge jamb shimming to raise the door slightly, or trim the bottom of the door slab with a circular saw. For exterior doors with an adjustable threshold, raise the threshold height first before trimming the door.
Cold Air Drafts Around an Exterior Door
Check the weatherstripping compression on all four sides — press your hand around the perimeter of the closed door to feel for air movement. Replace any weatherstripping that doesn’t compress fully. Check the threshold seal — it should contact the door bottom without a gap. For comprehensive weatherproofing, see our guide on How to Seal and Weatherproof a Door.
Frequently Asked Questions
What is the standard size for an interior door?
The most common interior door size in US homes is 80 inches tall by 32 inches wide (2/8 in door code), though 28-inch and 30-inch widths are also standard. ADA-compliant interior doors are typically 36 inches wide. Rough opening width is door width + 2 inches; rough opening height is door height + 2 inches.
What is the standard size for an exterior door?
Standard US exterior doors are 80 inches (6 feet 8 inches) tall by 36 inches wide. Some newer construction uses 96-inch (8-foot) tall exterior doors. Double-door (French door) openings are typically 60 or 72 inches wide. Rough openings follow the same +2 inch formula as interior doors.
Can I install a pre-hung door in an existing opening?
Yes — if the existing rough opening is the correct size and the old jamb has been removed. Verify the rough opening dimensions match the pre-hung unit’s requirements before ordering. If the opening is too wide, you can add a temporary king stud to narrow it; if too narrow, you’d need to modify the framing.
Do I need to install a door jamb separately from a pre-hung door?
No — a pre-hung door unit includes the jamb already assembled around the slab. If you’re hanging a door slab in an existing jamb, or building a jamb from scratch, see our dedicated guide on How to Install a Door Jamb.
How do I choose between a hollow-core and solid-core interior door?
Hollow-core doors are lightweight and inexpensive — good for closets and secondary rooms. Solid-core doors are heavier, more soundproof, and feel more substantial — ideal for bedrooms, home offices, and bathrooms where sound privacy matters. Solid-core doors cost $150–$400+; hollow-core doors are typically $50–$150 at home improvement stores.
Conclusion
Installing a door — interior or exterior — is one of the most satisfying DIY projects because the result is immediately functional and visible. Nail the fundamentals: plumb hinge jamb, level head, consistent reveal, and (for exterior doors) complete weatherproofing from sill to head. An hour of careful shimming at the start saves hours of callback work adjusting doors that won’t latch or swing.
Next steps: hang your hardware with our guides on How to Install a Door Knob and seal the perimeter with How to Seal and Weatherproof a Door.
