Removing a vertical sliding window sash — the movable glass panel in a double-hung or single-hung window — is a necessary skill for glass replacement, cleaning, painting, and balance spring repairs. Modern double-hung windows tilt inward for easy sash removal; older windows require a bit more work to free the sash from its channels. This guide covers both the tilt-in system and the fixed-channel system used in older windows.
What You’ll Need
- Flathead screwdriver
- Putty knife
- Utility knife
- Pry bar or window sash zipper tool
- Needle-nose pliers
- Work gloves (glass shards if the pane is cracked)
- Helper (for large or heavy sash panels)
- Painter’s tape (to secure cracked glass before removal)
Safety Precautions
If the window pane is cracked or broken, cover both sides of the glass with painter’s tape in a cross-hatch pattern before attempting to remove the sash. This prevents the glass from shattering during removal and keeps shards together. Wear cut-resistant work gloves for any sash removal involving cracked glass.
Window sashes are heavier than they look — a full-size sash with a double-pane insulated glass unit (IGU) can weigh 20–40 pounds. Work carefully near upper floors, and never lean out of an upper-story window to work. For windows above the first floor, always work from inside.
Identify Your Window Type First
Before removing a sash, identify your window type:
- Modern double-hung with tilt latches: Has two tilt latch tabs near the top of the lower sash rail. The sash tilts inward for removal — no tools required.
- Older double-hung with parting bead: Has wooden stop strips (parting beads) on the sides that hold the sash in the channel. Requires prying to remove.
- Single-hung window: Only the lower sash moves; the upper sash is fixed. Remove only the lower sash; the upper is typically nailed or caulked in place.
- Sash-cord or weighted window: An older system where the sash is connected to counterweights via cords or chains through the side jamb. Cutting or disconnecting the cords is required for full removal.
Method 1: Remove a Modern Tilt-In Double-Hung Sash
This is the easiest method — designed for DIY cleaning and sash replacement.
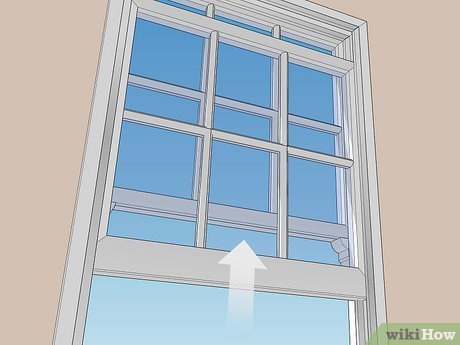
Step 1: Raise the Lower Sash to Mid-Height
Push the lower sash up to approximately the halfway position of the window opening. This positions the tilt latch tabs and pivot pins in the correct location relative to the balance shoe channel for tilting and removal.
Step 2: Release the Tilt Latches
Locate the two tilt latch tabs — small plastic slides — near the top corners of the lower sash rail. Press or slide both latches simultaneously toward the center of the sash to release them. On most windows, pressing both simultaneously prevents the sash from tilting accidentally when only one is released.
Step 3: Tilt the Sash Inward
With the latches released, grasp the top rail of the sash and tilt it toward you — the bottom pivots outward as the top comes in. Tilt it until it lies at about a 45-degree angle. The pivot pins at the bottom corners of the sash remain in the balance shoes, acting as the pivot point.
Step 4: Lift and Remove the Sash
Once tilted, slide one side of the sash upward slightly to disengage its pivot pin from the balance shoe, then angle the sash and pull that side toward you. Repeat on the opposite side. The sash will come free of the window frame. Set it flat on a clean, padded surface — never lean a sash against a wall unsupported, as it can slide and shatter.
Step 5: Remove the Upper Sash (If Needed)
The upper sash on a double-hung tilt-in window uses the same tilt-latch system as the lower sash, but it tilts from its raised position. Pull the upper sash down to mid-height, release the tilt latches at its top rail, tilt it inward, and remove it the same way.
Method 2: Remove an Older Fixed-Channel or Parting-Bead Window Sash
Older windows — including most windows pre-1970 — don’t have tilt-in systems. The sash sits in wood channels and is held by stop and parting bead strips.
Step 1: Cut Any Paint Sealing the Stop
Old windows are often painted shut — multiple coats of paint bond the inside stop to the sash. Run a utility knife or a paint zipper along the joint between the interior stop strip and the sash on both sides. Score it firmly — multiple passes may be needed if heavily painted. This cut prevents the stop from splitting when you pry it off.
Step 2: Remove the Interior Stop
The interior stop is the narrow strip of wood on the room-side face of the window jamb that holds the lower sash in the inner channel. Slide a putty knife behind the stop near its center, then gently pry it away from the jamb. Work along its length in small increments — don’t try to pry the whole stop off at once or it will split. Remove the stop carefully so it can be re-installed later. Set aside with the nails still in it, or pull the nails and set the stops aside.
Step 3: Swing the Sash Free
With the stop removed, the lower sash is no longer restrained on the room side. Pull the bottom of the sash toward you. If the sash has a sash cord or chain, it will pull taut — cut it or unhook it to allow full removal. Let the sash cord feed back into the weight pocket slowly — don’t let it snap back into the wall.
Step 4: Remove the Sash from the Channels
Tilt the bottom of the sash toward you and angle it out of the upper channel. With both hands, slide the sash out of the side channels and bring it fully into the room. If the sash binds in the channels, a slight side-to-side wiggle will free it.
Step 5: Remove the Upper Sash (If Needed)
To access the upper sash on an older double-hung window, you must also remove the parting bead — the thin wooden strip that separates the upper and lower sash channels. The parting bead fits into a groove in the side jamb and must be pried out (it’s usually not nailed). Once the parting bead is removed, the upper sash can be swung inward and removed the same way as the lower.
Reinstalling the Sash
Reinstalling a modern tilt-in sash reverses the removal steps: insert the pivot pins into the balance shoes, tilt the sash upright until both tilt latches snap back into the locked position. Test by sliding the sash up and down — it should move smoothly with even resistance.
Reinstalling an older parting-bead sash requires re-seating the sash in the channels, re-inserting the parting bead (for the upper sash), and renailing the interior stop. Run a thin bead of clear silicone along the stop before reinstalling to act as a gasket, but don’t paint over the sash-to-stop joint — this leads to a painted-shut window.
Pro Tips and Common Mistakes
- Never stand a sash on its edge without support: IGU sashes placed on their edge unsupported can flex, stressing the glass seal and eventually causing inter-pane fogging. Always store sashes flat or in a padded vertical rack.
- Label which sash is which before removing both: Upper and lower sashes in an older window may be different sizes. Mark them “upper” and “lower” on the top rail before removal.
- Tape cracked glass before moving it: Even a hairline crack can become a break under the stress of removal. Tape both sides before touching a cracked sash.
- Don’t lose the tilt latches: Some tilt latch systems have small springs that can fall out during sash removal. Keep a hand near the latch mechanism as you tilt.
- Check balance spring tension before reinstalling: If a sash was off track or falling before removal, the balance spring may have failed. Replace it before reinstalling — a failed balance spring will cause the same problems immediately.
Troubleshooting

The Tilt Latches Released but the Sash Won’t Tilt In
The pivot pins may be stuck in the balance shoes. Apply firm but controlled inward pressure on the sash top while pushing down slightly — the pins need to rotate in the shoes. If they are corroded or seized, a few drops of penetrating oil in the shoe slot may help. Do not force the tilt — excessive force can break the pivot pin or the balance shoe clip.
The Interior Stop Breaks When I Try to Remove It
The stop is either painted in too heavily or the pry point was too close to a nail. Cut deeper along the paint joint with a utility knife, then use a wider putty knife to pry gradually along the full length rather than at a single point. Replacement stop molding is inexpensive and available at any hardware store if it does break.
The Sash Falls After I Release the Tilt Latches
The balance springs have failed — they can no longer hold the sash’s weight. Remove the sash and replace the balance units on both sides before reinstalling. See our guide on How to Fix a Window Off Track for balance shoe and spring details.
Frequently Asked Questions
Can I remove a window sash without removing the window frame?
Yes — sash removal is specifically designed to be done without removing the full window frame. The sash is the movable panel only; the frame stays in the wall. This is how most glass replacement and balance spring repairs are done without a full window replacement.
How do I remove a window sash that’s painted shut?
Score the paint joint between the sash and the stop strip on both sides with a utility knife. Then tap a window zipper or putty knife along the joint to break the paint bond. Work around all four sides of the sash before attempting to open it — breaking the paint seal on all sides prevents damaging the wood when the sash finally breaks free.
How do I know if I have a single-hung or double-hung window?
Try pushing both sashes — the upper and lower. If only the bottom sash moves, it’s a single-hung window. If both the upper and lower sashes move independently, it’s a double-hung window. Tilt-in latches are present only on double-hung windows.
Is it safe to remove a window sash on a second-story window?
Yes — provided you work from the inside. Never lean out of an upper-story window to remove or work on a sash. The tilt-in system is specifically designed so all work can be done from indoors at any height. On older windows, all sash removal work should also be done from the interior side.
How long does sash removal take?
A modern tilt-in sash takes 5–10 minutes to remove once you understand the system. An older parting-bead sash takes 15–30 minutes for the lower sash (due to stop removal) and 30–45 minutes for the upper sash (due to parting bead removal). Reinstallation takes a similar amount of time.
Conclusion
Removing a vertical sliding window sash is a core home maintenance skill — once you’ve done it once, it takes only minutes. Modern tilt-in windows make the process almost foolproof. Older windows require a bit more patience with the stops and parting beads but are completely manageable with the right tools. Either way, the key is working gently, supporting the sash at all times, and not forcing anything that doesn’t move freely.
For related projects, see How to Fix a Window Off Track for balance shoe issues, and How to Replace a Window if the sash itself needs to be replaced entirely.
