Installing a glass shower door transforms a shower from a wet mess behind a curtain into a clean, finished enclosure. The process differs by door type: framed doors use aluminum channels anchored to the walls; frameless doors use heavy-duty hinges and clips mounted directly to tile; and sliding doors use a top-and-bottom track system. This guide covers all three, with the specific steps and critical sealing details that prevent leaks for years.
What You’ll Need
Tools
- Tape measure and pencil
- Level (4-foot)
- Drill with masonry/tile drill bit
- Phillips screwdriver
- Hammer
- Hacksaw or miter saw with aluminum-cutting blade (for framed/sliding door track cutting)
- Caulk gun
- Rubber mallet
- Safety glasses and work gloves
Materials
- Glass shower door kit (your chosen type: framed, frameless, or sliding — all components included)
- Masonry screws or hollow wall anchors (for tile/concrete wall mounting)
- 100% silicone caulk (mold-resistant, for bath/shower; typically white or clear)
- Backer board or surface test kit (to confirm wall soundness before drilling)
- Tile drill bit (carbide-tipped, to match anchor screw diameter)
Safety Precautions
Tempered glass shower panels are heavy — a single 72-inch panel can weigh 40–70 pounds. Always have a helper to hold panels while you fasten hardware. Never lean glass panels against a tiled wall unsupported. If a tempered glass panel is chipped or cracked, do not install it — tempered glass can spontaneously shatter from edge damage. Return it for replacement before starting.
When drilling into tile, use masking tape over the drill site to prevent the bit from walking on the glazed surface. Start with a carbide-tipped tile bit at low speed with no hammer mode until you’re through the tile, then switch to hammer drill mode for the substrate behind it.
Before You Start: Check Wall Plumb and Measure Carefully
Shower walls are notoriously out of plumb — tiles that look straight often aren’t. Before ordering a glass door unit, measure your shower opening at the top, middle, and bottom. If the width varies by more than 1/2 inch, the wall has a bow or lean that must be addressed or accommodated. For framed doors, the channel can be shimmed. For frameless doors, out-of-plumb walls create visible gaps — consider a custom-measured unit or a wet-area filler strip.
For all door types, confirm the shower curb (the bottom threshold) is level. An unlevel curb causes water to pool at the low end and leak under the door seal. Use a level before purchasing.
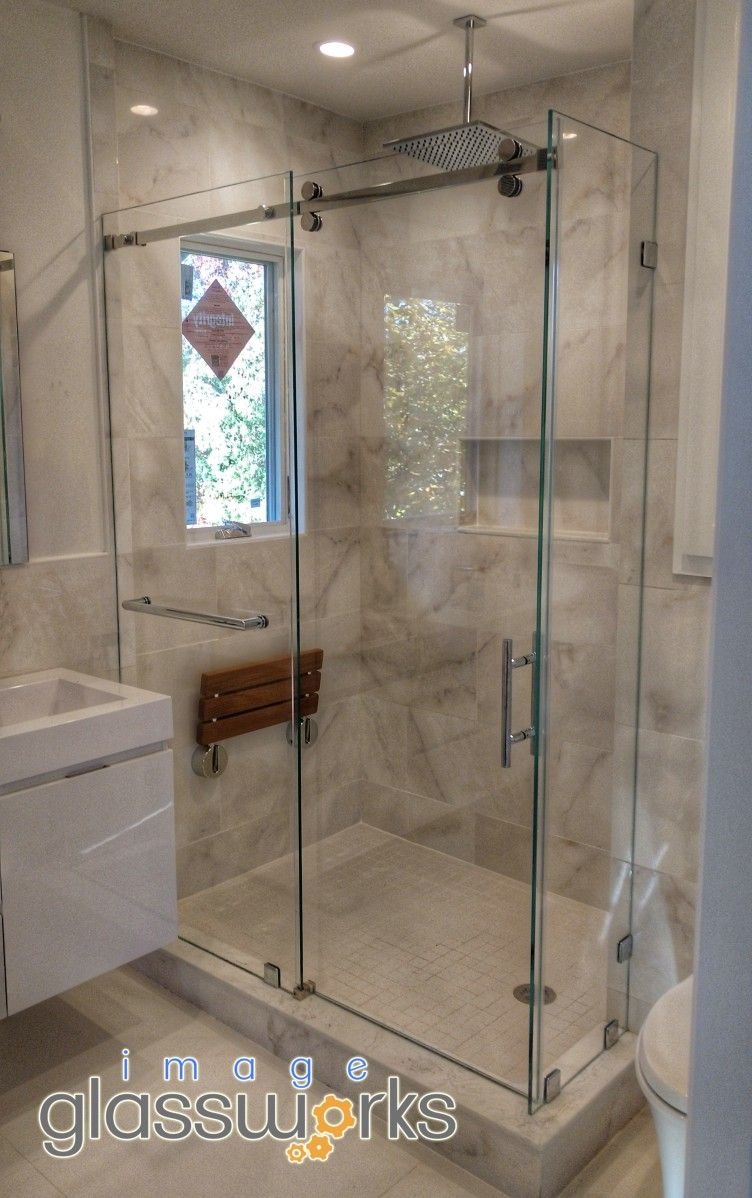
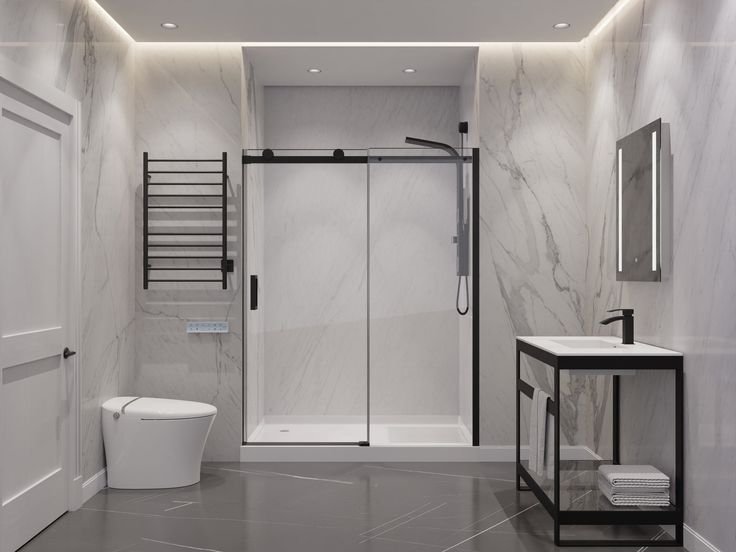
How to Install a Framed Sliding Glass Shower Door
Framed sliding doors are the most common type for tub enclosures and shower stalls. They mount via aluminum channels at the top and bottom, with side guide channels on the walls.
Step 1: Cut the Bottom Track to Length
Measure the width of the shower opening at the curb level. Cut the bottom track (the aluminum channel that sits on the shower curb) to this exact length using a hacksaw or miter saw with an aluminum-cutting blade. Deburr the cut end with a file. The track should fit snugly with no gaps at the wall ends.
Step 2: Apply Caulk and Set the Bottom Track
Run a continuous bead of 100% silicone caulk along the underside of the bottom track. Set the track on the shower curb, press it firmly into the caulk, and check that it’s level. Adjust with shims if necessary. The bottom track must be level side to side — an unlevel track causes doors to drift open or closed. Allow the caulk to cure per manufacturer directions before proceeding, or tape the track temporarily in position if you need to continue immediately.
Step 3: Install the Side Wall Channels
Cut the side wall channels (vertical aluminum strips) to the height from the curb to the top track position. Hold each side channel against the wall, plumb it with a level, and mark the mounting hole positions. Drill through the tile with a carbide-tipped tile bit, then switch to a masonry bit for the substrate. Insert anchors and fasten the side channels with the included screws. Do not overtighten — tile can crack under excessive pressure from screw heads. Apply a bead of silicone along the back (wall-side) of each side channel before fastening to create a waterproof seal between the channel and the wall tile.
Step 4: Install the Top Track
Cut the top track to the same length as the bottom track. Most top tracks clip or screw into the tops of the side wall channels. Check that the top track is level and parallel to the bottom track — hold a level across both tracks to verify. Fasten the top track into the side channels per the kit instructions.
Step 5: Install the Door Panels
Slide the door rollers (the wheel assemblies on the top of each glass panel) into the top track. Lower the panels into the bottom track guide groove. Most sliding shower doors have an outer fixed panel and an inner sliding panel. Install the outer panel first, then the inner. Adjust the roller height using the adjustment screws on the roller assembly until the panels hang level and move smoothly. The bottom of the panel should just clear the bottom track guide without dragging.
Step 6: Install Guides and Door Handles
Attach the bottom door guides (small plastic pieces that keep the panel bottoms aligned in the track) per the instructions. Install the door handles or towel bar — these typically use set screws through the door frame into the glass panel holes. Do not overtighten handle hardware against the glass edge. Apply silicone around the outside of the frame-to-wall joint on all sides after confirming everything is plumb and aligned.
How to Install a Frameless Hinged Glass Shower Door
Frameless shower doors are heavier glass (typically 3/8-inch to 1/2-inch thick tempered glass) hinged directly to the wall or to a fixed glass panel. They look sleek but require precise installation — the hinges must be mounted absolutely plumb for the door to swing correctly and close tightly.
Step 1: Plan the Hinge Locations
Most frameless door kits use two or three hinges on the swing side. Mark the hinge locations on the wall tile at the manufacturer’s specified heights. Use a level to confirm that the hinge centerlines are perfectly plumb — even 1/8 inch out of plumb over 72 inches of door height will cause the door to swing open or closed on its own.
Step 2: Drill Hinge Mount Holes
Place masking tape on the tile at each hinge hole location. Mark the center. Use a carbide tile bit at low speed with no hammer to drill through the tile glaze, then switch to standard drill for the backer board. Do not use hammer mode while drilling through tile — it shatters tile. Drive wall anchors appropriate for your wall substrate (tile backer, mortar bed, or drywall — each requires a different anchor type).
Step 3: Mount the Hinge Bodies to the Wall
Fasten the wall-side hinge bodies to the anchors. Check plumb with a level one final time after tightening. Apply a small bead of silicone behind each hinge mount plate where it contacts the tile, to seal the water gap and prevent water from wicking behind the plate into the wall.
Step 4: Hang the Glass Panel on the Hinges
With a helper, lift the glass panel (always wearing gloves and handling at the edges, never the flat face) and hook the glass-side hinge arms onto the wall-side hinge bodies. Tighten the hinge connection hardware to the specified torque — overtightening can crack the glass at the hinge hole. Most frameless hinges use an allen-key set screw. Follow the manufacturer’s torque specification explicitly.
Step 5: Install Seals, Door Strike, and Handle
Apply a magnetic door seal or vinyl wiper seal along the leading edge of the door (the side that closes against the wall or fixed glass panel). Install the door strike or magnetic catch on the wall. Mount the towel bar or D-handle using the provided hardware. Test the door swing — it should open and close smoothly, and the seal should compress just enough to prevent water spray without making the door hard to operate.
Step 6: Seal and Cure
Apply silicone caulk along the bottom of the door at the curb, the side of the fixed glass panel against the wall, and any remaining frame-to-tile joints. Leave the inside of the shower unsealed for 24 hours to allow the silicone to fully cure before using the shower.
Sealing: The Most Critical Step for Any Shower Door Type
Poor sealing is the number one cause of shower door leaks. Follow these sealing rules for any door type:
- Use only 100% silicone caulk rated for wet bathroom areas (not acrylic latex caulk — it fails in continuous moisture).
- Seal the back of every wall-mounted channel and bracket before fastening — this prevents water from wicking between the hardware and the tile.
- Seal the side channels to the wall tile on the room (dry) side — not the shower (wet) side. The wet side must remain open for water drainage.
- Do not caulk inside the bottom track — it has drain holes or weep channels that must remain clear. Caulking the bottom track blocks drainage and causes water pooling.
- Allow 24–48 hours cure time before using the shower after any caulking.
Pro Tips and Common Mistakes
- Pre-clean tile surfaces before caulking: Silicone will not bond to soap residue, hard water scale, or dust. Wipe all tile surfaces with denatured alcohol before applying caulk.
- Dry-fit everything before applying caulk: Test the entire assembly — tracks, panels, channels — dry before applying any permanent caulk. It’s much easier to adjust before the caulk cures.
- Use a wet-area silicone rated for constant moisture: Standard window and door silicone degrades in constant shower conditions. Use a product labeled “bathroom” or “kitchen and bath” silicone, ideally mold-resistant.
- Don’t use hammer drill mode through tile: Always drill tile on regular drill mode with a carbide bit — switching to hammer mode shatters tile. Only switch to hammer mode after fully penetrating the tile into the substrate.
- Level the bottom track with precision: For sliding doors, any deviation from level in the bottom track causes the door to drift. Use a torpedo level inside the track channel, not just across the top surface.
Troubleshooting
The Sliding Door Drifts Open or Closed
The bottom track is not level. If the caulk has not yet cured fully, re-level the track now. If it has cured and is locked in position, adjust the roller height on the high side of the door — raising one side effectively compensates for a slightly unlevel track.
Water Leaks Under the Door at the Curb
The door sweep or wiper seal is damaged, compressed, or missing. Remove the existing sweep, clean the door bottom edge with denatured alcohol, and install a new door sweep using the provided clips or adhesive. Also check that the bottom track has its drain holes open and is not filled with caulk.
The Frameless Door Swings Open on Its Own
The hinges are not plumb. Loosen the hinge set screws slightly and shim the hinge wall mount plate to correct plumb, then re-tighten. If the hinges are adjustable, use the built-in adjustment set screws to tilt the door angle.
Frequently Asked Questions
How long does it take to install a glass shower door?
A framed sliding shower door takes 2–3 hours for an experienced DIYer. A frameless hinged door takes 3–5 hours due to the precise hinge positioning. Allow additional curing time (24 hours minimum) before using the shower after installation.
Can I install a glass shower door myself, or do I need a professional?
Framed and sliding shower doors are very DIY-friendly — all mounting is via wall channels that don’t require perfect plumb. Frameless doors are harder because the hinges must be precisely plumb and the glass is heavier. If your walls are significantly out of plumb or you’ve never drilled through tile, a professional installation is worth considering for frameless doors.
What type of caulk should I use around a shower door?
Always use 100% silicone caulk specifically rated for shower/bath applications — it’s mold-resistant and handles constant moisture. Never use acrylic latex or vinyl caulk around shower doors; they peel and mold within months in constant wet conditions.
How thick should frameless shower glass be?
Frameless shower doors use tempered glass in either 3/8-inch (10mm) or 1/2-inch (12mm) thickness. Half-inch glass is heavier, more rigid, and feels more premium — it’s the standard for high-end frameless installations. Three-eighths-inch glass is used in more economy frameless door kits. Both are safe; the difference is primarily in feel and rigidity.
How do I prevent soap scum buildup on glass shower doors?
Apply a rain-repellent or hydrophobic coating (like Rain-X for glass, or a dedicated shower glass treatment) to the glass interior after installation and reapply every 3–6 months. Squeegee the glass after each shower use to prevent soap and mineral buildup. For existing buildup, see our guide on How to Remove Hard Water Stains From Shower Doors.
Conclusion
Installing a glass shower door is a weekend-scale DIY project with results that dramatically upgrade your bathroom. The two most important principles apply to every door type: get the mounting tracks or hinges perfectly level and plumb, and seal every wall penetration with quality silicone. Do those two things right and your new shower door will look great and stay dry for years.
For bathroom tile and shower preparation projects, see How to Clean Shower Tile and How to Waterproof a Shower for the underlying preparation that makes any shower installation last.
