Changing a door lock is a 20–30 minute job for most lock types and requires only a screwdriver. Whether you’re replacing a deadbolt after moving into a new home, upgrading to a higher-security lock, or swapping out a keyed knob, the process is the same: remove the old hardware, install the new mechanism, and confirm the latch or bolt extends and retracts cleanly. This guide covers deadbolts, keyed knob/lever sets, and European (UPVC) cylinder locks.
What You’ll Need
| Tools | Materials |
|---|---|
| Phillips screwdriver (or drill/driver) | Replacement lock set or cylinder |
| Flathead screwdriver | Strike plate (often included) |
| Measuring tape | 3-inch security screws (for strike plate) |
| Allen key / hex wrench | Wood chisel (if adjusting mortise) |
| Pencil | Euro cylinder gauge (if replacing UPVC cylinder) |
Safety and Precautions
- Always test the new lock before closing the door. Confirm the key works and the bolt or latch operates correctly with the door open before relying on it. Getting locked out with a malfunctioning new lock is a real risk if you don’t test first.
- Use 3-inch screws in the strike plate on exterior doors. Short strike plate screws only grip the door jamb — they offer almost no resistance to forced entry. Long screws that reach the structural stud behind the jamb are a critical security upgrade.
- Keep the door propped open while installing. Work with the door open and wedged so it can’t accidentally close and latch while you have the latch mechanism disassembled.
Step 1: Choose the Right Replacement Lock
Match the Lock Type and Grade to Your Door
| Lock Type | Best For | Notes |
|---|---|---|
| Single-cylinder deadbolt | Exterior doors without glass nearby | Key exterior / thumb-turn interior |
| Double-cylinder deadbolt | Doors with glass panels near the lock | Key required both sides — fire egress risk |
| Keyed entry knob/lever | Exterior or interior doors needing keyed access | Often paired with a deadbolt for exterior |
| Euro cylinder (UPVC door) | uPVC doors, multi-point locking systems | Measure cylinder size precisely — see Step 5 |
| Smart lock | Any exterior door | Most fit standard deadbolt prep holes; check compatibility |
Look for ANSI Grade 1 locks on exterior doors (the highest residential security grade). Grade 2 is acceptable for interior doors. Grade 3 is too light for exterior use.
Step 2: Remove the Old Deadbolt
Standard Deadbolt Removal — Under 5 Minutes
- Open the door. Look at the interior side of the deadbolt — you’ll see two Phillips screws on the interior thumb-turn plate. Remove both screws.
- Pull the interior and exterior pieces of the deadbolt assembly apart — they should separate cleanly once the screws are out.
- Remove the deadbolt itself from the edge of the door: unscrew the two small screws on the edge faceplate, and slide the deadbolt out of the door edge hole.
- Inspect the strike plate in the door frame. If it’s in good condition and you’re installing the same-size deadbolt, you can reuse it. If replacing with a different size or upgrading to a higher-security strike plate, remove it too.
Step 3: Install the New Deadbolt
Same Backset as the Old Bolt? It Drops Right In
- Slide the new deadbolt into the edge of the door, with the bolt extending toward the strike plate when operated. Drive the two edge faceplate screws to secure it.
- Insert the exterior cylinder (keyed side) into the large borehole from outside the door. The tailpiece on the back of the cylinder must align with the slot in the deadbolt mechanism.
- From the interior, slide the thumb-turn piece onto the tailpiece. Drive the two mounting screws from the interior side to lock both pieces together through the door.
- Turn the key from the outside to extend the bolt, then use the thumb-turn from inside. The bolt should extend and retract smoothly with no catching or binding.
- If the bolt binds: check that the tailpiece is fully engaged in the deadbolt mechanism. Slightly loosening the mounting screws (over-tightening compresses the mechanism) often resolves binding.
Step 4: Replace a Keyed Knob or Lever Set
Follows the Same Process as Handle Replacement
- Locate the release mechanism on the interior knob or lever (a small slot or push-pin hole on the neck). Depress it and pull the interior knob off the spindle.
- Remove the rose plate (pry the notch or unscrew counterclockwise). Remove the two long through-screws from the interior side. Pull both sides of the assembly free.
- Remove the latch bolt from the door edge by unscrewing the faceplate screws.
- Install the new latch bolt first — set the backset (2-3/8 or 2-3/4 inch) on the adjustable latch and drive the faceplate screws.
- Insert the exterior keyed knob through the borehole, align the spindle through the latch, add the interior knob, and drive the mounting screws evenly.
- Test the key and latch function before closing the door.
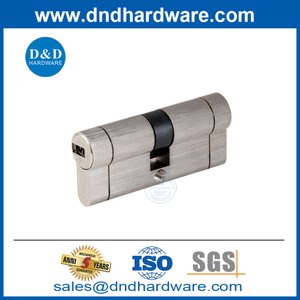
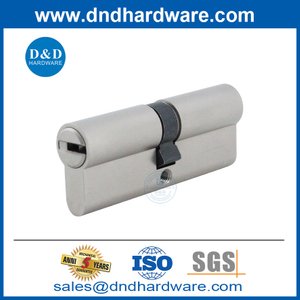
Step 5: Replace a Euro Cylinder Lock (UPVC Door)
Measure First — Euro Cylinders Are Size-Specific
UPVC (and some aluminum and composite) doors use a Euro cylinder — a narrow oval lock that fits into the door from the edge. They operate multi-point locking systems, and incorrect sizing is the number-one installation error.
- Measure the cylinder before removing it: Open the door and look at the cylinder on the door edge — it’s held by a single screw through the door face. Measure the distance from the center of the screw hole to the exterior face of the door, and from the center to the interior face. These are your “external” and “internal” measurements (e.g., 35mm external / 35mm internal = a 70mm total cylinder).
- Remove the retaining screw from the door face (usually a Phillips or Allen head). The screw is located directly through the door face at the cylinder center.
- Open the door fully, insert the key, and turn it slightly — this retracts a cam inside the lock that allows the cylinder to slide out. Pull the cylinder out toward the exterior side.
- Buy an exact replacement cylinder in the same size (e.g., 70mm, 80mm). If upgrading security, buy a cylinder rated to TS007 3-star or at minimum TS007 1-star — anti-snap, anti-pick, and anti-drill cylinders are available in standard Euro sizes.
- Insert the new cylinder with the key inserted slightly (cam must be aligned). Push it into the door edge until the screw hole aligns with the door hole. Drive the retaining screw.
- Test with the key: lock and unlock the door, then test all points of the multi-point lock mechanism engage cleanly.
Step 6: Install or Upgrade the Strike Plate
Always Use Long Screws on Exterior Locks
- For deadbolts: install the new strike plate in the same mortise as the old one if the bolt size hasn’t changed. Use the longer 3-inch security screws (not the short screws supplied) and drive them into the structural stud behind the door jamb.
- For a box strike: a reinforced box strike (a deep-pocket strike plate) provides significantly more security than a flat strike plate for deadbolts. It’s a direct upgrade — same mortise, more steel around the bolt.
- Use the chalk/lipstick test to confirm the bolt engages the strike plate cleanly: rub chalk on the bolt face, lock and unlock once, and check the chalk transfer on the strike plate to verify alignment.
Pro Tips and Common Mistakes
- Re-key instead of replacing if security is the concern. If you moved into a new home and want to control who has keys, re-keying (changing the pin tumblers inside the existing cylinder) costs $5–15 per lock at a hardware store or locksmith — far cheaper than full replacement. Buy a re-keying kit for Schlage, Kwikset, or your brand, and do it yourself in 15 minutes.
- Don’t over-tighten deadbolt mounting screws. Tight screws compress the mechanism and cause the bolt to bind. The screws should be firm but not cranked down.
- Match the finish across all door hardware. If you’re changing the deadbolt, consider swapping the knob/lever set at the same time so everything matches. Mismatched finishes look unfinished on an exterior door.
- Measure the Euro cylinder before buying. Euro cylinders vary in size and the wrong size will either not fit or leave too much cylinder exposed, which is a security vulnerability.
Troubleshooting
| Problem | Likely Cause | Fix |
|---|---|---|
| New deadbolt binds when turning key | Mounting screws over-tightened or tailpiece misaligned | Back off screws slightly; re-seat tailpiece in bolt mechanism |
| Bolt doesn’t reach strike plate | Bolt length mismatch or door has warped | Measure and confirm throw length; adjust door if needed |
| Euro cylinder hard to remove | Key not positioned to retract cam | Insert key and turn slightly (not to lock); then pull cylinder |
| Multi-point lock doesn’t engage after cylinder change | Cylinder cam angle wrong | Re-insert cylinder with key adjusted to neutral position |
| Key hard to turn in new lock | Lock is tight from factory; normal initially | Apply a small amount of graphite lock lubricant; use regularly for first week |
Frequently Asked Questions
Should I replace locks when I move into a new home?
Yes, or at minimum re-key them. You have no way of knowing how many copies of the existing keys are out there. Re-keying is the most cost-effective option ($5–15 per lock with a DIY kit). Full lock replacement makes sense if the existing hardware is worn, outdated, or you want to upgrade the security grade at the same time.
What is a Euro cylinder and do I have one?
Euro cylinders are oval-shaped lock cylinders common on uPVC doors, composite doors, and some aluminum doors — particularly those with multi-point locking systems. If your door has a handle that you lift to engage multiple lock points, and the keyhole is in a narrow oval cylinder on the door face, you have a Euro cylinder lock.
Can I change a deadbolt myself without a locksmith?
Yes — replacing a deadbolt is one of the most beginner-friendly lock jobs there is. As long as you’re swapping to a lock with the same backset and borehole size, no drilling is required. The entire replacement takes about 20 minutes with a screwdriver. A locksmith is only necessary if you’re re-keying in bulk, drilling new lock holes, or dealing with a damaged lock that won’t come out.
How do I measure a Euro cylinder for replacement?
With the door open, measure from the center of the retaining screw hole to the exterior face of the door (external measurement) and to the interior face (internal measurement). Add them together for the total cylinder size. For example: 35mm external + 35mm internal = 70mm cylinder. Buy an exact match — even 5mm off will mean the screw hole doesn’t align.
What is the most secure deadbolt for a residential exterior door?
Look for an ANSI Grade 1 single-cylinder deadbolt with a solid brass or solid steel construction, anti-pick pins, and a 1-inch throw bolt. Brands like Medeco, Mul-T-Lock, and Schlage B60N are well-regarded residential options. Pair with a reinforced box strike plate and 3-inch screws for a fully upgraded exterior door security system.
Conclusion
Changing door locks is a weekend DIY job that most homeowners can handle in under 30 minutes per lock. For deadbolts and keyed knobs, the key success factors are matching the backset, installing the strike plate with long screws, and testing thoroughly before relying on the lock. For UPVC doors with Euro cylinders, measure precisely before buying — the cylinder size is critical. And if security is the main motivator, consider upgrading to a higher-grade cylinder at the same time, since it drops into the same hole for minimal additional cost.
If you’re also updating the handle hardware alongside the lock, our guide on how to replace a door handle covers the lever and knob swap process in detail. And for strike plate alignment issues after the new lock is installed, see our tips in how to fix a door that won’t latch.
