
Replacing a door handle is a 20–30 minute job that requires only a screwdriver in most cases. The key is buying hardware that matches your existing backset — the distance from the door edge to the center of the handle borehole. This guide covers how to remove and replace lever handles, round door knobs, and pull handles on sliding or barn doors, plus how to fix a loose handle without fully replacing it.
What You’ll Need
| Tools | Materials |
|---|---|
| Phillips screwdriver (or drill/driver) | Replacement door handle set |
| Flathead screwdriver | Strike plate (often included in set) |
| Allen key / hex wrench set | 3-inch wood screws (for strike plate upgrade) |
| Measuring tape | Pencil |
| Chisel (optional, for strike plate mortise) | Wood filler (if screw holes have stripped) |
Safety and Precautions
- Prop the door open while working. Removing the handle from a closed door can leave you trapped inside a room with no latch to release. Always work with the door wedged or held open.
- Don’t overtighten mounting screws on hollow-core doors. Interior hollow-core doors have thin skins that can crack or delaminate if mounting screws are driven too aggressively. Firm and snug is the target — not power-tool-cranked.
- Test the new handle before fully tightening. Operate the handle through its full range and check that the latch retracts and extends smoothly before driving the final screws. Easier to adjust now than to back everything out.
Step 1: Measure and Buy the Right Replacement
Match Backset and Function Before Purchasing
- Measure the backset: the distance from the edge of the door to the center of the large round borehole where the handle/knob passes through. Standard sizes are 2-3/8 inch (common in older homes) and 2-3/4 inch (standard in modern homes).
- Measure the door thickness: standard interior doors are 1-3/8 inch; exterior and solid-core are 1-3/4 inch. Most handle sets accommodate both, but check the package specs.
- Choose the correct function:
- Passage lever/knob: No lock — hallways, closets, non-private interior doors
- Privacy lever/knob: Push-button or thumb-turn lock — bedrooms, bathrooms
- Keyed entry: Key lock exterior side — front door, back door, garage entry
- Dummy lever: No latch, surface-mount only — closet bi-fold doors, one-sided decorative handles
- If replacing a lever with a lever (or knob with knob), the new hardware should drop into the same holes with no drilling required. Switching from knob to lever of the same backset is also usually a straight swap.
Step 2: Remove the Old Lever Handle
Most Modern Lever Sets Release With One Screw or a Push Pin
- Look on the neck of the interior lever — between the lever arm and the rose plate — for a small hole, slot, or visible screw.
- If there’s a small hole: insert the release pin (or a straightened paper clip) into the hole and push while pulling the lever straight off the spindle.
- If there’s a visible Phillips screw on the lever shank: remove the screw, then pull the lever off.
- Once the lever is off, look at the rose plate (the round decorative cover against the door face). It may unscrew counterclockwise, or have a small notch to pry open with a flathead screwdriver to expose the mounting screws underneath.
- Remove the two long mounting screws that hold the assembly together from the interior side. Pull both sides of the handle assembly free from the door.
- Remove the latch bolt from the door edge by unscrewing its two faceplate screws and sliding it out.
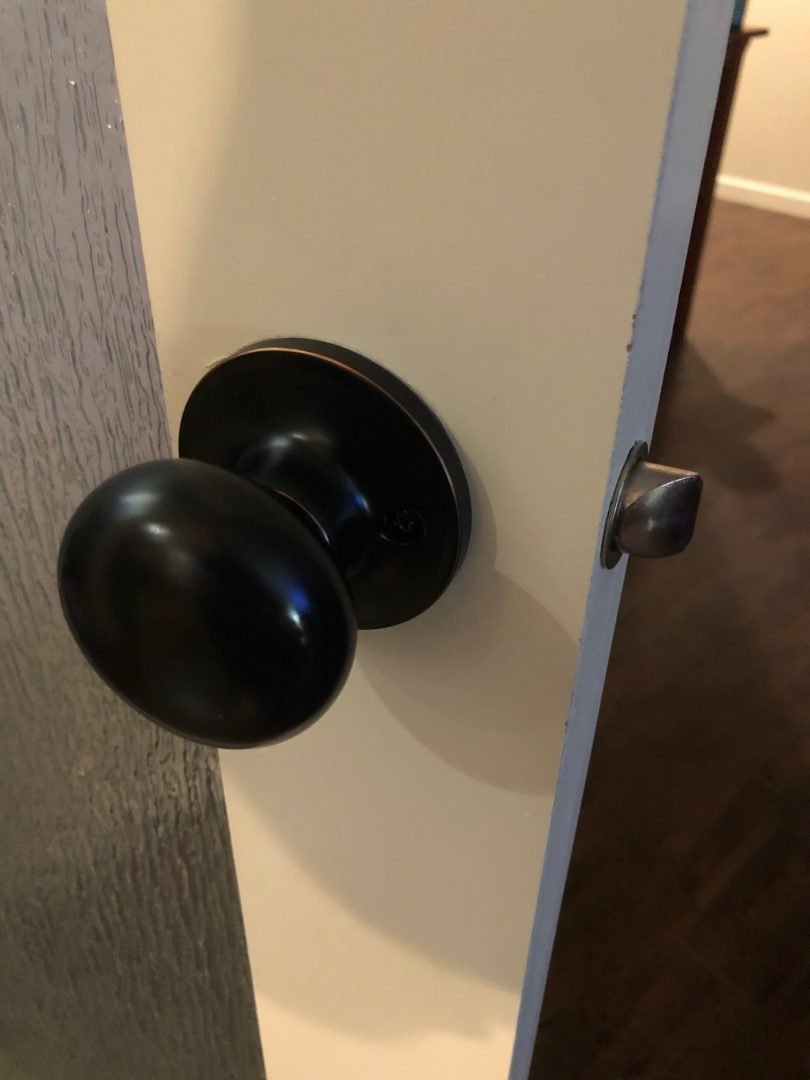
Step 3: Remove an Old Round Door Knob
Slightly Different Release Mechanism Than Levers
- Look for a small slot or hole on the shank of the interior knob (the part between the knob and the rose plate). This is the release point.
- Insert a flathead screwdriver or the included release tool into the slot and push inward while rotating or pulling the knob. The knob pulls straight off the spindle once released.
- The rose plate usually has a notch — pry it gently with a flathead to reveal the mounting screws. Remove the screws and pull the entire assembly out of the borehole.
- Remove the latch faceplate screws from the door edge and slide out the latch bolt.
Step 4: Install the New Handle Assembly
Latch First, Then the Handle
- If the new latch is adjustable, set the backset to match your measurement before installing (slide or flip the latch face to 2-3/8 or 2-3/4 inch).
- Slide the new latch bolt into the edge of the door with the angled ramp of the bolt pointing toward the strike plate (the direction the door closes). Drive the two faceplate screws snug — do not overtighten.
- Insert the exterior handle through the large borehole, threading the spindle through the square hole in the latch mechanism.
- From the interior side, slide the interior handle onto the spindle. Align the mounting holes on both rose plates.
- Drive the two long mounting screws from the interior side, tightening evenly (a few turns each, alternating) so both rose plates come together flat against the door without rocking.
- Test the handle: operate it fully and confirm the latch retracts smoothly. If it’s stiff, back off the mounting screws slightly.
Step 5: Install or Adjust the Strike Plate
Use 3-Inch Screws for Security
- Close the door slowly and observe where the latch bolt contacts the door frame. If the old strike plate is aligned, you may be able to reuse it — test by closing the door fully.
- If the latch hits the frame above or below the old strike plate opening: rub chalk or lipstick on the end of the latch bolt, close and open the door, and find the transfer mark on the frame. That’s the center of the new strike plate.
- Trace the new strike plate outline, chisel a mortise so it sits flush with the frame surface, and mark the latch opening center.
- Drive the strike plate screws — use 3-inch screws that penetrate through the jamb into the structural stud behind the frame. This provides far greater pull resistance than the short screws included in the hardware kit.
- Close the door and test: the latch should click in cleanly, and the door should feel solid with no rattle.
Step 6: Replace a Pull Handle on a Sliding or Barn Door
A Simpler Job — Usually Just Screws
Sliding doors and barn doors use pull handles that are surface-mounted — no latch bolt or borehole required in most cases.
- Locate the mounting screws on the interior face of the pull handle. They’re usually on the face of the handle plate or hidden under small cap covers.
- Remove the screws. On double-sided pull handles that pass through the door, one side’s screws will release both sides.
- Pull the old handle free. Clean the mounting area of any adhesive or old finish.
- Hold the new pull handle in position, mark the screw holes with a pencil, and drill pilot holes to prevent splitting.
- Drive the mounting screws firmly — snug but not so hard that the handle plate distorts.
Pro Tips and Common Mistakes
- Don’t mix finishes between the handle and hinges. Brushed nickel handles look odd paired with brass hinges. If you’re replacing the handle, it’s a good time to swap hinges to match — a 20-minute job per hinge.
- Check if the latch is handed (directional). Most adjustable latches have a thumb button to flip the angled ramp direction. If the door swings to the left, the ramp needs to face left. Getting this wrong means the latch scrapes instead of clicking in.
- Use wood filler on stripped screw holes before reinstalling. If the old mounting screws spun freely, the holes are stripped. Toothpick + wood glue, or longer replacement screws that reach fresh wood, will fix this before you install the new hardware.
- Keep the old hardware as a template. Before throwing away the old handle, take it to the hardware store to match backset, spindle size, and borehole diameter exactly.
Troubleshooting
| Problem | Likely Cause | Fix |
|---|---|---|
| Handle turns but latch doesn’t move | Spindle not seated through latch square hole | Disassemble, re-seat spindle, reassemble |
| Latch doesn’t click into strike plate | Backset mismatch or strike plate misaligned | Check backset setting; reposition strike plate |
| Handle wobbles after installation | Mounting screws not equally tightened | Tighten evenly, alternating sides |
| Door rattles when closed | Latch bolt doesn’t engage strike plate fully | Widen or deepen the strike plate opening with a file or chisel |
| Privacy lock won’t release from outside | Emergency release slot blocked or wrong tool | Use a coin or the included key in the exterior slot; check alignment |
Frequently Asked Questions
Do I need special tools to replace a door handle?
In most cases, a Phillips screwdriver and a flathead screwdriver are all you need. Some handles have set screws that require an Allen key. You may need a chisel if the new strike plate mortise needs to be adjusted, and a drill if you’re installing a handle in a door with no existing holes.
Can I replace a door knob with a lever handle?
Yes, as long as both use the same backset (2-3/8 or 2-3/4 inch) and the same borehole diameter (standard 2-1/8 inch). The latch bolt drops into the same edge hole, and the lever rose plate covers the same borehole opening. No drilling needed in most cases.
Why is my new handle stiff or hard to operate?
The most common cause is over-tightened mounting screws compressing the handle mechanism. Back off each mounting screw by one quarter turn at a time, testing the handle after each adjustment, until it operates smoothly.
How do I replace a door handle if the screws are hidden?
Many modern handles hide the mounting screws under the rose plate. Look for a small notch on the edge of the rose — pry it gently with a flathead screwdriver or a butter knife. Some roses unscrew counterclockwise. Others have a small pin hole on the neck of the handle (push with a clip or the included pin tool to release the handle, then expose the screws).
How do I know if I need to replace the latch bolt too?
If the new handle set comes with a latch that matches your backset, always install it — it’s designed to work together with the handle mechanism. If you’re reusing an old latch to save time, verify the spindle hole dimensions are compatible and the latch functions smoothly before committing to the installation.
Conclusion
Replacing a door handle is one of the easiest hardware upgrades you can make — and it has an outsized visual impact since handles are the most touched part of any door. Match the backset, choose the right function, and swap out the strike plate screws for 3-inch versions while you’re in there. The whole job takes less time than a trip to the hardware store once you have the right hardware in hand.
If you’re refreshing multiple doors, check our complete guide on how to install a door knob for additional tips on knob-specific installs. And if the door itself needs attention, our walkthrough on how to adjust door hinges covers the alignment fixes that make the hardware swap last.
