Cabinet door hinge problems are almost always one of three things: the door is crooked (European cup hinges need adjustment), the screws are stripped (quick fix with the right technique), or the hinge is broken and needs replacing. Modern European-style cup hinges have built-in adjustment screws that let you move the door up, down, in, out, and sideways without removing anything. This guide covers all three fixes for both European hinges and older wrap or surface-mount hinges.
What You’ll Need
| Tools | Materials |
|---|---|
| Phillips screwdriver (or drill/driver) | Replacement hinges (if needed — match brand and cup size) |
| Flathead screwdriver | Wooden toothpicks and wood glue (for stripped holes) |
| Drill with 35mm Forstner bit (for new cup holes) | 35mm European cup hinges (standard size) |
| Measuring tape and pencil | Longer screws (#6 or #8, if upgrading) |
| Level | Masking tape (for alignment marks) |
Safety and Precautions
- Support heavy cabinet doors before removing hinges. Upper cabinet doors can be heavy and will fall if both hinges are removed simultaneously. Remove and work on one hinge at a time, or have a helper hold the door.
- Don’t over-tighten adjustment screws on soft-close hinges. European soft-close hinges have a damper mechanism that can be damaged by aggressive overtightening. Snug is enough — no power-tool torque on these small screws.
- Match the hinge before ordering replacements. Cup hinges vary by overlay (full, half, or inset), cup diameter (35mm is standard, but some older cabinets use 26mm), and arm length. Take the old hinge to the hardware store or photograph the label to match exactly.
Step 1: Identify Your Hinge Type
European Cup Hinges vs. Traditional Hinges
| Hinge Type | Appearance | Adjustment |
|---|---|---|
| European cup (concealed) | Round cup set into door; metal arm clips to cabinet interior | 3-way adjustable via screws on mount plate |
| Wrap-around / strap | L-shaped metal hinge wrapping door edge to cabinet face | Limited — shim or relocate |
| Surface-mount (face frame) | Visible decorative hinge on outside of cabinet face | Limited — move screw holes |
| Piano (continuous) hinge | Full-length hinge running full door height | Replace entire hinge if bent |
European cup hinges are standard on nearly all modern frameless cabinets (IKEA, most kitchen cabinets installed after 1990). If you have these, the adjustment in Steps 2–4 applies directly.
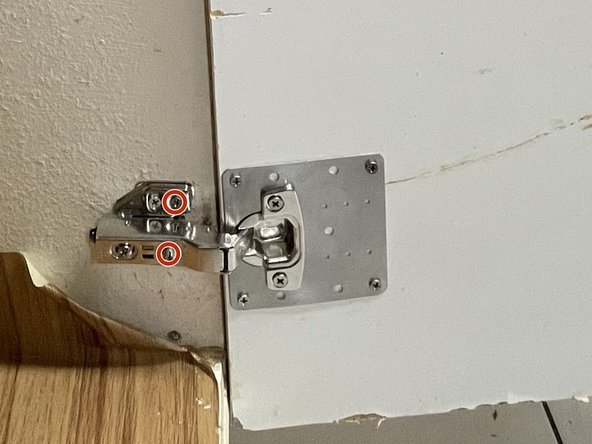
Step 2: Adjust a European Cup Hinge (3-Way Adjustment)
Fix a Crooked or Misaligned Cabinet Door Without Tools — Almost
European hinges have three adjustment screws on the mounting plate that control left/right, in/out, and up/down movement. You only need a Phillips screwdriver.
- Side-to-side adjustment (left/right): The side screw on the mounting plate moves the door horizontally. Turn it clockwise to move the door toward the hinge, counterclockwise to move it away. Use this to center the door gap between adjacent doors.
- Depth adjustment (in/out): The depth screw moves the door toward or away from the cabinet face. Turn it to adjust how far the door protrudes, which affects the gap at the door edges when closed.
- Height adjustment (up/down): On hinges with an elongated slot in the mounting plate, loosen the mounting screws slightly and slide the plate up or down, then re-tighten. This raises or lowers the entire door.
- Work one hinge at a time. Make small adjustments (half-turn), close the door, evaluate, then continue. It takes 3–5 minutes to bring a misaligned door into perfect alignment.
- Once aligned, verify by checking the reveal (the gap between the door and the cabinet or adjacent door) is even — ideally 1/16 to 1/8 inch on all sides.
Step 3: Fix a Loose Hinge With Stripped Screws
The Most Common Cabinet Hinge Problem
When hinge screws spin freely in their holes, the hinge rocks and the door sags or swings crookedly. The fix is to restore wood grip in the stripped hole — not to buy a new hinge.
- Remove the hinge mounting plate from the cabinet box (the inside surface). You’ll see the stripped screw holes clearly — they’re smooth, with no grip.
- Dip 2–3 wooden toothpicks in wood glue and push them firmly into the stripped hole. Break them flush with the cabinet surface. Let the glue dry for at least 30 minutes.
- Reinstall the hinge mounting screws into the same holes — the toothpick wood fills the gap and the screw threads grip the new material.
- Alternatively: use a screw that is one size larger (#8 instead of #6) and longer (1.25 inch instead of 3/4 inch). This grabs fresh wood beyond the stripped zone.
- After the repair, test by applying moderate pressure to the cabinet door — the hinge should feel solid with no movement at the screw connection.
Step 4: Replace a Damaged or Broken European Cup Hinge
When the Cup, Arm, or Mount Plate Is Cracked or Bent
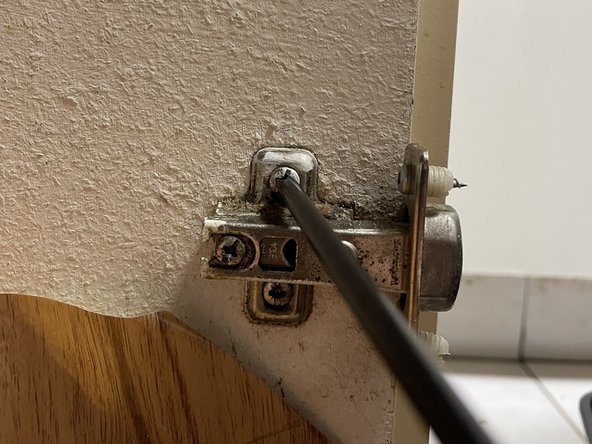
- Remove the damaged hinge: European hinges clip onto the mount plate — press the release clip (a small lever on the arm body) or turn the center screw on the clip, and the hinge arm lifts free. The mount plate unscrews from the cabinet interior.
- Remove the cup from the door: unscrew the two small screws holding the cup body in the 35mm bored hole.
- Take the old hinge to the hardware store or measure: note the overlay (how much the door overlaps the cabinet frame), cup diameter (35mm standard), and arm length. Blum, Grass, Salice, and Amerock are common brands that sell individual replacement hinges.
- Install the new cup body in the existing bored hole — the 35mm hole is standard and the new hinge cup will fit it. Drive the two retention screws.
- Snap the new hinge arm onto the mount plate (or install the new mount plate if you’re replacing the full assembly). Adjust as described in Step 2.
Step 5: Fix Traditional Wrap or Surface-Mount Hinges
Older Style Hinges With Less Adjustability
Traditional hinges on face-frame cabinets don’t have the adjustment range of European hinges. For a misaligned door, the options are shimming, relocating the hinge, or repairing stripped holes.
- For stripped screw holes: use the toothpick-and-glue method (Step 3) or fill with epoxy wood filler. Let cure, then redrive original screws or slightly larger ones.
- For a door that hangs crooked: remove the hinge, insert a thin cardboard shim behind the hinge leaf that needs to move. This tilts the door in the direction of the shimmed hinge.
- For a severely bent hinge: replace it. Match the screw hole pattern exactly by holding the new hinge over the old hole positions. If the new hinge holes don’t align, plug old holes with toothpick/glue and re-drill in the new positions.
- For a full overlay cabinet door that’s shifted: check whether the face frame itself has shifted — if the cabinet box is racked, no hinge adjustment will fully compensate. Re-level and re-square the cabinet box before adjusting hinges.
Pro Tips and Common Mistakes
- Adjust both hinges together, not just one. If a door is 1/4 inch low on the latch side, split the adjustment between the top and bottom hinge — 1/8 inch each. Adjusting only one hinge torques the door and can crack the cup joint over time.
- Don’t ignore soft-close failures. If a soft-close hinge no longer slows the door, the damper is worn. Most European soft-close hinges are inexpensive ($2–5 each) and clip onto the same plate as the old hinge — swap the arm only, keep the cup and plate.
- Check the door for twist before adjusting. Hold the door open at 90 degrees and look across the face from the top. If the door face twists (one corner higher than the other), the door itself is warped — adjustment can minimize it but not fully fix a warped door. Consider replacing the door.
- Label and photo before removing multiple hinges. If you’re removing several cabinet doors at once for painting or refinishing, photograph each door with its hinge position before removal so you can return them to the correct cabinet.
Troubleshooting
| Problem | Likely Cause | Fix |
|---|---|---|
| Door won’t stay closed (springs open) | Closing force screw set too strong or door catch missing | Reduce closing force screw; install or adjust magnetic catch |
| Door sags and won’t align | Stripped hinge screws in cabinet box | Toothpick + glue method or longer screws |
| Door hits adjacent door when opened | Cup too deep or arm set too far in | Adjust depth screw outward; check overlay setting |
| Gap uneven — tight on one side, gap on other | Hinge cup not centered in bored hole | Loosen cup screws, center cup, re-tighten; re-adjust arm |
| Soft close no longer working | Damper worn out | Swap hinge arm only — same clip-on platform |
Frequently Asked Questions
Why does my cabinet door hang crooked?
The most common causes are loose or stripped hinge screws that let the hinge shift, or a European hinge arm that needs side-to-side or depth adjustment. Less commonly, the cabinet box itself is racked out of square. Start with tightening the hinge screws and running through the 3-way adjustment before assuming the cabinet box is the issue.
Are all European cup hinges the same size?
The cup diameter is almost always 35mm — that’s a universal standard. However, hinges vary by overlay type (how much the door overlaps the cabinet frame: full overlay, half overlay, or inset), arm length, and closing mechanism (standard, soft-close, or push-open). Match the overlay and arm length when buying replacements.
How do I fix a cabinet door hinge without removing the door?
For European hinges, all three adjustments (side, depth, height) can be made with the door hanging. Loosen or turn the adjustment screws, move the door, and re-tighten. You only need to remove the door to repair stripped cup screws in the door itself or to replace the cup body in the bored hole.
What size is the hole for a European cup hinge?
The standard cup bore diameter is 35mm. The hole is drilled to approximately 13mm deep. If you’re replacing a broken hinge and the cup hole is damaged, you can repair it with wood filler and re-drill, or replace the door panel if damage is extensive.
Can I replace just the hinge arm without replacing the whole hinge?
Yes — for European clip-on hinges, the arm that connects the cup to the mount plate is usually a separate piece that clips on and off without tools. If only the arm is broken or the soft-close damper is worn, you can buy just the arm replacement for $2–5. This is much cheaper than replacing the full hinge assembly.
Conclusion
Most cabinet hinge problems are fixed in under 10 minutes once you know which adjustment you need. For European cup hinges, the 3-way adjustment covers almost every misalignment scenario without removing the door. For stripped screws, the toothpick-and-glue trick is a genuine permanent fix that works as well as a new cabinet section. Only reach for a full hinge replacement when the cup, arm, or plate is physically cracked or bent beyond adjustment.
If you’re dealing with door hardware on passage doors in addition to cabinets, our guide on how to adjust door hinges covers the same principles for full-size door hinges. And if the cabinet door itself needs attention beyond just the hinge, see our tips on how to fix a hole in a door for surface repair methods that work on cabinet doors too.
