Planing a door means removing a controlled amount of material from an edge so the door swings freely without rubbing the frame. The right tool depends on how much needs to come off: a hand plane for under 1/8 inch, a belt sander for up to 1/4 inch, and a circular saw or track saw for anything larger. This guide walks through all three methods with the diagnosis step that tells you which one to use.
What You’ll Need
| Tools | Materials |
|---|---|
| Hand plane (jack or smoothing plane) | Chalk or pencil |
| Belt sander (optional for larger areas) | Sandpaper (80- and 120-grit) |
| Circular saw + straightedge clamp guide (for large cuts) | Exterior wood primer |
| Sawhorses or workbench | Matching paint or finish |
| Flathead screwdriver | Painter’s tape |
| Hammer | Polyurethane (for unfinished wood edges) |
| Combination square or straightedge | Shims (to support door while removed) |
Safety and Precautions
- Support the door fully before removing hinge pins. A solid wood door can weigh 50–80 lbs. Have a helper hold the door, or insert a wedge shim under the bottom edge before pulling hinge pins. Dropping a door can crack the frame or injure your feet.
- Check for lead paint before sanding (homes built before 1978). Sanding lead-painted surfaces produces hazardous dust. Use a home lead test kit. If positive, wet-sand only and follow EPA RRP lead-safe work practices.
- Wear eye protection and a dust mask. Hand planing and sanding create fine wood dust. Safety glasses and an N95 or better respirator are standard PPE for this job.
Step 1: Find Exactly Where and How Much to Remove
Chalk Test — Do This Before Touching Any Tool
Removing material from the wrong edge or taking off too much are the two most common mistakes when planing a door. The chalk test eliminates both errors.
- Rub chalk, a crayon, or lipstick along the full length of the door edge that you think is binding.
- Close the door slowly and deliberately, then open it. The chalk will transfer to the frame at the exact contact points — that’s what you’re removing material from.
- Mark the affected area with a pencil line directly on the door edge. Note whether the rub is across the full edge length or just at a corner.
- Measure the gap (or absence of gap) at the contact zone. The target is a uniform 1/8-inch gap on all sides. Measure how much you need to add to reach that gap — that’s the maximum you should remove.
Step 2: Remove the Door From Its Hinges
Required for Any Serious Planing — Don’t Skip This
Planing a door while it’s still hanging produces uneven, bowed results. Always remove the door to work on it flat.
- Open the door fully and insert a shim or fold of cardboard under the bottom corner of the door, on the latch side. This removes the weight from the hinges before you pull the pins.
- Using a flathead screwdriver and hammer, tap the hinge pins up from the bottom hinge first, then the top. Tap upward on the exposed bottom of each pin. Have your helper hold the door steady.
- With both pins out, lift the door free from the frame and carry it to sawhorses or a workbench. Lay it flat or lean it on its long edge, supported stably on both ends.
Step 3: Plane a Small Amount With a Hand Plane (Under 1/8 Inch)
The Most Precise Method — For Fine Adjustments
- Confirm the hand plane blade is sharp and set to a fine depth — about 1/32 inch per pass. A dull plane tears the wood rather than shearing it cleanly.
- Orient the plane to work with the wood grain. For door stiles (the vertical edges), plane from the top corner downward, heel-to-toe in long strokes.
- Keep even pressure throughout each stroke. Lighten pressure at the ends of the pass to avoid rounding off the corners.
- After every 2–3 passes, lay a straightedge across the edge to check for flatness. You want to take material off evenly across the full length, not create a low spot in the middle.
- Check the door in the frame periodically — re-insert the hinge pins loosely, close the door, check the gap, then remove and continue if more is needed.
- Stop planing when the gap reaches 1/8 inch uniformly. Sand with 120-grit to smooth the edge, then seal the bare wood immediately.
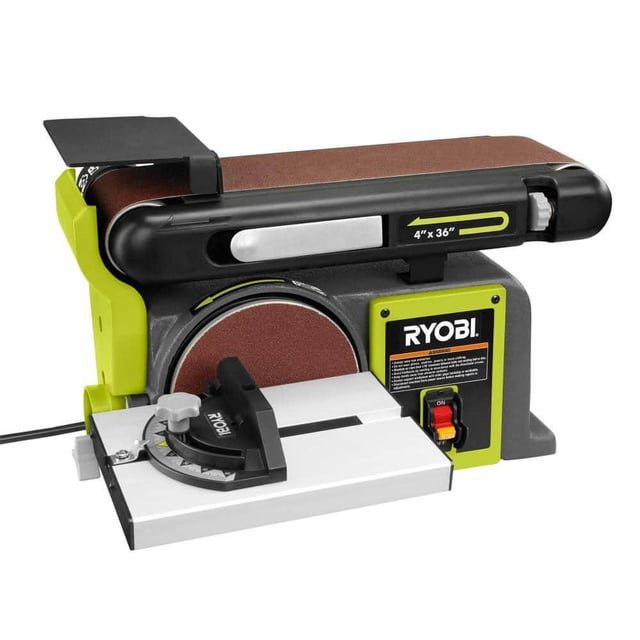
Step 4: Use a Belt Sander for Medium Amounts (1/8 to 1/4 Inch)

Faster Than a Hand Plane for Larger Contact Zones
- Clamp the door flat to sawhorses. The belt sander should ride on the flat of the door edge without tilting.
- Use 80-grit abrasive to remove material efficiently. Keep the sander moving in long, overlapping passes along the full length of the edge — never dwell in one spot.
- Check progress with a straightedge frequently. Belt sanders remove material quickly and unevenly if you’re not careful.
- Transition to 120-grit once you’re within 1/32 inch of your target to refine the surface and avoid over-sanding.
- Final-sand with 120-grit by hand (sanding block, not orbital) for a clean, flat finish edge.
Step 5: Use a Circular Saw for Large Amounts (Over 1/4 Inch)
When You Need to Remove a Significant Strip
If a door has dropped significantly due to settling, or was hung wrong from the start, a saw cut is faster and more accurate than planing a large amount by hand.
- Mark the cut line clearly with a chalk line or pencil line. Double-check by measuring at both ends — make sure the line is parallel to the door edge, not the door face.
- Clamp a straight board or aluminum track guide to the door face as a saw fence. Set it so the saw blade runs exactly on the waste side of the cut line.
- Apply painter’s tape along the cut line on the door face to reduce tear-out on painted or finished surfaces.
- Make the cut in one smooth, steady pass. Use a fine-tooth blade (60-tooth or finer) for the cleanest cut.
- Clean up the sawn edge with a hand plane or sanding block — one or two passes to remove any saw marks and check flatness.
- Seal the cut edge immediately: raw wood cut ends are extremely absorbent. Apply two coats of exterior primer or polyurethane before re-hanging.
Step 6: Rehang the Door and Verify the Gap
Confirm Before Sealing and Painting
- Carry the planed door back to the frame. Insert the hinge pins loosely from the top hinge down — do not fully seat them yet.
- Close the door and check the gap uniformly: top, bottom, latch side, and hinge side. The target is 1/8 inch on all sides, 3/4 inch at the bottom above a hard floor.
- If the gap is still uneven, remove the door and take one or two more passes with the plane. If you removed too much (rare but possible), shim the affected hinge to compensate for up to 1/16 inch.
- Once the gap is correct, seat the hinge pins fully and test the door swing through its full range. Check that the latch engages the strike plate cleanly.
Pro Tips and Common Mistakes
- Don’t plane on a humid day. Wood absorbs moisture and swells. If you’re addressing a seasonal swelling problem, plane when conditions are dry — ideally in mid-winter — so you’re working with the door close to its smallest dimension. Otherwise you’ll remove too much material.
- Always work with the grain on stile edges. Planing against the grain causes tearout — the plane will skip and dig rather than shear cleanly. On door stiles, grain typically runs vertically; plane downward or at a slight skew angle.
- Seal immediately after planing. Bare, freshly planed wood absorbs moisture within hours, especially on exterior doors. Two coats of primer or clear finish on the same day you plane is the rule.
- Check hinge screws before planing. If the door rubs due to sagging from loose hinge screws, you don’t need to plane at all — tighten the hinges first, and re-evaluate. Planing a door that just has loose hinges removes material you didn’t need to remove.
Troubleshooting
| Problem | Likely Cause | Fix |
|---|---|---|
| Door still rubs after planing | Not enough material removed, or wrong edge | Redo chalk test, re-plane the confirmed contact zone |
| Door gap too large after planing | Over-planed | Shim the affected hinge to rotate the door slightly |
| Planed edge has waves or low spots | Uneven pressure during planing | Use a straightedge to find high/low spots; flatten with hand plane |
| Tearout (chipping) on planed edge | Planing against the grain or dull blade | Reverse direction or sharpen plane iron; use skew angle |
| Door swells again after planing | Raw edge not sealed | Sand, prime, and finish the edge immediately |
Frequently Asked Questions
How do I know if I should plane a door or adjust the hinges?
Try tightening all hinge screws (with 3-inch screws if needed) before planing. If the rubbing stops or significantly improves, the problem was hinge sag — not a planing job. Only plane when the gap is genuinely absent or the frame has shifted permanently, not just because the hinges are loose.
Can I plane a hollow-core door?
Yes, but with caution. Hollow-core doors have a thin wood veneer skin over a cardboard or foam interior. You can remove material from the edge, but you must stay away from the perimeter rails (the solid wood strips at the top, bottom, and sides — usually about 1.5–2 inches wide). Never plane a hollow-core door more than you can see in the solid rail area.
How much can you take off a door when planing?
For hollow-core doors: no more than the width of the solid perimeter rail — usually 1.5–2 inches from the edge total, absolute maximum. For solid wood and solid-core doors, you can remove more, but always keep the door structurally sound and appropriately wide for the opening.
Do I have to paint the planed edge?
Yes — especially on exterior doors and any door exposed to humidity. The planed edge is raw, unfinished wood that will absorb moisture immediately. Left unsealed, it will swell again and re-create the binding problem. Apply primer and paint or polyurethane the same day you plane.
Can I use a power planer instead of a hand plane?
A power (electric) planer removes material much faster and is useful for larger amounts. However, it’s harder to control than a hand plane for fine adjustments and can remove too much material quickly if not used carefully. If using a power planer, set it to the shallowest depth and make test passes at the door end before running the full length.
Conclusion
Planing a door is one of those jobs that looks harder than it is, once you understand the tool selection and the critical importance of doing the chalk test first. Match the method to the amount you need to remove — hand plane for fine adjustments, belt sander for medium zones, circular saw for large reductions — and seal the bare wood the same day you finish. The door should swing and latch cleanly with a uniform 1/8-inch gap on all sides when you’re done.
If you identified that the rubbing is actually from hinge sag rather than a true fit issue, our guide on how to adjust door hinges covers the shimming and screw technique that can save you from planing unnecessarily. And if the door is sticking seasonally due to moisture swelling, see our full guide on how to fix a rubbing door for the diagnosis-to-fix process.
