
A French drain stops working when the perforated pipe or the surrounding gravel becomes clogged with sediment, tree roots, or silt. Cleaning it means flushing water from the inlet end to push debris out the outlet, using a sewer jetter or drain snake for compacted blockages, and — in severe cases — excavating and replacing the filter fabric or pipe. Most homeowners can restore a sluggish French drain in a few hours without excavation. Here’s how to diagnose the problem and fix it.
What You’ll Need
Tools
- Garden hose with a high-pressure nozzle
- Sewer jetter (pressure washer attachment — most effective for pipe flushing)
- Drain snake or hand auger (for root intrusion)
- Shovel (if excavation is needed)
- Wet/dry vacuum (to pull water from inlet if ponding)
Materials
- Clean gravel (if topping off after maintenance)
- Replacement filter fabric (landscape fabric) — if repairing a failed system
- Perforated drain pipe sections (if replacing damaged pipe)
Safety Precautions
- Call 811 before any excavation — even minor digging near a French drain requires a utility locate call to prevent hitting buried electrical, gas, or water lines.
- Wear eye protection when using a sewer jetter — high-pressure water can eject debris at high velocity from the pipe opening.
- Don’t flush chemical drain cleaners into French drains — they kill the soil biology that helps drainage and contaminate groundwater.
- Watch for soft ground or sinkholes near the drain route — a French drain that has been failing for years may have created underground voids where soil has washed into the pipe. Step carefully.
Diagnosing the Problem First
Before cleaning, identify where the drain is failing. Stand in the yard during or immediately after heavy rain and observe:
- Water ponding at the inlet — clog is near the top of the drain or the pipe opening is buried/silted over
- Water ponding midway along the drain route — clog is in the middle section of pipe or that section of gravel is saturated with sediment
- Little or no flow at the outlet — the outlet (discharge point) is blocked or the pipe is clogged throughout
- Water seeping through surface above the drain route — the perforations in the pipe may be completely blocked and water is backing up through the gravel
How to Clean a French Drain Step by Step
Step 1: Locate and Clear the Inlet and Outlet
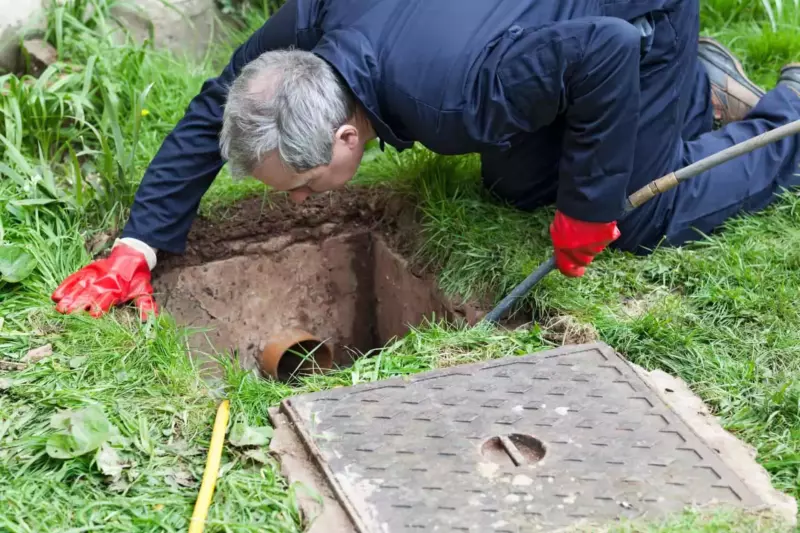
Find both ends of your French drain — the inlet (where water enters) and the outlet (where it exits, typically at a lower point in your yard, near a storm drain, or into a dry well). Clear any debris, leaves, or soil covering the pipe openings at both ends. Push a stick or your gloved hand into the pipe inlet to check whether the opening itself is blocked with compacted debris. If you can push several feet in without resistance, the inlet isn’t the primary problem.
Step 2: Flush from the Inlet with a Garden Hose
Insert a garden hose with a high-pressure nozzle into the inlet end of the pipe. Turn the water on full and push the hose as far into the pipe as it will go while the water runs. Work the hose back and forth while flowing water. This pushes loose sediment, debris, and minor root intrusion toward the outlet. Watch the outlet end — you should see discolored water and debris exiting within a few minutes if the flush is working. If no water exits the outlet despite full pressure from the hose, the clog is significant and you need a sewer jetter.
Step 3: Use a Sewer Jetter for Stubborn Clogs
A sewer jetter is a high-pressure nozzle attachment for a pressure washer that feeds into drain pipes and cleans as it advances. You can rent them at most equipment rental stores for $50–$100 per day. Feed the jetter hose into the inlet end of the French drain while running the pressure washer. The forward-facing and rear-facing jets simultaneously blast clogs ahead of the nozzle and clean pipe walls as it moves. Feed it in slowly — 6 inches at a time — and allow the water to work. This is the most effective non-excavation method for compacted silt blockages.
Step 4: Use a Drain Snake for Root Intrusion
If you feel resistance that won’t yield to water pressure, tree or shrub roots may have penetrated the perforated pipe. Feed a hand-crank or electric drain snake into the pipe. When you feel root resistance, rotate the snake clockwise to cut through or latch onto the roots, then pull back. Root intrusion in French drains is common — willow, silver maple, and bamboo are the most aggressive. After snaking, follow with a sewer jetter flush to clear cut root material from the pipe.
Step 5: Check and Clean the Outlet
With the inlet end cleaned and flushed, inspect the outlet. If it opens into daylight (a hillside, ditch, or storm drain), the outlet opening may be grown over with vegetation or partially buried. Clear it completely. If it discharges into a dry well, the dry well itself may be saturated or filled with sediment — this requires either excavation to clean or replacement. If your outlet runs into a municipal storm drain, check local codes — some municipalities require permits for this type of discharge.
Step 6: Address Failed Filter Fabric (If Needed)
The filter fabric (landscape fabric) wrapped around the pipe prevents fine soil particles from entering the drain system. Over 5–15 years, this fabric can clog with fine sediment — a condition called “blinding.” When the fabric blinds, it blocks water from reaching the pipe entirely. The only fix is excavation. Dig down to expose the pipe, remove the old fabric and heavily silted gravel, inspect the pipe for damage, rewrap with new non-woven geotextile fabric, and refill with clean crushed stone (3/4-inch washed gravel). This is a significant project but restores the drain to full function for another 10–15 years.
Step 7: Test and Observe
After flushing and snaking, run your garden hose at the inlet for 5–10 minutes and watch the outlet. You should see steady flow within 1–2 minutes. If you see only a trickle despite sustained inlet pressure, the gravel or fabric surrounding the pipe is still the problem and excavation may be necessary. Note the flow rate now and compare it after the next significant rain — improvement in yard drainage confirms the cleaning worked.
French Drain Maintenance Schedule
| Task | Frequency |
|---|---|
| Clear inlet and outlet openings of debris | Annually (fall, before heavy rain season) |
| Flush with garden hose from inlet | Every 1–2 years |
| Full sewer jetter cleaning | Every 3–5 years, or when drainage slows |
| Root intrusion check (if trees nearby) | Every 2–3 years |
| Excavation and fabric replacement | Every 10–15 years, or when system fails completely |
Pro Tips
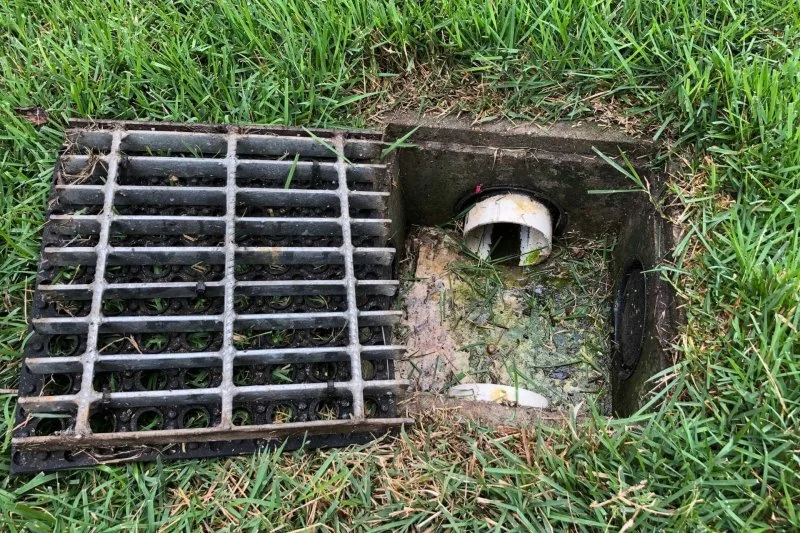
- Install a cleanout access port when building or repairing a French drain — a vertical pipe with a cap at the surface gives you direct hose and snake access without digging. If your system doesn’t have one, adding one during maintenance excavation is a worthwhile upgrade.
- Choose non-woven geotextile fabric for wrapping the pipe — woven landscape fabric blinds much faster with fine silt. Non-woven fabric (usually gray and felt-like) has superior long-term drainage performance.
- Keep trees a minimum of 10 feet away from French drain routes — the closer the trees, the more frequent the root intrusion maintenance.
- Document your drain layout — take photos and make a sketch showing the inlet, outlet, and route when the system is installed or serviced. Future troubleshooting is much easier with this reference.
Frequently Asked Questions
How do I know if my French drain needs cleaning or replacing?
Try a full flush with a sewer jetter first. If water flows freely at the outlet after jetting, the pipe is still functional — cleaning solved the problem. If water still won’t flow after jetting and snaking, the fabric or surrounding gravel has failed and the system needs excavation and partial or full replacement. A French drain with failed filter fabric cannot be restored without digging.
Can I use a pressure washer directly on a French drain?
A standard pressure washer lance is too rigid to go far into a curved drain pipe. Use a sewer jetter attachment — it’s a flexible hose that attaches to your pressure washer and feeds through bends in the pipe. Electric pressure washers (1200–1500 PSI) work for routine cleaning; gas-powered units (2500+ PSI) are needed for heavily compacted silt or root intrusion.
How long does a French drain last before needing replacement?
A properly installed French drain with quality non-woven filter fabric lasts 10–20 years before the fabric completely blinds. The pipe itself can last 25–30 years or more (especially if it’s solid PVC or corrugated HDPE without perforations in the lower half). Regular cleaning extends the service life significantly. French drains installed without filter fabric often fail within 3–5 years as the gravel fills with fines.
Why is water still pooling after I cleaned my French drain?
If the yard still floods after cleaning, check: (1) the outlet is truly open and draining to a lower point; (2) the soil surrounding the drain is clay-heavy — clay doesn’t drain well regardless of the system; (3) the drain is undersized for the watershed area it’s managing. Large areas of roof runoff or hard landscape directing water to a small drain require a larger diameter pipe or additional drain runs.
Should I add herbicide to kill roots in my French drain?
Copper sulfate crystals (available at plumbing supply stores) can be flushed into the drain to kill roots that have penetrated the pipe. It works slowly over several weeks. Use only the amounts specified on the label — excess copper sulfate in groundwater harms soil biology and nearby plants. Physical removal with a snake or jetter is more immediately effective and preferable if root intrusion is severe.
Conclusion
Cleaning a French drain is manageable without excavation in most cases — a garden hose flush handles minor blockages, a sewer jetter handles compacted silt, and a drain snake handles root intrusion. Tackle maintenance every 1–2 years before the system degrades to the point where excavation becomes necessary. With an inlet cleanout port and annual inlet/outlet clearing, most French drains can operate efficiently for a decade or more between major service events.
If your French drain is part of a larger yard drainage project, see our guide on how to build a French drain for installation context. For cleaning a clogged drip irrigation system in the same yard, see our guide on how to clean a clogged drip system.
