
A clogged drip irrigation system stops water from reaching your plants evenly — or at all. The fix is a systematic flush starting at the water source and working outward to each emitter. Most clogs come from mineral buildup, algae growth, or debris in the filter screen. With a few basic tools and about an hour, you can restore your drip system to full flow without replacing expensive components.
What You’ll Need
Tools
- Flat-head screwdriver or emitter removal tool
- Bucket or container for flushing
- Small wire brush or old toothbrush
- Garden hose with pressure nozzle (optional)
- Needle or pin (for clearing emitter orifices)
- Slip-joint pliers
Materials
- White vinegar (for mineral deposit clogs)
- Household bleach — 5.25% sodium hypochlorite (for algae clogs)
- Clean water for flushing
- Replacement emitters (have a few on hand)
- Replacement filter screen (if screen is damaged)
- Irrigation-safe pipe thread tape (if reassembling fittings)
Why Drip Systems Clog
Understanding what causes clogs helps you fix them faster and prevent them from coming back. The four main culprits are mineral deposits, algae, debris, and root intrusion.
- Mineral deposits (scaling): Hard water leaves calcium and magnesium behind as water evaporates through emitters. This is the most common clog type in US regions with hard water.
- Algae growth: Sunlight on clear or translucent tubing grows algae inside the lines, especially in warm climates. Algae can completely block emitter orifices.
- Sediment and debris: Dirt, sand, or organic material enters through the water source or at connection points, lodging in the filter screen or emitter body.
- Root intrusion: Fine feeder roots can enter subsurface emitters seeking moisture. If you run subsurface drip, this is worth checking first.
- Fertilizer residue: Running liquid fertilizer through drip lines without flushing afterward causes buildup and can interact with minerals to form blockages.
Safety Precautions
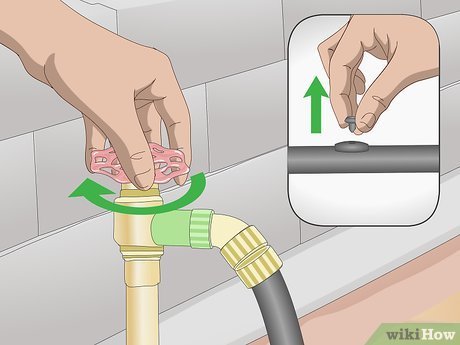
- Turn off the water supply completely before disconnecting any fittings or emitters.
- Never mix bleach and vinegar — they react to produce chlorine gas, which is toxic. Use one or the other, not both in the same session without thoroughly rinsing between uses.
- Wear gloves when handling bleach solutions. Even dilute bleach can irritate skin with prolonged contact.
- Don’t use bleach near edible plants without thoroughly flushing the system — use vinegar instead for food garden drip systems.
- Release pressure slowly when opening end caps — trapped pressure can cause fittings to spray water unexpectedly.
- Check local regulations on flushing water — in some areas, irrigation discharge must be directed to a drain, not a storm drain.
How to Clean a Clogged Drip System Step by Step
Work from the water source outward — filter first, then main line, then distribution lines, then individual emitters. This order prevents debris you dislodge from re-clogging downstream components.
Step 1: Turn Off the Water and Inspect the System
Shut off the water supply valve to your drip system. Walk the entire layout and note which plants aren’t getting water (dry soil, wilting) versus which are receiving normal flow. This tells you whether the clog is in the main filter/header (affecting everything) or in individual lateral lines or emitters (affecting specific zones). Mark problematic areas with small flags or stakes so you can address them systematically.
Step 2: Clean the Filter Screen
The filter screen at the head of the system catches sediment before it enters your lines. A clogged filter reduces flow to the entire system. Locate your filter — typically a Y-filter or disc filter near the backflow preventer or timer. Unscrew the filter housing (turn counterclockwise), remove the screen cartridge, and hold it under running water to rinse debris off. For stubborn buildup, soak the screen in white vinegar for 15–20 minutes, then scrub gently with a toothbrush. Rinse thoroughly before reinstalling.
Step 3: Flush the Main Supply Line
With the filter reinstalled, temporarily remove the end cap from your main supply line — the largest diameter tubing running from the water source. Place a bucket at the open end. Turn the water on slowly and let it run for 2–3 minutes at full flow. You’ll see discolored water, debris, and sediment flush out. Close the end cap only after the water runs clear. If flow from the main line is weak even with the end cap off, the problem may be in the filter, the water source pressure, or the backflow preventer — not the lines.
Step 4: Flush Each Lateral Line
Lateral lines are the smaller tubing branches that run from the main supply line to individual plant zones. Each lateral should have its own end cap. Remove one end cap at a time, turn on the water briefly, and let debris flush out. Repeat for every lateral. This clears any sediment that bypassed the main filter and settled in the distribution tubing. A 30–60 second flush per lateral is usually enough.
Step 5: Remove and Inspect Individual Emitters
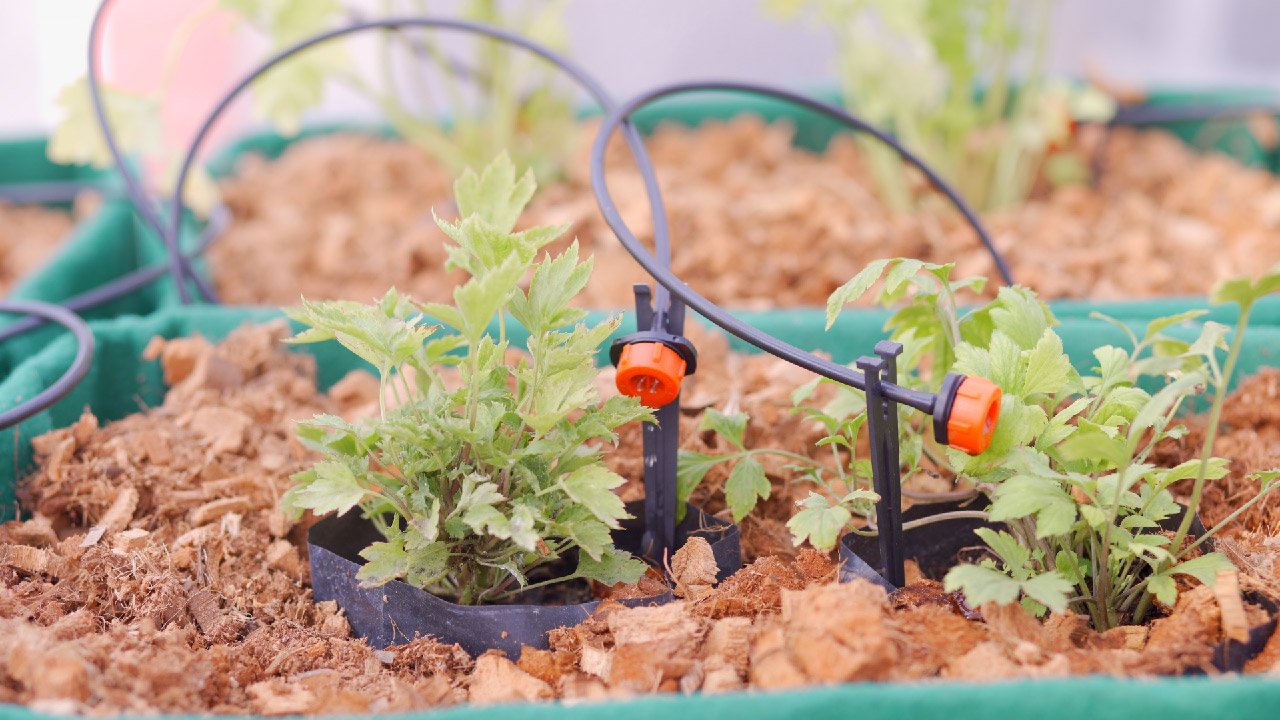
With lines flushed, focus on individual emitters. Use an emitter removal tool or a flat-head screwdriver to twist and pull each emitter from its stake or punch hole in the tubing. Inspect the small orifice opening at the tip. On pressure-compensating emitters, you’ll also find a small silicone diaphragm inside — check that it’s not torn or clogged with debris.
Sort emitters into two groups: those that look visibly clogged (white mineral crust, brown debris, or no visible opening) and those that look clean. Replace any emitter with a cracked body or damaged diaphragm — they’re inexpensive (under $0.50 each) and not worth cleaning.
Step 6: Soak Emitters to Remove Mineral Buildup
Place clogged emitters in a container of undiluted white vinegar. Let them soak for 30 minutes to 2 hours depending on how heavy the scaling is. The acetic acid in vinegar dissolves calcium carbonate deposits. After soaking, use a needle or pin to carefully clear the tiny orifice hole — don’t use metal tools on the diaphragm. Rinse the emitters under running water, blow gently through the inlet to confirm airflow, then reinstall.
For algae-clogged emitters (green or brown organic material), soak in a solution of 1 tablespoon of 5.25% bleach per gallon of water for 20 minutes. Rinse thoroughly before reinstalling. Do not use this method on emitters in food gardens unless you flush the system with clean water for at least 10 minutes before the next irrigation cycle.
Step 7: Check and Clear Punch Holes in the Supply Line
Sometimes the punch hole where the emitter connects to the tubing gets partially clogged with a small debris plug. After removing the emitter, look into the tubing hole with a flashlight. If you see debris, use a pin or toothpick to clear it. Don’t enlarge the hole — the compression barb on the emitter needs a snug fit to prevent leaks.
Step 8: Reinstall Emitters and Test the System
Push cleaned or replacement emitters firmly back into the tubing holes until the barb seats completely. Replace all end caps on lateral lines. Turn the water on slowly and walk the system. Check that every emitter is dripping or flowing at its rated output. Look for any geyser-style leaks that indicate a loose emitter or damaged tubing. Let the system run for a full cycle to confirm even distribution.
Step 9: Consider a Chemical Flush for System-Wide Algae
If algae is present throughout your lines (green slime visible inside tubing when you cut a section), run a dilute bleach solution through the whole system. Mix 1 cup of 5.25% bleach per 10 gallons of water. Run this solution through the system for 30 minutes, then flush with clean water for 15–20 minutes until no chlorine odor remains at the emitters. Do this at the start or end of the irrigation season, not during active growing season in food gardens.
Pro Tips
- Use a disc filter, not just a screen filter — disc filters with a 150–200 mesh rating catch finer particles and are easier to backflush without disassembly.
- Flush end caps regularly — open end caps at the end of each irrigation season and let water flush through to clear accumulated sediment. Takes 2 minutes and prevents most clogs.
- Label your emitter flow rates — mark each emitter location on a simple diagram showing its GPH rating. This helps you quickly identify an emitter performing below spec during future checks.
- Use UV-resistant black tubing — clear or translucent tubing accelerates algae growth. Black polyethylene tubing eliminates the light that algae needs to thrive.
- Add an inline filter at each valve — if you have multiple irrigation zones on a timer, a small Y-filter at each valve catches debris before it reaches the emitters in that zone.
- Run a vinegar flush annually — even without visible clogs, an annual vinegar flush through the lines dissolves early-stage mineral deposits before they become full blockages.
Troubleshooting: Common Drip System Problems
| Symptom | Likely Cause | Fix |
|---|---|---|
| Entire system has weak flow | Clogged main filter or low water pressure | Clean filter screen; check water pressure (should be 15–30 PSI at emitters) |
| One lateral line not flowing | Clog in lateral line or disconnected end cap | Flush lateral line; check for kinks or damage |
| Single emitter not dripping | Mineral clog or failed diaphragm | Remove and soak in vinegar; replace if diaphragm is torn |
| Emitter squirting sideways | Debris deflecting flow inside emitter body | Remove and flush under high pressure; replace if clog won’t clear |
| Water pooling at one spot | Emitter dislodged or punch hole enlarged | Reseat emitter; use a goof plug and repunch a new hole nearby if needed |
| Green slime in tubing | Algae growth — clear tubing + sunlight exposure | Run bleach flush; replace clear tubing with black UV-resistant tubing |
| Subsurface emitter not working | Root intrusion clogging the emitter | Dig up and replace with root-resistant emitter (add copper tape around area) |
Drip System Seasonal Maintenance Schedule
| When | Task |
|---|---|
| Start of irrigation season (spring) | Clean filter screen, flush all main and lateral lines, inspect all emitters, run system for one full cycle and walk the layout |
| Monthly during growing season | Check emitters for output consistency, clean filter screen, flush end caps if pressure seems low |
| Mid-season (peak summer) | Inspect for algae in lines, check pressure at emitters with a gauge, look for wet spots indicating leaks |
| End of irrigation season (fall) | Run bleach or vinegar flush, drain all lines, remove and store emitters in cold climates, cap all openings |
Frequently Asked Questions
How often should I flush my drip system?
Flush the main and lateral lines at the beginning and end of each irrigation season. In areas with hard water, flush more frequently — monthly during the growing season — to prevent mineral deposits from accumulating in emitters. Check and clean the filter screen every 4–6 weeks during active use.
Can I use CLR or other descalers on drip emitters?
White vinegar is safer and just as effective for most mineral deposits. CLR and similar commercial descalers work but can degrade plastic emitter bodies and rubber diaphragms with repeated use. If you do use a commercial descaler, dilute it significantly (1:10 with water) and limit soak time to 15 minutes. Always rinse thoroughly before reinstalling.
Why does my drip system lose pressure after I clean it?
If pressure drops after cleaning, the most likely causes are: a filter screen that wasn’t fully reinstalled (causing a bypass leak), an emitter that wasn’t properly seated creating a drip-side leak, or an end cap left off a lateral line. Walk the system with the water running and look for any water pooling where it shouldn’t be.
How do I know if I need to replace the whole drip line instead of just cleaning it?
Replace sections of tubing if they’re cracked, brittle, have multiple punctures from previous repairs, or have visible animal or UV damage. Most standard polyethylene drip tubing lasts 5–10 years. If you’re cleaning the same lines repeatedly every season and still getting clogs, the tubing has likely degraded internally and replacement is more cost-effective than continued maintenance.
Is it safe to run vinegar through the drip system to clean it without removing emitters?
Yes — you can run a diluted vinegar solution (1 part vinegar to 4 parts water) through the entire system without removing emitters. Let it soak in the lines for 30–60 minutes, then flush with clean water for 10–15 minutes. This is an effective annual maintenance flush for mineral deposits and is safe for soil and most plants when properly diluted and flushed.
Conclusion
Cleaning a clogged drip system is methodical work — start at the filter, flush the lines, then address individual emitters one by one. The combination of a vinegar soak for mineral clogs and a bleach flush for algae handles the vast majority of drip system problems US homeowners encounter. With a seasonal maintenance schedule, you can prevent most clogs from forming in the first place and keep your irrigation system running efficiently for years.
If your yard has larger irrigation infrastructure, you might also find our guide on how to build a French drain useful for managing drainage alongside your watering system. For broader outdoor maintenance, see our guide on building a backyard greenhouse to pair proper irrigation with a controlled growing environment.
