A French drain solves yard water problems that surface grading alone can’t fix: areas where water pools after rain, soggy spots near foundations, and places where runoff from a slope creates standing water. The concept is simple — a gravel-filled trench with a perforated pipe intercepts ground water and surface runoff, then redirects it to a lower discharge point. Installed correctly, a French drain is an invisible, low-maintenance permanent fix for chronic drainage issues.
What You’ll Need
Tools
- Trenching spade or trenching shovel
- Mattock or pick (for hard or rocky soil)
- Wheelbarrow
- Carpenter’s level and tape measure
- Landscape marking paint or stakes and string
- Hand tamper
- Utility knife
Materials
- 4-inch diameter perforated drain pipe (enough to cover your drain run length plus 10% extra)
- Washed gravel or drain rock (3/4-inch clean crushed stone) — approximately 1 cubic yard per 50 linear feet of 12-inch-wide, 18-inch-deep trench
- Filter fabric (landscape geotextile) — enough to line the trench walls and bottom
- Catch basin or outlet grate (for the discharge end)
- PVC end cap (for capping the upstream end of the pipe)
- Pipe connectors, elbows, and couplings as needed for your layout
Safety and Precautions
- Call 811 before any digging. Underground utility lines (gas, electric, water, telecommunications) must be located and marked before excavation begins. This is legally required in all US states and takes 2–3 business days after calling.
- Check local codes and permits. Some municipalities require permits for drainage systems that discharge to streets, storm drains, or neighboring properties. Discharging onto a neighbor’s property without permission is a liability issue.
- Trench safety: For trenches deeper than 5 feet, OSHA requires proper shoring or sloping. Home French drain trenches are typically 18–24 inches deep and do not approach this threshold, but be aware of the rule.
- Do not discharge toward a building foundation — the outlet must be at a lower elevation than the intake and must direct water well away from any structure.
How French Drains Work
A French drain consists of a gravel-filled trench with a perforated pipe buried at the bottom. Water from the surrounding soil seeps into the gravel (which has large pore spaces) and then flows into the perforated pipe through the holes. The pipe carries the water by gravity to a lower discharge point — typically a dry well, a swale, a storm drain inlet, or the street curb. The filter fabric wrapped around the gravel prevents fine soil particles from migrating into the gravel and clogging the system over time.
Step-by-Step: How to Build a French Drain
Step 1 — Plan the Route and Grade
Walk your property after a rain to observe where water pools and which direction it flows. A French drain must be planned to run from the high wet area (intake) to a lower discharge point — water follows gravity. The trench bottom must slope continuously downhill at a minimum of 1 inch drop per 10 feet (1% grade). Use a string line and line level or a laser level to determine existing grades and plan a trench route that achieves this minimum slope. Mark the planned trench route with landscape paint or stakes and string.
Step 2 — Call 811 and Wait for Utility Marking
Before any digging, call 811 (the national Call Before You Dig number) or visit 811.com to submit a locate request. Your local utility companies will send locators to mark the approximate locations of underground lines with spray paint and flags. This typically takes 2–3 business days. Do not dig until all utility marks are in place. Work carefully around any marked utility locations — dig by hand within 18 inches of a marked line.
Step 3 — Excavate the Trench
Dig the trench 12 inches wide and 18–24 inches deep along your planned route. Maintain a consistent downhill grade throughout — check the grade frequently with a level and measuring tape. As you excavate, pile removed soil away from the trench edge (so it won’t fall back in) and remove it in a wheelbarrow to prevent it from mixing with the gravel you’ll be adding. The trench bottom should be smooth and free of large rocks, roots, or debris.
Step 4 — Install Filter Fabric
Line the trench with filter fabric (geotextile landscape fabric). Drape the fabric over the edges and down into the trench, covering the bottom and both walls with at least 6 inches of overlap at the top on each side. The fabric allows water to pass through freely while blocking soil particles that would otherwise migrate into the gravel and eventually clog the drain system. Secure the fabric edges at the top of the trench with stakes or stones temporarily while you work.
Step 5 — Add the Initial Gravel Bed
Pour 3–4 inches of washed gravel into the bottom of the fabric-lined trench. Spread it evenly with a shovel and tamp lightly. This gravel bed creates the foundation level for the pipe and provides initial drainage space beneath the pipe. Check the grade of this gravel bed with a level — it should slope continuously downhill at the planned 1% grade.
Step 6 — Lay the Perforated Pipe
Lay the 4-inch perforated drain pipe on top of the gravel bed with the perforations facing down (holes pointing toward 4 o’clock and 8 o’clock, not straight down at 6 o’clock — this is the correct installation position for most perforated pipe). Connect pipe sections with couplings. Add elbows where the route turns. At the upstream end (the wet area intake end), cap the pipe with a PVC end cap to prevent soil entry. At the downstream end (discharge point), connect to a catch basin, outlet pipe, or leave the end open to daylight where it discharges. Confirm the pipe runs continuously downhill from intake to outlet with no low spots that would trap water.
Step 7 — Fill with Gravel
Backfill the trench with washed gravel, covering the pipe completely and filling to within 3–4 inches of the surface. The gravel should come to within 3–4 inches of grade to allow for the final layer. Tamp the gravel gently as you fill — don’t compact aggressively, as compacted gravel loses void space that is essential for drainage function. Check that gravel is covering the pipe fully on all sides.
Step 8 — Fold and Lap the Filter Fabric
Fold the excess filter fabric from the sides over the top of the gravel, overlapping in the center. This completely encases the gravel-pipe system in filter fabric, creating a “sock” around the entire drainage system. The top fabric layer is critical — without it, fine soil from above (whether from the topsoil layer or from settling) will migrate down into the gravel over time and progressively reduce the drainage capacity.
Step 9 — Backfill and Finish the Surface
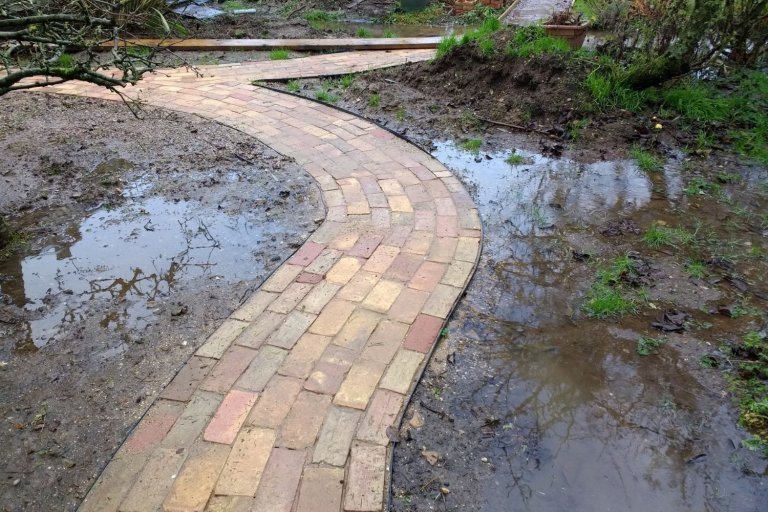
Place 3–4 inches of topsoil over the wrapped fabric to bring the trench back to grade. Compact lightly and seed or sod over the disturbed area. In lawn areas, the finished French drain is completely invisible. For a surface-channel French drain design (a decorative gravel trench with no topsoil cover), skip the topsoil and leave the gravel at grade level, covered with landscape fabric and a clean layer of decorative rock on top for an attractive drainage channel.
Step 10 — Test with Water and Inspect
After backfilling, run a garden hose into the intake area and watch the discharge end — water should flow freely from the outlet within a minute or two. If no water appears at the outlet after running the hose for 5 minutes, the pipe may have a low spot trapping water, or the outlet may be obstructed. Check grade and outlet before declaring the installation complete.
Pro Tips for French Drain Installation
- The most common French drain failure is clogging — caused by skipping the filter fabric. Never install a French drain without fabric encasing the gravel. A clogged drain requires excavation to repair.
- Size the pipe to the drainage need. Standard 4-inch perforated pipe handles most residential drainage applications. For large areas with significant runoff, consider 6-inch pipe.
- A catch basin at the low spot (a buried box with a grate at grade level) captures surface water in addition to subsurface water and feeds it into the French drain system — effective for areas where both surface runoff and soil saturation are problems.
- Rent a trenching machine for runs longer than 50 feet — hand-digging a 20-foot trench is a manageable afternoon; a 100-foot trench by hand is genuinely exhausting. Trenching machines are available at most equipment rental companies for $150–$250 per day.
Frequently Asked Questions
How deep should a French drain be?
For intercepting surface water and solving yard drainage, 18–24 inches deep is sufficient. For protecting a foundation from hydrostatic pressure (water pushing against the foundation wall), the drain should be installed at the footing level, which is typically 4–8 feet deep — this type of work usually requires a contractor and excavation equipment.
How much gravel do I need for a French drain?
For a standard 12-inch-wide, 18-inch-deep trench, you’ll need approximately 1 cubic yard of gravel per 50 linear feet of drain. Most gravel suppliers sell by the cubic yard — calculate your trench volume (length x width x depth, in feet, divided by 27 to convert to cubic yards) and add 10% for waste and settling.
Where should a French drain discharge?
The best discharge options are: (1) a lower area of your own property that drains naturally (a swale, a low corner of the lot), (2) a municipal storm drain inlet — check local ordinances first, (3) a dry well (a buried gravel-filled pit that allows water to slowly percolate into the deep soil). Never discharge directly onto a neighbor’s property without their agreement, and never discharge in a way that creates new erosion or flooding problems elsewhere.
How long does a French drain last?
A properly installed French drain with filter fabric encasing the gravel can last 30–40 years before significant clogging occurs. Without filter fabric, a French drain may clog within 5–10 years as silt migrates into the gravel. Periodic inspection of the outlet (annually or after major storms) keeps the system clear and functioning.
Can I install a French drain myself?
Yes — a backyard French drain is well within DIY capability for most homeowners. The main requirements are physical effort for digging, correct grade planning, and following the proper installation sequence (fabric, gravel, pipe, gravel, fabric, soil). Foundation-level French drains installed to address basement water intrusion are a different scope — these are typically installed by waterproofing contractors.
Conclusion
A French drain is one of the most effective permanent solutions for yard drainage problems. Plan the route, call 811, dig the trench with a consistent downhill grade, line with filter fabric, add gravel, lay the pipe perforations-down, fill with gravel, fold the fabric over the top, and backfill. Done correctly, the drain is invisible in your yard and eliminates pooling and soggy areas for decades.
For other drainage and outdoor projects, see our guide on How to Build a Backyard Pond to create a functional water feature — sometimes a pond is the right solution for low-lying areas. And if you’re ready to tackle more outdoor hardscaping, check out How to Build a Backyard Firepit.
