
Faucets collect mineral deposits, soap scum, and grime at the base, handle, and aerator — and the aerator (the small screen at the tip) often reduces water pressure when clogged. Cleaning a faucet completely means addressing the exterior finish, the base where buildup concentrates, and the aerator separately. The right approach depends on your faucet’s finish — chrome, brushed nickel, oil-rubbed bronze, and matte black each require slightly different care. Here’s how to clean every part correctly.
What You’ll Need
Tools
- Old toothbrush or small cleaning brush
- Microfiber cloth or soft cotton cloth
- Small bowl or cup
- Adjustable pliers and plumber’s tape (for aerator removal)
- Rubber band and small plastic bag (for aerator soak method)
Materials
- White vinegar (distilled)
- Dish soap (mild)
- Baking soda
- Lemon juice (optional alternative to vinegar)
- Mineral oil or car wax (for chrome and brushed nickel finishing)
Know Your Faucet Finish Before Cleaning
| Finish | Safe Cleaners | Avoid |
|---|---|---|
| Chrome | Dish soap, white vinegar, baking soda | Bleach, steel wool, abrasive powders |
| Brushed Nickel | Dish soap, very dilute vinegar (rinse immediately) | Undiluted vinegar (prolonged contact), bleach |
| Oil-Rubbed Bronze | Mild dish soap only — water wipe for daily | Any acid (vinegar, lemon), abrasives, bleach |
| Matte Black | Mild dish soap, damp cloth only | Vinegar, bleach, abrasives, hard scrubbing |
| Polished Brass | Dish soap, lemon juice diluted | Bleach, wire brushes, strong acids |
Safety Precautions
- Never use bleach on faucet finishes — chlorine destroys protective coatings on oil-rubbed bronze and matte black finishes permanently.
- Don’t leave vinegar on brushed nickel, oil-rubbed bronze, or matte black finishes — the acid strips the finish coating. For those finishes, use very dilute vinegar only on chrome parts (the aerator), not the housing.
- Use plumber’s tape on aerator threads when reinstalling to prevent over-tightening.
How to Clean a Faucet Step by Step
Step 1: Clean the Faucet Body and Handles
Mix a few drops of dish soap with warm water. Dip a soft microfiber cloth into the solution and wipe down the entire faucet body, handles, and spout. For standard cleaning, this is enough. Rinse by wiping with a cloth dampened with plain water, then dry immediately with a dry cloth — water spots form quickly on chrome and nickel.
Step 2: Remove Mineral Deposits from the Base
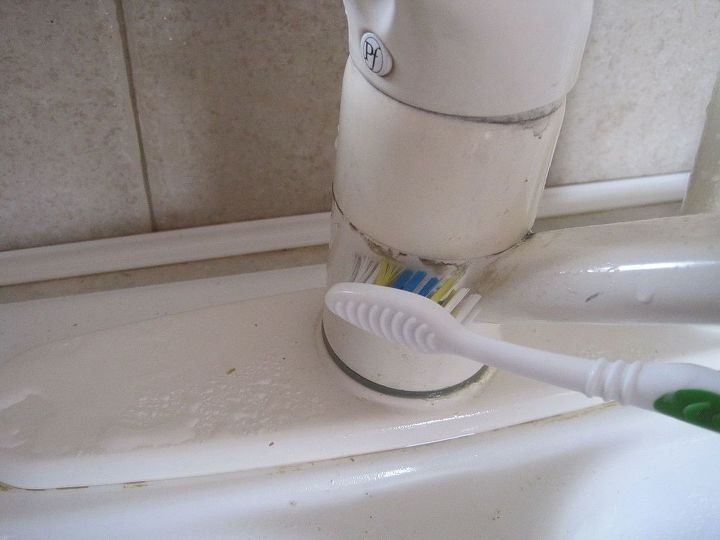
The base of the faucet where it meets the sink deck accumulates the heaviest mineral buildup — water drips and evaporates here constantly, leaving calcium deposits. For chrome faucets, soak a cloth or paper towel in undiluted white vinegar and wrap it around the base. Secure with a rubber band and leave for 20–30 minutes. Remove and scrub with an old toothbrush. Rinse thoroughly and wipe dry.
For brushed nickel, oil-rubbed bronze, or matte black finishes, mix 1 tablespoon of dish soap with 2 cups warm water instead of vinegar. Apply with a toothbrush and scrub the base gently. These finishes are damaged by acid cleaners — stick to soap and water regardless of how heavy the deposit is. For stubborn deposits on non-chrome finishes, use a plastic scraper and very gentle mechanical action rather than chemicals.
Step 3: Clean the Aerator
The aerator is the small threaded insert at the tip of the spout. It mixes air into the water flow and contains a fine mesh screen that catches sediment over time — reducing pressure and causing uneven spray. To clean it, grasp the aerator body with your fingers and turn counterclockwise. If it’s tight, wrap it with tape and use pliers — protect the finish with a cloth. Once removed, take it apart: you’ll find a housing, one or two mesh screens, and a rubber washer. Soak all metal parts in a small bowl of white vinegar for 15–30 minutes. Use a toothbrush to scrub the mesh screens under running water after soaking. Rinse the rubber washer with plain water only — vinegar can degrade rubber with prolonged contact. Reassemble and screw back on by hand, then just snug with pliers — don’t overtighten.
Step 4: Unclog a Slow Aerator Without Removing It
If you want to avoid removing the aerator, use the bag method. Fill a small plastic bag with enough white vinegar to submerge the faucet tip. Place the bag over the faucet spout so the aerator is fully submerged in the vinegar. Secure it to the spout with a rubber band. Leave for 30–60 minutes. Remove the bag, turn on the water at full pressure for 30 seconds to flush loosened deposits, and repeat if flow hasn’t fully restored.
Step 5: Clean Handle Crevices and Escutcheon Plates
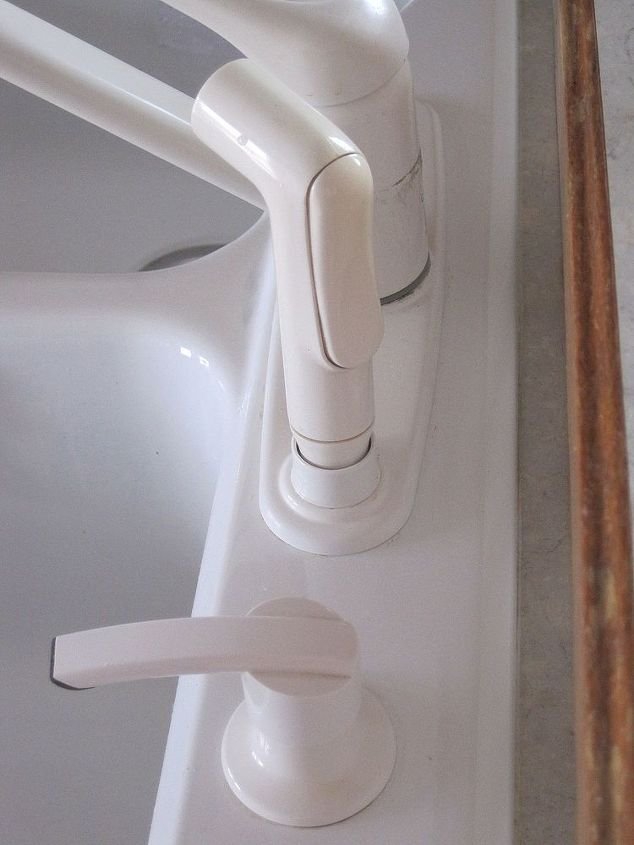
The escutcheon plate (the decorative plate at the base of the handle or where the spout meets the counter) collects soap scum and moisture in its edges. Use an old toothbrush with dish soap solution to scrub around the edges and any textured surfaces of the handles. Single-handle faucets have a cap at the top that can be popped off to reveal and clean underneath if soap residue accumulates there. Rinse well and dry.
Step 6: Polish and Protect the Finish
For chrome faucets, a final wipe with a few drops of mineral oil on a dry microfiber cloth restores shine and creates a water-repellent barrier. For brushed nickel, use a dry cloth buff only — no oil. For oil-rubbed bronze and matte black finishes, wipe with a completely dry microfiber cloth after washing. Some manufacturers recommend applying a thin coat of carnauba wax (paste car wax) to these finishes quarterly to maintain their protective coating.
Faucet Cleaning by Frequency
| Task | Frequency |
|---|---|
| Wipe exterior with damp cloth and dry | Daily (or after each heavy use) |
| Full soap and water scrub of body and handles | Weekly |
| Vinegar treatment for mineral deposits (chrome) | Monthly or when buildup visible |
| Aerator clean or soak | Every 3–6 months, or when pressure drops |
| Polish / protective coating | Every 3–6 months |
Pro Tips
- Dry the faucet after every use — in hard water areas especially, drying with a soft cloth after each use prevents mineral deposits from building up at all. This takes 5 seconds and eliminates most cleaning effort.
- Never use a magic eraser on faucet finishes — melamine foam (magic erasers) is a very fine abrasive. It dulls chrome and scratches brushed nickel and matte black finishes.
- Lemon juice works as well as vinegar for chrome — and leaves a pleasant scent. Cut a lemon in half and rub it directly on mineral deposits on a chrome faucet. Let sit 5 minutes and wipe off.
- Toothpaste for spot polishing chrome — a small amount of plain white toothpaste on a soft cloth buffs chrome to a high shine. Use only on chrome — not on other finishes.
Frequently Asked Questions
How do I get hard water stains off a faucet without vinegar?
Commercial lime and rust removers like CLR work well on chrome faucets for heavy hard water staining. Apply with a cloth, let sit 1–2 minutes, scrub with a toothbrush, and rinse immediately. On non-chrome finishes, use a paste of baking soda and water as a mild mechanical approach, or contact the faucet manufacturer for finish-safe recommendations — Moen, Delta, and Kohler all publish care guides for their finishes online.
My faucet has white crusty buildup that won’t come off — what do I do?
Heavy calcium carbonate deposits require longer acid contact time. For chrome, soak a cloth in undiluted white vinegar and leave it on the deposits for several hours or overnight. Check periodically — once softened, the deposits brush off easily. For stubborn cases, a CLR application works faster. On non-chrome finishes, use a plastic scraper to carefully chip off heavy deposits mechanically before using any cleaner.
How do I clean a matte black faucet without damaging the finish?
Matte black faucets are the most finish-sensitive. Use only mild dish soap with warm water and a soft cloth — nothing abrasive, no vinegar, no bleach. Dry immediately after every use to prevent water spots and mineral etching. Most matte black finishes are PVD (Physical Vapor Deposition) coated — they’re durable but acid-sensitive. If the finish is visibly worn, contact the manufacturer about warranty coverage.
Why does my faucet have low water pressure after cleaning?
If pressure dropped after cleaning, the most likely cause is a piece of mineral deposit or debris that came loose during cleaning and lodged in the aerator. Remove the aerator, take it apart, rinse the screens under running water, and reinstall. If pressure is still low after cleaning the aerator, check the shut-off valves under the sink — they may not be fully open.
Can I use a dishwasher to clean my faucet aerator?
You can place the metal aerator parts (not the rubber washer) in a small mesh bag in the top rack of a dishwasher. The heat and detergent dissolve mineral deposits effectively. However, the vinegar soak method is gentler on the mesh screens and just as effective. If you use the dishwasher method, check the mesh screens visually after — high heat can occasionally warp very fine mesh.
Conclusion
A clean faucet is more than cosmetic — a cleared aerator restores full water pressure, and removing mineral buildup from the base and finish prevents permanent etching and corrosion. Weekly soap-and-water wipe-downs plus a monthly vinegar treatment (for chrome) and semi-annual aerator cleaning handle the full maintenance cycle without much effort. Match your cleaning method to your finish type, dry after every use, and your faucet will look good for the life of the fixture.
For complete sink area maintenance, pair this guide with our article on how to clean a stainless steel sink and our guide on how to clean a sink drain for complete kitchen or bathroom sink maintenance.
