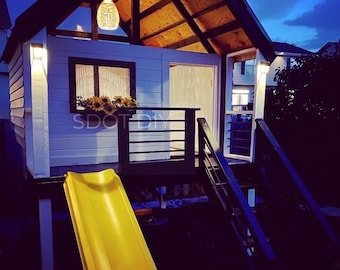
A DIY backyard playhouse is one of the most rewarding builds you can do for your family — and it’s far more achievable than most people think. A basic 6×6 or 8×8 playhouse on a ground-level platform can be built in a weekend by one capable adult, with the kids watching (and maybe holding a board or two). Materials cost $400–$1,200 depending on size and finish level. This guide walks through the full process from foundation to roof.
What You’ll Need
Tools
- Circular saw or miter saw
- Drill/driver with bits
- Framing nailer or hammer
- Carpenter’s square and level
- Measuring tape and chalk line
- Shovel (for ground leveling)
- Safety glasses and work gloves
Materials (for a 6×8 foot ground-level playhouse)
- Pressure-treated 4×4 lumber: 4 pieces at 4 feet (corner posts or deck blocks)
- Pressure-treated 2×6 lumber: 4 pieces at 8 feet (floor frame)
- 3/4-inch pressure-treated plywood: 1 sheet (floor)
- 2×4 studs: 20 pieces at 8 feet (wall framing)
- 7/16-inch OSB or 1/2-inch plywood: 4 sheets (wall sheathing)
- 2×6 lumber: 4 pieces at 8 feet (rafters)
- 1×6 cedar or pine boards (for siding) or T1-11 siding panels
- Roofing felt and asphalt shingles (2 squares)
- 2×4 ridge board: 1 piece at 8 feet
- Framing nails, screws, joist hangers, and framing hardware
- Door hinges and latch
- Exterior paint or stain
Safety and Precautions
- Check local building codes. Many jurisdictions require a permit for accessory structures over 120 square feet. Small playhouses (6×8, 8×8) typically don’t require permits, but always verify with your local building department.
- Use pressure-treated lumber for all ground-contact components — the floor frame, deck blocks, and posts. Standard lumber in contact with soil deteriorates rapidly.
- Build for children’s weight plus adults, not just children — parents will be inside the playhouse too. Floor framing should be sized to support at least 40 lbs per square foot.
- Round or sand all exposed edges on the interior — splinters on climbing and grasping surfaces are an injury risk for children.
- Use only exterior-grade, non-toxic paint for any painted surfaces that children will touch.
Step-by-Step: How to Build a Playhouse
Step 1 — Choose the Location and Level the Ground
Choose a location that is visible from the house (for supervision), receives partial shade (full sun overheats a small structure quickly in summer), and has good drainage (no low spots that pool water). Clear the area of grass and debris. The ground doesn’t need to be perfectly level, but should be within 2–4 inches across the footprint — use a shovel to remove high spots and fill low spots with compacted gravel. A slightly sloped site is fine — the foundation handles leveling.
Step 2 — Build the Platform Foundation
Lay out 6 concrete deck blocks (or preformed concrete piers) in the planned 6×8 foot footprint: one at each corner, one at the midpoint of each 8-foot side. These blocks sit on the leveled ground and support the floor frame. Use a string line and level to ensure all blocks are at the same height (shim lower blocks with gravel until all are level with each other). This is the most critical step — an unlevel foundation makes every subsequent step harder.
Step 3 — Frame the Floor
Cut pressure-treated 2×6 boards to form a 6×8 foot rectangular frame — two 8-foot boards for the long sides and two 6-foot boards for the short sides (the short boards fit between the long ones, making the overall outside dimension 6×8 feet). Assemble the frame with framing nails or screws at each corner. Add two interior 2×6 joists running the 6-foot direction, evenly spaced, to support the plywood floor. Set the completed frame on the deck blocks and check level in all directions. Nail 3/4-inch pressure-treated plywood to the top of the frame for the floor deck.
Step 4 — Frame the Walls
Build each wall section flat on the ground and tilt it up. A standard wall section has a bottom plate, a top plate, and 2×4 studs at 16 or 24-inch spacing. For a 6-foot-wide playhouse, the side walls will be 6 feet long; the end walls 8 feet (for the 8-foot direction). Build two standard side walls first. The front end wall includes a door rough opening — frame it with a header and king studs sized for your planned door width (a 24-inch door opening is comfortable for children and most adults). Tilt each wall up onto the platform, plumb it with a level, and brace temporarily. Nail through the wall bottom plate into the floor deck.
Step 5 — Frame the Roof
A simple gable roof uses paired rafters that meet at a center ridge board. Determine the roof pitch — a 4:12 or 6:12 pitch looks proportional on a small playhouse and provides good rain shedding. Cut all rafters to the same pattern using a speed square to mark the ridge plumb cut and the bird’s mouth (the notch where the rafter rests on the wall top plate). Install the ridge board at the peak, running the full length of the playhouse. Attach rafter pairs at even intervals — typically matching the stud spacing below.
Step 6 — Install Wall Sheathing and Siding
Cover the exterior wall framing with 7/16-inch OSB or 1/2-inch plywood sheathing, nailed every 6 inches at edges and 12 inches in the field. This adds rigidity to the structure. Apply T1-11 siding (a grooved plywood panel that looks like board-and-batten siding) over the sheathing, or use individual 1×6 cedar boards. T1-11 is the most common playhouse siding — it’s durable, attractive, and simple to install. Apply a bead of exterior caulk at all panel joints.
Step 7 — Install the Roof Sheathing and Shingles
Sheathe the roof with 7/16-inch OSB panels nailed to the rafters. Apply 15-lb roofing felt over the sheathing, stapled in place, starting from the bottom and overlapping each successive row by 6 inches. Install asphalt shingles starting from the bottom row (the starter course) working upward, following manufacturer’s nailing pattern instructions. Install a ridge cap shingle strip at the ridge. A properly shingled roof sheds water reliably and lasts 20+ years on a small structure.
Step 8 — Build and Hang the Door
Build a simple door from 1×6 cedar boards assembled with horizontal braces on the back. Size the door to fit the rough opening with 1/4-inch clearance on each side and top. Hang with two exterior hinges and install a latch. A hook-and-eye or barrel bolt latch on the inside and a hasp latch on the outside give children both privacy and the ability to lock from within.
Step 9 — Add Windows
Cut window openings in the wall framing at child height (32–36 inches from floor is ideal for small children). Frame each opening with a header, rough sill, and trimmer studs. For a safe, budget-friendly window, install a piece of plexiglass or polycarbonate sheet (cut to size) held in a simple wood frame screwed to the opening. No glass — it shatters. Add a simple exterior shutter on a hinge for the play value of opening and closing.
Step 10 — Sand, Paint, and Finish
Sand all interior edges and surfaces smooth with 80-grit paper, paying special attention to corners and edges that children will grab. Apply exterior primer and two coats of exterior latex paint — use a non-toxic, low-VOC formulation for surfaces children will contact. Paint the interior too — it brightens the space and protects the wood. Add finishing touches: a small wooden window box for flower planting, shutters, a covered porch overhang, or a small deck — these details transform a basic box into a beloved play space.
Pro Tips for Building a Playhouse
- Oversize the door opening — a door that’s comfortable for adults ensures parents can comfortably get inside, which matters during the inevitable moments when a child needs help or gets stuck.
- Build with the future in mind — playhouses can be repurposed as storage sheds, garden sheds, or hobby spaces once children outgrow them. Quality construction means the structure can serve multiple uses for decades.
- Involve the kids in non-dangerous tasks — painting, carrying boards, handing screws. The participation makes the final product more meaningful to them.
- Pre-prime all lumber before assembly for hard-to-reach areas — it’s much easier to paint individual pieces before they’re assembled than to reach inside corners and joints after assembly.
Frequently Asked Questions
How much does it cost to build a backyard playhouse?
Materials for a basic 6×8 foot playhouse cost $400–$700. An 8×10 foot playhouse with windows, a porch, and quality siding runs $800–$1,500 in materials. Pre-built playhouse kits cost $500–$3,000. Custom-built professional playhouses can cost $5,000–$20,000+. DIY is significantly cheaper and allows complete customization to your yard, your children’s interests, and your design vision.
Do I need a permit to build a backyard playhouse?
In most US jurisdictions, a playhouse under 120 square feet (roughly 10×12 feet) doesn’t require a permit. Playhouses with electricity, plumbing, or sleeping lofts may trigger permit requirements. Always check with your local building department before starting — rules vary significantly by municipality, and some HOAs have their own restrictions.
What kind of wood should I use to build a playhouse?
Use pressure-treated lumber for all ground-contact components (floor frame, posts). For walls, roof framing, and visible surfaces: cedar is the premium choice (naturally rot-resistant, easy to work, looks great), but standard construction-grade SPF lumber works well and is more affordable. T1-11 plywood siding is the most popular exterior finish for DIY playhouses — durable, attractive, and easy to paint.
How long does it take to build a playhouse?
A basic 6×8 foot playhouse takes two skilled adults one full weekend (two 8-hour days). A beginner working alone can expect 3–4 days of work to complete the same structure. Larger playhouses with porches, lofts, and detailed finishes may take a week of weekend work. The roofing and siding typically take the most time for first-time builders.
How do I make a playhouse safe for kids?
Key safety measures: sand all edges and surfaces smooth; use only exterior-grade, low-VOC, non-toxic paint; ensure the floor is level and securely attached to the foundation; use safety glass (polycarbonate) rather than real glass for windows; round or chamfer all exterior corners; ensure the door latch is operable from both inside and outside; and check annually for wood deterioration, loose fasteners, and structural problems.
Conclusion
Building a backyard playhouse is completely achievable in a weekend with basic carpentry skills and the right materials. Frame the floor, frame the walls, tilt them up, frame the roof, sheathe and shingle, add siding, hang the door and windows, and paint. Quality construction means the playhouse serves its purpose for years and can be repurposed as storage or a garden shed when the kids are grown.
Once the playhouse is done, consider enclosing the yard with our guide on How to Build a Wood Fence. And for another great weekend build project, check out How to Build a Backyard Firepit for evening family gatherings.
