Reupholstering furniture saves a structurally sound piece that’s been ruined by torn, stained, or dated fabric. A dining chair seat takes about 30 minutes; a fully padded armchair can take a weekend. Either way, you’ll pay a fraction of professional reupholstery cost and get a chair that looks exactly how you want it. The process is: remove old fabric, assess the padding underneath, cut and attach new fabric, and finish the edges cleanly.
What You’ll Need
Tools
- Staple gun (heavy-duty, electric or pneumatic for chairs and sofas) and staples (3/8 inch)
- Staple remover and flathead screwdriver (for removing old staples)
- Upholstery tack puller or needle-nose pliers
- Sharp fabric scissors or rotary cutter and cutting mat
- Measuring tape
- Marker or chalk
- Rubber mallet
- Sewing machine (for slipcovers and pieces with sewn panels)
Materials
- Upholstery fabric (see yardage guide below)
- Upholstery foam (high-density, 1.8 lb density minimum for seats) — if replacing padding
- Dacron batting (for softening foam edges and filling forms)
- Upholstery tacks or furniture nails (for traditional finishing)
- Welting or gimp trim (for hiding staple lines on visible edges)
- Hot glue gun and glue sticks (for attaching trim)
- Spray adhesive (for bonding batting to foam)
Safety and Precautions
- Pneumatic staple guns operate under high pressure — never point at people and always disconnect the air hose before clearing jams.
- Keep fingers away from the staple gun nozzle at all times — trigger-only operation with fingers well clear of the tip.
- Use sharp, dedicated fabric scissors — dull scissors distort fabric cuts and make clean straight lines impossible.
- Inspect the frame for stability before reupholstering. Re-glue any wobbly joints now — it’s nearly impossible to repair the frame once it’s covered in new fabric.
- If removing old fabric exposes springs, check that all springs are tied and secured before proceeding. Broken spring ties need professional repair before re-padding.
Fabric Yardage Guide
| Piece | Fabric Needed |
|---|---|
| Dining chair seat (drop-in) | 1/2 yard |
| Dining chair with back | 1–1.5 yards |
| Wingback chair | 5–7 yards |
| Sofa (3-cushion) | 12–15 yards |
| Loveseat | 8–10 yards |
| Occasional/accent chair | 3–5 yards |
Always add 10–20% extra for pattern matching, cutting errors, and fabric direction alignment.
Step-by-Step: How to Reupholster Furniture
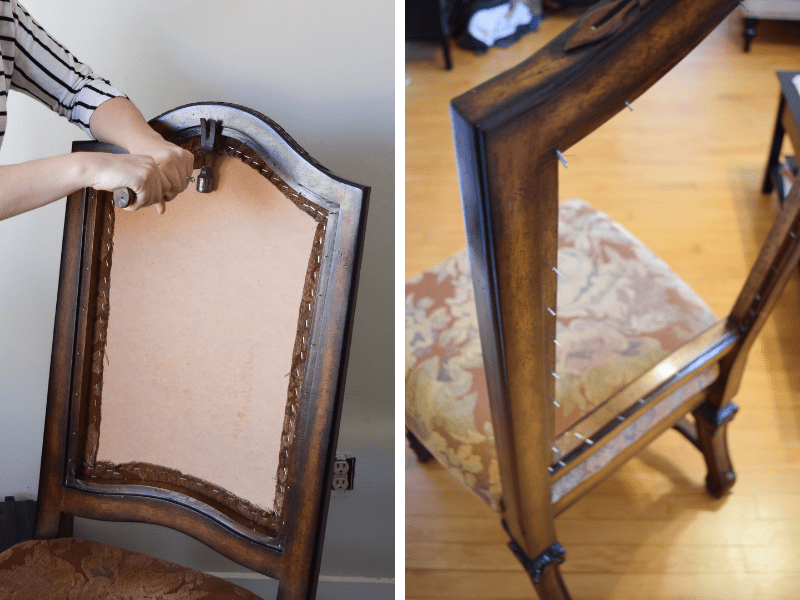
Step 1 — Remove the Old Fabric (Use It as a Template)
Take photos of every panel from multiple angles before removing anything — these are your reference for reassembly. Use a staple remover and flathead screwdriver to pry up all staples; needle-nose pliers pull out broken staple legs. Remove fabric panels one at a time and keep them intact — they are your cutting templates for the new fabric. Label each panel with a marker: “seat front,” “back inside,” “arm left,” etc. Don’t throw away the old fabric until you’ve used it to cut all the new pieces.
Step 2 — Assess and Replace Padding If Needed
Once the old fabric is off, inspect the padding. Push down on foam sections — if they compress to less than half their original height and don’t spring back, the foam needs to be replaced. Good upholstery foam should spring back to full height after compression. For seat cushions, use high-density foam rated at minimum 1.8 lb density for durability; 2.0 lb is better for chairs and sofas that will see daily use. Cut foam to the required dimensions using a sharp serrated knife or electric knife. Wrap the foam in a thin layer of Dacron batting held in place with spray adhesive to soften the edges and give the finished cushion a slightly rounded, plush appearance.
Step 3 — Cut New Fabric Using Old Panels as Templates
Lay your old fabric panels on the new fabric and trace around them with chalk, adding 2–3 inches of extra fabric on all sides for pulling and stapling. Cut carefully with sharp fabric scissors. Pay attention to fabric direction — the pattern or texture should run consistently from top to bottom, not sideways. If you’re working with a patterned fabric, align the pattern at the most visible center point of each panel (center of the seat, center of the back) and work outward. For solid or textured fabrics without a pattern, simply maintain consistent grain direction.
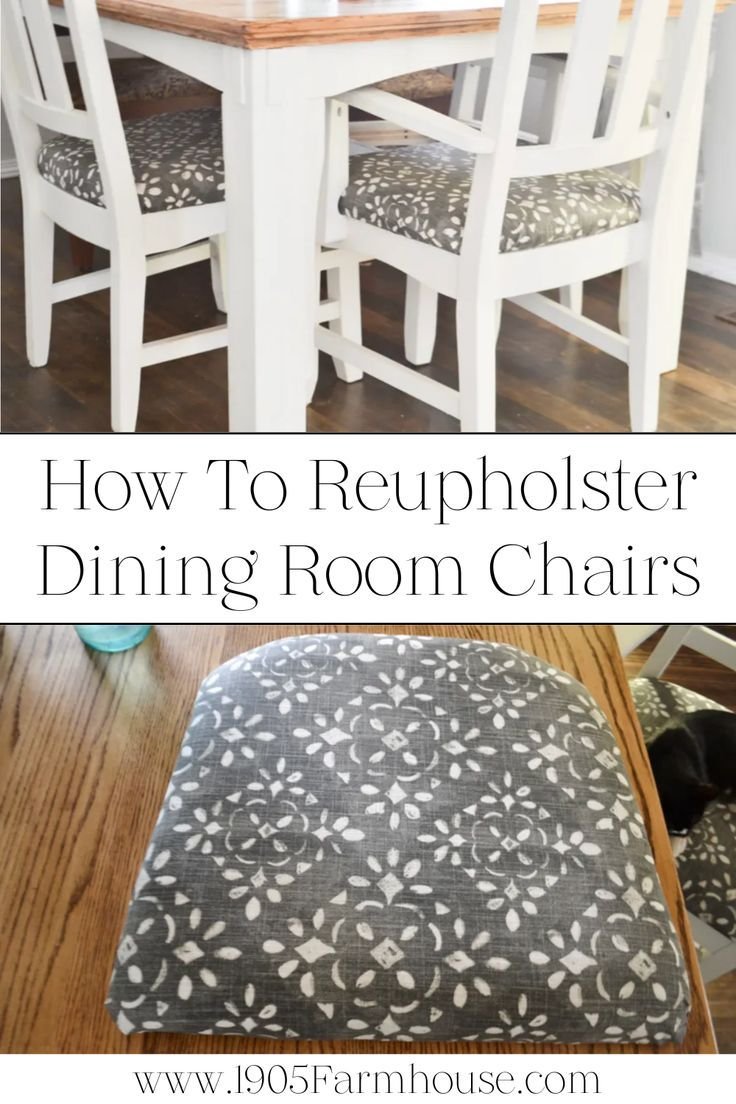
Step 4 — Start with the Seat — The Simplest Reupholstery
Dining chair drop-in seats are the easiest starting point. Unscrew the seat from the chair frame (usually 4 screws from underneath). Center your fabric over the seat, foam side down. Pull the fabric over the back edge and staple it at the center of the back edge. Then pull over the front edge and staple at center front. Pull each side and staple at center. Work outward from each center staple, alternating sides, pulling the fabric smoothly as you go. Pull firmly and consistently — the fabric should be taut with no wrinkles, but not so tight it compresses the foam. Space staples about 1 inch apart.
Step 5 — Handle Corners Cleanly
Corners are where reupholstery quality is visible. For a square corner, fold the fabric like wrapping a gift: pull the fabric over the corner point and staple, then fold the two fabric tails in on each side and staple flat. Trim any excess fabric bulk underneath. For a rounded corner, make small relief cuts in the fabric edge (cuts perpendicular to the edge, about 1 inch deep, spaced 1 inch apart), then wrap the fabric smoothly over the curve, stapling as you go. Practice once or twice — corner technique improves quickly with repetition.
Step 6 — Reupholster Chair Backs and Arms (More Complex Pieces)
Work inside panels before outside panels — inside back, inside arms, then outside back and arms. Pull and staple each inside panel with the same center-out, alternating technique. For arm pieces, work slowly — the shape is curved and multiple small folds and pleats are needed to get the fabric to lie flat. Use your photos from Step 1 as constant reference. On outside panels (outside back, outside arm), the edges will be visible, so these panels are usually finished with welting or trim rather than exposed staple lines.
Step 7 — Attach Finishing Trim
Staple lines on visible edges — the perimeter of outside back panels, the front edge of arms, and other exposed seams — need to be covered with upholstery trim. Gimp braid (a woven flat trim) and upholstery welting are the two most common options. Apply a thin line of hot glue along the staple line and press the trim firmly into place, starting at a hidden corner. Work steadily and apply trim in the longest continuous runs possible, cutting neatly at corners and joins. Hold trim in place for a few seconds after applying hot glue to allow it to bond.
Step 8 — Reattach the Piece
Screw drop-in seats back into the chair frame. For full chairs and sofas, reattach any removable parts (cushion backs, decorative legs, etc.) that were removed for access. Check that all staples are fully seated — any proud staple will eventually work through fabric. Use a rubber mallet to tap in any staples that didn’t fully engage. Sit in or test the piece to check for any fabric tension issues or comfort problems before considering the project complete.
Pro Tips for Reupholstery
- Use an electric staple gun, not a manual one, for thick upholstery fabric and hardwood frames. Manual guns tire out your hand quickly and don’t consistently drive staples fully home.
- Iron the fabric before cutting to remove wrinkles and creases — it’s much easier to cut accurate panels from flat, smooth fabric.
- Buy extra fabric. Cutting errors, pattern mismatches, and miscalculations happen. A project that runs out of fabric mid-way is difficult to recover if the fabric is discontinued or sold out.
- Choose fabric wisely for durability. Upholstery fabrics are rated by “double rubs” — how many times the surface can be rubbed before showing wear. For chairs and sofas, choose fabrics rated 15,000 double rubs or higher; 30,000+ for heavy-use pieces.
Common Mistakes to Avoid
- Not removing all old staples: Old staples left in the frame create lumps and bumps under new fabric and prevent new fabric from lying flat.
- Stapling in order around the perimeter (instead of alternating sides): Going all the way around one side at a time creates pulling and bunching. Always alternate — front, back, left, right — working outward from center each time.
- Skipping the Dacron batting layer: Foam alone has visible square edges. Batting wrapping softens edges and gives upholstered pieces the smooth, rounded look of professional work.
- Using cheap foam: Budget foam rated below 1.8 lb density collapses quickly under regular use, requiring re-reupholstering within a year.
Frequently Asked Questions
Is it hard to reupholster furniture yourself?
Difficulty varies significantly by piece. A drop-in dining chair seat is beginner-accessible and takes 30 minutes. A tufted sofa or a wing chair with complex curves requires significant skill and is better tackled after a few simpler projects. Start with dining chairs or occasional chairs to learn the basics before moving to sofas or overstuffed armchairs.
How much does it cost to reupholster a chair versus buying new?
DIY reupholstery for a dining chair costs $15–$40 in materials (fabric, foam, staples). An accent chair costs $50–$150 in materials. Professional reupholstery for a dining chair runs $100–$250; for an armchair, $400–$900. Buying equivalent-quality new seating is often $300–$1,500 or more. DIY reupholstery offers the best combination of cost and customization.
What kind of fabric is best for reupholstering a sofa?
For durability, choose polyester blends, microfiber, or indoor/outdoor fabrics with a double-rub rating of 30,000 or higher. Linen and velvet are beautiful but require more careful maintenance. Avoid 100% cotton for high-use pieces — it wrinkles easily and has relatively low abrasion resistance. Performance fabrics (crypton, Sunbrella) are excellent choices for households with pets and children.
Can I reupholster a sofa without sewing?
For some sofas, yes — if the original design used primarily stapled-on panels rather than sewn cushion covers. However, most sofas have sewn cushion covers and sewn panels on the arms and back. A basic sewing machine is needed for those components. If your sofa has loose cushions, you can focus on the frame sections (which can be stapled) and have the cushion covers professionally sewn, or purchase premade cushion covers in a matching fabric.
How long does it take to reupholster a chair?
A dining chair drop-in seat: 30 minutes. A simple dining chair with a back panel: 2–3 hours. An accent or occasional chair: one full day (6–8 hours). A wingback or fully upholstered armchair: 2–3 days. A sofa: an experienced upholsterer takes 8–12 hours; a first-time DIYer should plan a full weekend.
Conclusion
Reupholstering furniture is the most transformative DIY furniture project available. Start with something simple — a drop-in dining chair seat — to build confidence with the tool and technique. Once you’ve done three or four dining chairs, an accent chair feels approachable. Work systematically: remove old fabric, assess padding, cut new fabric using old panels as templates, pull and staple center-out, handle corners cleanly, and finish with trim to cover visible staple lines.
When the reupholstery is done, protect your investment with proper care. See our guide on How to Clean Microfiber Furniture if you chose a microfiber fabric, or How to Clean a Sofa for general upholstery maintenance.
