Restoring wooden furniture means bringing a piece back to a condition it can be proud of — whether that’s stripping decades of old finish, filling dents and scratches, or repairing peeling or bubbling veneer. Most furniture restoration is DIY-accessible as long as you work methodically and match your repair method to the damage. This guide covers full wood restoration alongside the most common veneer repairs, so you have one complete reference for both.
What You’ll Need
Tools
- Random orbital sander
- Sanding blocks (for detail areas)
- Putty knife and palette knife
- Sharp utility knife or veneer saw
- Roller or J-roller (for pressing veneer)
- Spring clamps and bar clamps
- Paintbrushes (foam and bristle)
- Tack cloth
- Drop cloth
- Painter’s tape
Materials
- Chemical paint and finish stripper
- Wood filler or grain filler (for dents and scratches)
- Sandpaper: 80, 120, 150, 220, 320 grit
- Wood stain (matching or new color)
- Pre-stain wood conditioner
- Polyurethane, lacquer, or paste wax (for topcoat)
- For veneer repair: Veneer contact cement or PVA wood glue, replacement veneer (matching species and grain direction), iron (for heat-activated veneer repair), veneer tape
Safety and Precautions
- Chemical strippers are caustic — wear nitrile gloves, safety glasses, and work in a ventilated area. Follow the product’s specific safety instructions.
- Sanding creates fine dust that is harmful to lungs. Wear an N95 mask when sanding, especially with older furniture that may contain lead paint (furniture made before 1978).
- Test for lead paint on any furniture made before 1978 using an inexpensive lead test kit from any hardware store before sanding.
- Solvent-based finishes are flammable — keep away from open flames and heat sources. Store rags flat to dry before disposal.
- Work on a stable surface when applying clamps — uneven surfaces cause clamps to slip and workpieces to shift during glue cure.
Part 1: How to Restore Wooden Furniture
Step 1 — Assess the Damage and Clean the Piece
Before starting any restoration, assess every surface: note scratches, dents, gouges, water rings, missing finish, structural joint problems, and any previous repair attempts. Clean the entire piece with a damp cloth and mild dish soap to remove grime, then dry completely. A clean surface helps you see the actual damage — grime and old polish can obscure scratches and make surface condition hard to accurately assess. Deciding your restoration scope now saves time: spot repair or full strip-and-refinish?
Step 2 — Repair Structural Issues
Wobbly joints, broken stretchers, and loose chair rungs must be fixed before any surface work. Pull apart loose joints as much as possible, scrape out the old dried glue with a chisel or sandpaper wrapped around a dowel, then re-glue with wood glue. Clamp securely and allow 24 hours to cure. For joints that can’t be easily pulled apart, inject wood glue with a syringe into the joint gap, clamp, and wipe away excess glue before it dries.
Step 3 — Strip the Old Finish (Full Restoration)
If the old finish is badly damaged, discolored, or incompatible with your new topcoat, strip it completely. Apply a thick coat of chemical stripper with a brush, following the grain. Cover with plastic sheeting to slow evaporation and let it work for the time specified on the product (typically 15–30 minutes). Once the finish bubbles and wrinkles, scrape it off with a plastic scraper — avoid metal scrapers on solid wood, as they can gouge the surface. Work in sections. Apply a second coat if needed for stubborn finish. Neutralize with mineral spirits or water per the stripper’s instructions, then allow to dry completely.
Step 4 — Sand the Bare Wood
Start with 80 or 120 grit if the stripper left residue or if the wood surface is rough. Progress through 150, then 220 grit. Always sand with the grain — cross-grain scratches show through stain prominently. Use a random orbital sander for flat surfaces and sanding blocks for curved sections, rails, and moldings. After final 220-grit sanding, wipe with a tack cloth, then dampen the surface lightly with water to raise the grain, allow to dry, and sand once more with 220 grit. This final step ensures the finished surface stays smooth after staining.
Step 5 — Fill Dents, Scratches, and Gouges
Before staining, fill any surface imperfections. For shallow scratches, a wood crayon or scratch fill pen in a matching color can be effective after the finish is applied. For deeper dents and gouges, use stainable wood filler — apply it slightly proud of the surface with a putty knife, allow to dry per instructions, then sand flush with 150, then 220 grit. Test how the filler takes stain on a hidden spot — fillers vary in how they absorb stain, and some require a slight color adjustment to match surrounding wood.
Step 6 — Apply Wood Conditioner and Stain
On open-grain woods like oak, pine, and alder, apply a pre-stain wood conditioner before staining. This prevents the wood from absorbing stain unevenly, which causes blotching. Let the conditioner penetrate for 15 minutes per label instructions, then apply stain with a brush or rag, working it into the grain. Wipe off excess stain after the recommended penetration time (usually 5–10 minutes) with a clean rag, following the grain. Apply a second coat if a deeper color is desired. Allow the stain to dry fully — typically 24 hours — before applying any topcoat.
Step 7 — Apply the Topcoat Finish
Choose a topcoat appropriate to the use of the piece. Polyurethane is the most durable and water-resistant — ideal for tabletops, chairs, and high-use pieces. Lacquer dries faster and produces a clearer, more refined finish. Paste wax gives the most natural look and is traditional for antiques but provides less moisture protection. Apply the topcoat in thin, even coats using a quality brush or foam applicator. Allow each coat to dry fully, then sand lightly with 220 grit (or 320 grit between later coats) and wipe with a tack cloth before applying the next coat. Three coats is standard for a furniture-grade finish.
Part 2: How to Repair Furniture Veneer
Step 1 — Identify the Type of Veneer Damage
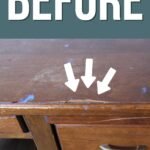
Veneer damage falls into three main categories. Bubbling or lifting: the veneer has separated from the substrate beneath due to moisture or adhesive failure, but the veneer itself is intact. Cracking or splitting: the veneer surface has developed cracks, usually from dryness. Missing veneer: a section of veneer has broken off or chipped away entirely, leaving bare substrate visible. Each type requires a different repair approach.
Step 2 — Repair Bubbled or Lifting Veneer
For veneer that has lifted or bubbled but is otherwise intact, the goal is to re-adhere it to the substrate. For small bubbles (smaller than a quarter), use an iron: cover the bubble with a damp cloth, then press a household iron set to medium heat over the cloth for 20–30 seconds. The heat reactivates old hide glue commonly used in antique furniture and the moisture helps the veneer relax flat. Press firmly and hold for a few seconds after removing the iron. Clamp or weight the area for 30 minutes.
For larger lifted areas that don’t respond to the iron, carefully slice the bubble open with a sharp utility knife following the grain direction. Inject wood glue (PVA or contact cement) under the veneer with a syringe or palette knife. Press the veneer flat, wipe away any glue that squeezes out, and clamp with a flat piece of scrap wood over the repaired area to distribute pressure evenly. Leave clamped for 24 hours.
Step 3 — Repair Cracked Veneer
Hair-line cracks in veneer can often be stabilized and filled with a veneer patching compound or tinted wood filler. Apply the filler into the crack with a putty knife, forcing it in, then wipe away the excess with a clean cloth. Once dry (usually 1–2 hours), sand gently with 220 grit only over the filled crack — avoid aggressive sanding that removes surrounding finish. Touch up with a matching stain pen or diluted stain applied with a fine brush, then seal with a thin topcoat.
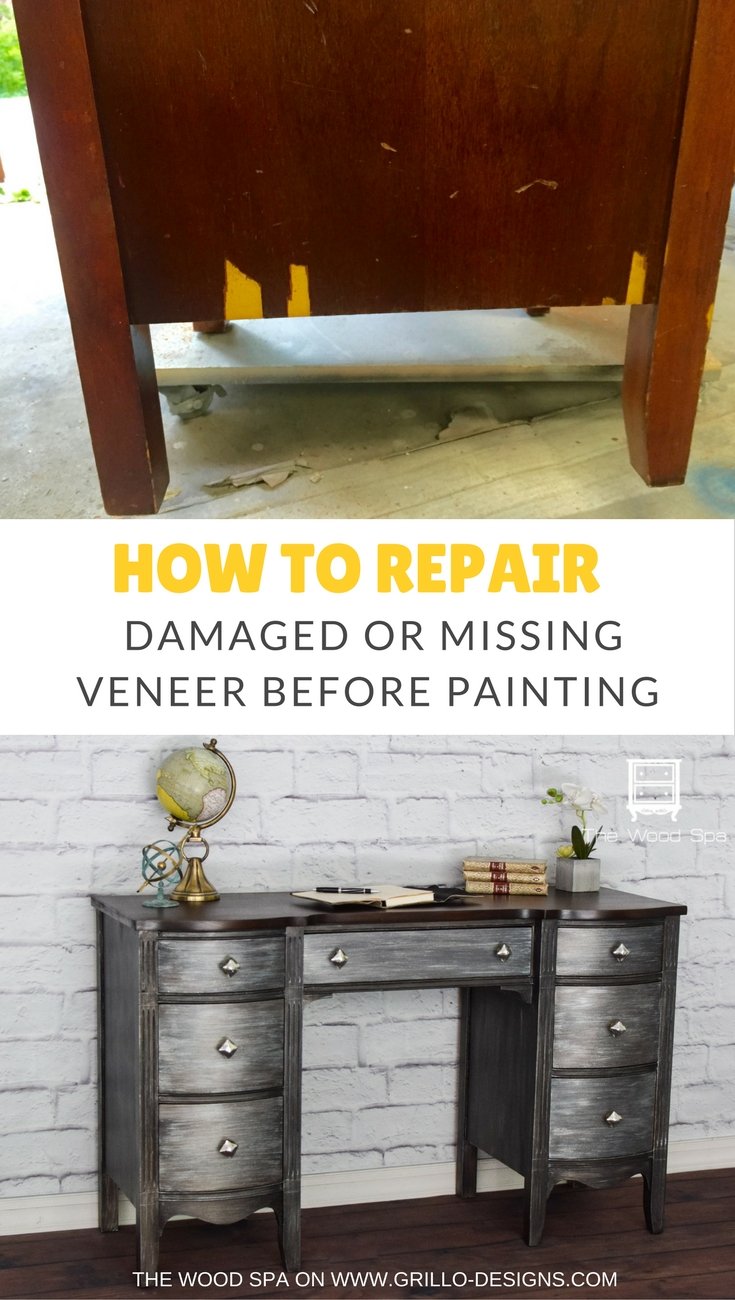
Step 4 — Replace Missing Veneer Sections
Missing veneer requires matching replacement material. Order veneer in the same wood species (oak, walnut, cherry, etc.) and try to match the grain pattern direction. Cut the replacement piece slightly larger than the missing area. Score around the missing section with a sharp utility knife and straightedge to create clean, straight edges — removing any ragged veneer remnants. Dry-fit the replacement piece before gluing. Apply contact cement to both the substrate and the back of the replacement veneer, allow to get tacky per instructions (usually 5–15 minutes), then carefully align and press the piece into position. Once contact cement touches, it bonds immediately — there’s no repositioning. Use a J-roller or the back of a spoon to press firmly from the center outward. Trim the edges flush with a sharp utility knife once the glue has cured.
Step 5 — Blend and Refinish the Repaired Areas
After structural veneer repairs, sand the repaired area carefully with 220 grit to smooth the transition between old and new material. Apply a pre-stain conditioner if necessary, then stain the repaired area to match the surrounding veneer color. This matching process may take several attempts — start with a lighter stain than you think you need, since stain is easier to add than to remove. Seal the entire repaired section with the appropriate topcoat to protect and unify the appearance.
Pro Tips for Furniture Restoration
- Always work sample areas first. Test your stain color on a scrap piece of the same wood species — stain color in the can looks very different on actual wood.
- Strip in a warm space. Chemical strippers work significantly faster above 65°F — cold slows the chemical reaction and extends working time dramatically.
- Veneer matching is the hardest part of veneer repair. For valuable antiques, it’s worth visiting a wood specialty supplier in person to compare veneer samples rather than ordering online blind.
- Let the piece off-gas after stripping before applying new stain — residual stripper chemicals can interfere with stain absorption and topcoat adhesion.
Common Mistakes to Avoid
- Sanding through veneer: Veneer is very thin — often only 1/42 inch. Use a light touch and check frequently to avoid sanding through to the substrate.
- Applying topcoat over incompletely dried stain: Trapping wet stain under a topcoat prevents proper curing and results in a finish that stays tacky or develops adhesion problems.
- Using water-based stripper on antique veneered furniture: Water causes veneer to bubble and lift from the substrate. Use solvent-based strippers on veneered antiques.
- Skipping the pre-stain conditioner on blotch-prone woods: Pine, alder, and birch absorb stain wildly unevenly without a conditioner, making the finished result look splotchy and unprofessional.
Frequently Asked Questions
How do I tell if furniture is solid wood or veneer?
Look at the edges and corners — solid wood shows end grain at the edges, while veneer shows a thin layer of wood over a different substrate (usually particleboard, plywood, or MDF). Open a drawer and look at the underside — veneered surfaces often show a different, cheaper wood on hidden surfaces. Veneer also has a very consistent grain pattern that repeats symmetrically, since it’s cut in sequential sheets from the same log.
Can I sand veneered furniture?
Yes, but carefully. Veneer is very thin and sands through quickly, especially at edges and corners. Use 220 grit maximum, keep the sander moving constantly, and sand by hand in sensitive areas. Never use a belt sander on veneer — it removes material too fast. Check frequently by feeling the surface — once you start feeling the substrate texture through the veneer, stop immediately.
What is the best way to remove old dark stain from wood furniture?
Chemical stripping followed by sanding is the most reliable method. Strip the old finish first, then use a wood bleach (oxalic acid for dark water stains; two-part A/B bleach for removing overall dark wood stain or dye) to lighten the wood. After bleaching, neutralize, allow to dry, and sand before applying your new stain color.
How do I fix white rings or heat marks on wood furniture?
White rings are caused by moisture trapped in the finish — the white appearance is moisture creating cloudiness in the finish layer, not in the wood itself. Rub a small amount of mayonnaise or petroleum jelly directly on the ring, leave for a few hours or overnight, then buff with a soft cloth. The oils displace the trapped moisture. For more stubborn rings, lightly rub with very fine steel wool (0000 grade) and a little paste wax, following the grain.
How much does it cost to restore furniture vs. buying new?
DIY furniture restoration typically costs $50–$200 in materials (stripper, sandpaper, stain, topcoat) for a single piece. Professional restoration runs $200–$800 or more depending on the piece and extent of work. Solid wood antiques and family heirloom pieces are almost always worth restoring rather than replacing — the quality of older solid wood furniture typically exceeds that of equivalent-priced new furniture.
Conclusion
Restoring wooden furniture and repairing damaged veneer are both well within reach for a careful DIYer. Strip the old finish, fill imperfections, sand progressively through the grits, apply conditioner and stain, and finish with three coats of protective topcoat. For veneer, match the damage type — re-adhere lifting with glue and clamping, fill cracks with wood filler, replace missing sections with matched veneer. The result is a piece restored to functional, beautiful condition without the cost of replacement.
Once your restoration is complete, maintain the new finish properly. See our guide on How to Polish and Wax Wood Furniture for ongoing care. And for cleaning before you begin, check out How to Clean Wood Furniture.
