Polishing and waxing wood furniture aren’t the same thing — and using the wrong product for your finish type will leave you with a dull, greasy, or silicone-coated surface you’ll regret. Polish cleans and adds temporary shine; wax builds a protective layer that lasts months. Together they restore luster, protect against moisture and scratches, and bring out the natural color and grain of the wood. Here’s exactly how to do both correctly.
What You’ll Need
Tools
- Soft microfiber cloths (several, lint-free)
- Soft natural-bristle brush (for carved or detailed areas)
- Old T-shirt rags (for wax application)
- Buffing cloth or old wool sock (for final buff)
Materials — Choose Based on Finish Type
- For lacquered or varnished modern furniture: Non-silicone furniture polish (Howard Feed-N-Wax, Old English, or similar)
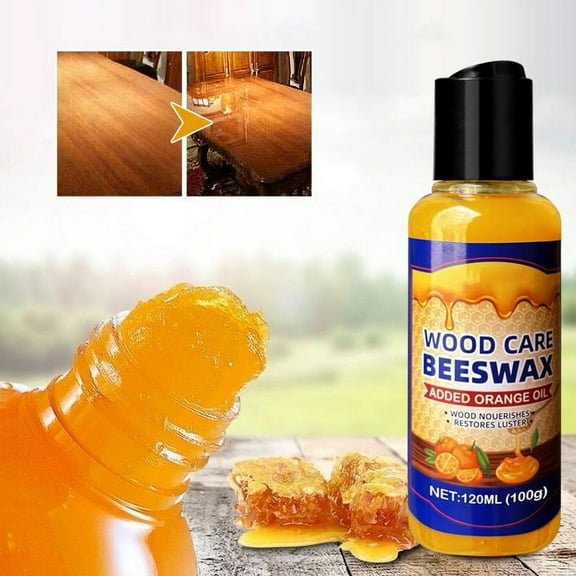
- For antique or waxed wood: Paste carnauba wax or beeswax (Briwax, Johnson Paste Wax, or similar)
- For oiled or raw wood: Danish oil or tung oil
- Mineral spirits or naphtha (for stripping old wax buildup before re-waxing)
- Mild dish soap and water (for cleaning before polishing)
Safety and Precautions
- Avoid silicone-based polishes if you ever plan to refinish or re-stain the furniture — silicone penetrates wood fibers and prevents future finishes from bonding properly.
- Never apply wax over oil-based products that haven’t fully cured, or over silicone polish — the wax won’t adhere correctly.
- Always clean the surface before polishing or waxing — applying either product over dust and grime locks the dirt in rather than removing it.
- Keep wax away from hinges and drawer tracks — wax can build up in mechanical parts and cause sticking.
- Work in a well-ventilated area when using mineral spirits to strip old wax.
Step-by-Step: How to Polish and Wax Wood Furniture
Step 1 — Clean the Surface First
Polishing or waxing a dirty surface traps grime under the finish and dulls the result. Mix a few drops of dish soap into warm water, dampen a microfiber cloth, wring it out thoroughly, and wipe down every surface following the grain. Follow immediately with a clean dry cloth. Allow the piece to dry completely for at least 30 minutes. If you’re planning to re-wax over old wax buildup, go to Step 2. If the surface is already clean and you’re ready to polish a lacquered or varnished piece, skip to Step 3.
Step 2 — Strip Old Wax Buildup (If Re-Waxing)
Old wax builds up over years and eventually becomes thick, dull, and grimy. Before applying fresh wax, strip the old layer completely. Dampen a cloth with mineral spirits or naphtha and wipe the entire surface — the old wax will dissolve and transfer onto the cloth. Work in sections, using fresh cloth sections frequently. You’ll see the cloth turn yellow or brown as it picks up old wax and grime. Allow the surface to dry fully after stripping (mineral spirits evaporate within 15–30 minutes) before applying fresh wax.
Step 3 — Polish Lacquered or Varnished Furniture
For furniture with a modern lacquer, varnish, or polyurethane finish, use a non-silicone furniture polish. Apply a small amount to a soft microfiber cloth — never directly to the furniture. Rub in the direction of the grain using moderate pressure, working in sections about 18 inches square. The polish cleans surface grime, fills minor scratches with color-matching oils, and adds a soft sheen. Buff off with a clean dry cloth immediately after applying. Do not leave polish sitting on the surface — it will haze.
Step 4 — Apply Paste Wax to Antique or Bare Wood
For antique furniture, unfinished wood, or wood with a waxed or oiled finish, paste wax is the gold standard. Scoop a small amount of wax (about the size of a marble) onto a soft cloth or old T-shirt rag. Apply to the surface using small, circular motions at first to work the wax into the grain, then finish with long strokes following the grain to ensure even coverage. Apply a thin, even coat — you don’t need much wax. Thick applications take longer to dry and are harder to buff out evenly.
Step 5 — Allow Wax to Haze
After applying the wax, let it sit and haze over — typically 10 to 20 minutes at room temperature. The wax will change from a wet, shiny appearance to a dull, matte haze as the solvents in the wax evaporate and the wax solids set against the wood surface. In cold or humid conditions, hazing can take up to 30 minutes. Don’t rush this step — buffing wax before it has properly hazed results in a streaky, uneven shine.
Step 6 — Buff to a Shine
Once the wax has fully hazed, take a clean, dry buffing cloth — an old wool sock, a clean T-shirt section, or a microfiber buffing cloth — and buff the surface vigorously in the direction of the grain. Use long, consistent strokes with moderate pressure. The friction of buffing heats and spreads the wax film, creating a smooth, even sheen. Replace your buffing cloth section frequently — as it picks up excess wax, a fresh surface buffs more effectively. Step back and check in natural light — any streaks or uneven areas can be re-buffed.
Step 7 — Work Wax into Carved and Detailed Areas
For furniture with carvings, turned legs, grooves, or other architectural details, apply wax with a soft-bristle brush (an old paintbrush works well) to work it into the crevices. Allow to haze, then buff with a clean brush using short strokes following the detail shape. Cotton swabs work well for very tight areas. Getting wax into the recessed areas of carved furniture creates depth that enhances the visual richness of the piece.
Step 8 — Apply a Second Thin Coat (Optional)
For maximum protection and depth of shine on pieces that get heavy use — like dining tables and coffee tables — apply a second thin coat of wax after the first coat is fully buffed out. The second coat fills any thin spots in the first and builds the overall protection level. Two thin coats always provide better results than one thick coat. Allow the second coat to haze and buff out the same way as the first.
Step 9 — Polish Turned or Shaped Pieces
For chair legs, turned spindles, or curved pieces, wrap your cloth around the shape and pull back and forth along the length of the piece (with the grain direction of the turned element). For very thin spindles, use a strip of cloth held at both ends, worked back and forth like a shoe-shining motion. This technique gets even coverage and shine on rounded surfaces where flat cloth strokes don’t work well.
Step 10 — Maintain Regularly
Polished and waxed furniture stays looking great with simple ongoing maintenance. Dust weekly with a dry microfiber cloth. Re-polish lacquered and varnished pieces every one to three months. Re-wax antique and bare wood every six to twelve months, depending on use and climate — pieces in dry climates or high-traffic areas benefit from more frequent waxing. Before each wax application, lightly clean the surface and check for any wax buildup; strip if necessary before re-waxing.
Pro Tips for Polishing and Waxing
- Less wax is always more. Excess wax doesn’t add more protection — it builds up, attracts dust, and creates a thick, gummy film over time. Thin applications buff out cleaner and last longer.
- Colored wax for antiques: Briwax and similar tinted paste waxes come in colors (clear, light, medium, dark, antique pine, etc.) that enrich the color of the wood while waxing. Choose a tone slightly warmer than your wood color.
- Buff in good light: Check your work in raking natural light or a single directional lamp — this reveals streaks, thin spots, and missed areas that are invisible under overhead lighting.
- Never use spray polish on antiques: Most spray polishes contain silicone, which penetrates antique finishes and is nearly impossible to fully remove. Stick to paste wax for all antique pieces.
Common Mistakes to Avoid
- Applying wax over silicone polish: Silicone residue prevents wax from bonding properly. If you’ve been using a silicone spray polish, clean the surface thoroughly with mineral spirits before switching to wax.
- Over-waxing frequently: Wax every six to twelve months, not monthly. Frequent over-waxing leads to buildup that dulls the surface and requires stripping to correct.
- Buffing too soon: If the wax hasn’t fully hazed, it smears instead of buffing to a shine. Patience here pays off significantly.
- Using the same cloth for applying and buffing: An application cloth loaded with wax will re-deposit wax during buffing instead of removing it. Always use a separate clean cloth for buffing.
Frequently Asked Questions
What is the difference between furniture polish and furniture wax?
Furniture polish is a liquid or spray product designed for quick application and temporary shine on lacquered or varnished surfaces. It cleans surface grime and adds gloss but doesn’t form a lasting protective film. Furniture wax is a solid or semi-solid product that forms a durable protective layer on the wood surface — it lasts months and provides better protection against moisture and wear.
How often should I wax wood furniture?
Most wood furniture benefits from waxing every six to twelve months. Pieces in high-use areas (dining tables, desks, frequently opened drawers) can be waxed every three to four months. A simple test: sprinkle a few drops of water on the surface. If the water beads up, the wax is still working. If it soaks in immediately, it’s time to re-wax.
Can I use car wax on wood furniture?
Some car waxes (pure carnauba paste wax with no silicone additives) can be used on wood furniture and work reasonably well. However, many car waxes contain silicone, harsh abrasives, or chemical additives formulated for automotive paint rather than wood finishes. Dedicated furniture wax is safer because it’s formulated specifically for wood and won’t contain chemicals that degrade wood finishes over time.
What’s the best furniture polish for antique wood?
For genuine antique furniture, avoid all spray polishes and use only a high-quality paste carnauba wax or beeswax. Howard Feed-N-Wax (an oil and wax blend) works well for dry antique wood, as does Briwax in a complementary tone. Never use Pledge or similar aerosol polishes on antiques — the silicone accumulates on porous antique finishes and is very difficult to remove.
How do I restore the shine to dull furniture without sanding?
Clean the surface thoroughly with a diluted dish soap solution to remove old wax and grime, then apply a fresh coat of furniture polish (for lacquered pieces) or paste wax (for antiques). Buff vigorously with a clean cloth. In most cases, this process restores shine without any sanding. If the surface is scratched, a colored polish or tinted wax can help fill minor scratches visually.
Conclusion
Polishing and waxing wood furniture is straightforward: clean first, use the right product for your finish type, apply thin coats, let wax haze fully, and buff vigorously with a clean cloth. Polish adds quick shine to lacquered pieces; wax builds lasting protection on antique and bare wood. Done regularly, these two steps keep wood furniture looking its best for generations without any refinishing needed.
For a deeper refresh, check out our full guide on How to Clean Wood Furniture. If your furniture needs more than polish — dents, chips, or damaged veneer — see How to Restore Wooden Furniture for comprehensive repair steps.
