Rattan and wicker furniture breaks in predictable ways: strands unravel at the edges, individual pieces snap or crack, and the weave loosens after years of use and outdoor exposure. Most repairs are manageable as a DIY project with the right materials — rattan reed and wicker materials are inexpensive and available at craft stores and online. A broken chair or table doesn’t have to be replaced; a few hours of careful work can restore it to full function.
What You’ll Need
Tools
- Needle-nose pliers
- Sharp utility knife or scissors
- Awl or ice pick (for opening tight weave spaces)
- Small bucket or bowl (for soaking rattan)
- Spring clamps or clothespins
- Fine-grit sandpaper (220 grit)
- Paintbrush (for applying finish)
Materials
- Rattan reed or wicker cane (matching the size of your existing strands)
- Wicker repair kit (optional — contains various sizes of reed and cane)
- Wood glue or strong waterproof adhesive (for structural repairs)
- Rattan or wicker binding wrap (flat cane, for wrapped joints)
- Exterior wood stain or paint (to refinish repaired areas)
- Clear exterior sealer or polyurethane (for protection)
Safety and Precautions
- Test repaired sections before full-weight sitting. Structural repairs (broken frame members) need to be fully cured — typically 24 hours for wood glue — before load-bearing use.
- Work with soaked rattan carefully — wet rattan is flexible but can spring back when it dries and cut your hands on sharp ends. Wear light gloves.
- When using utility knives, always cut away from your hands and body. Rattan is firm material and requires steady pressure to cut cleanly.
- Inspect the frame first before starting weave repairs — a structurally compromised frame (cracked or broken frame members) must be addressed before re-weaving over it.
Understanding Rattan vs. Wicker
Before repairing, it helps to know what you have. Rattan refers to the actual material — a tropical vine — used as either a solid pole (for frames) or split into strands (for weaving). Wicker describes the weaving technique, which can use rattan, reed, rush, seagrass, or synthetic materials. Most indoor and outdoor “wicker” furniture is either natural rattan or synthetic resin wicker. Natural rattan can be soaked to make it pliable for repairs; synthetic resin wicker cannot be soaked and requires different repair approaches.
Step-by-Step: How to Repair Rattan and Wicker Furniture
Step 1 — Assess the Damage
Before purchasing materials or starting repairs, fully assess the damage. Check for: broken or cracked frame poles (structural damage); loose, popped-out, or unraveling weave strands; frayed or brittle cane at the edges; broken joints where frame sections connect; and overall condition of the existing finish. Minor unraveling and loose weave sections can be repaired with a few new strands. Extensive damage over a large area may require replacing an entire woven panel. Structural frame damage needs to be fixed before any weave repair begins.
Step 2 — Repair Structural Frame Damage First
If any of the main rattan poles (the frame members) are cracked or broken, repair them before working on the weave. For a cracked pole, apply wood glue along the crack, press together firmly, and clamp with spring clamps. Wipe away any excess glue immediately. Allow to cure for 24 hours before removing clamps. For a clean break on a structural member, apply wood glue to both faces of the break, align carefully, clamp, and allow 24–48 hours of cure time. Once cured, wrap the repaired joint with binding cane for additional reinforcement and cosmetic improvement.
Step 3 — Soak Your Replacement Material
Natural rattan and cane must be soaked before weaving — dry rattan is brittle and will crack as you bend it into the existing weave. Submerge your replacement strands in warm water for 15 to 30 minutes. The rattan will turn slightly darker in color as it absorbs water and becomes flexible. Take out only what you need for the immediate repair and keep the rest submerged — material left out re-dries quickly. Synthetic resin wicker cannot be soaked and should be worked at room temperature only.
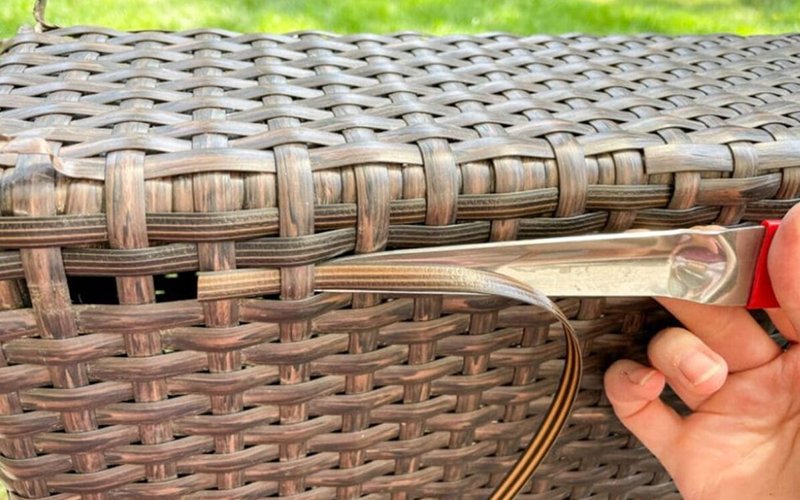
Step 4 — Remove Damaged Strands
Identify the broken or unraveling strands. Cut them out cleanly using sharp scissors or a utility knife — cut as close to the existing weave as possible without damaging neighboring strands. Use needle-nose pliers to pull out any remaining pieces that are threaded through the weave. Avoid pulling hard on the damaged strand before cutting it free — you can accidentally pull out adjacent strands that are still sound. Once all damaged material is removed, the repair area should look like a clean gap in the weave.
Step 5 — Re-Weave the Replacement Strand
Thread the soaked replacement strand through the existing weave, following the over-under pattern of the surrounding weave. Look carefully at the pattern before starting — most wicker uses a simple over-one, under-one plain weave, but some pieces use a twill or herringbone pattern. Use an awl to open tight spaces in the existing weave to thread the new strand through. Pull the strand snugly but not so tight that it distorts the surrounding pattern. Continue weaving until you reach the edge of the frame or the end of the damaged section.
Step 6 — Secure the Strand Ends
On natural rattan, secure the ends of each new strand by threading them under three or four adjacent strands on the underside of the piece, then trimming the excess close. For a more secure hold on chair seats and high-stress areas, apply a small amount of wood glue or strong craft adhesive under the tucked end and press it flat. Use a clothespin or spring clamp to hold it in place while the glue dries. On decorative pieces with lower stress, tucking the end securely under adjacent strands without glue is generally sufficient.
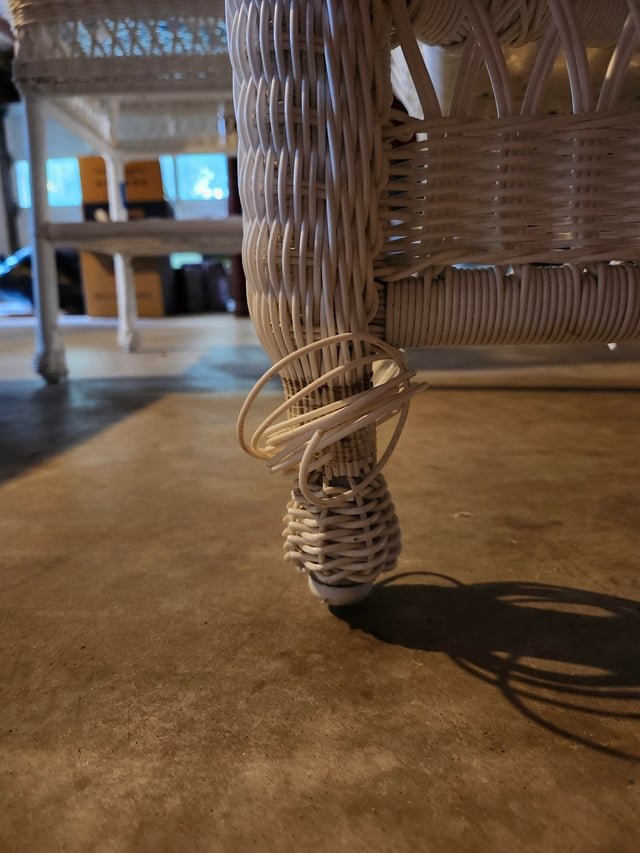
Step 7 — Repair Unraveling Edges
Edges are the most common failure point on wicker furniture — the binding cane or reed wrapping the perimeter frame pole comes loose, causing the entire edge to unravel. To repair: remove all the loose binding material from the damaged section, then re-wrap with new flat binding cane (soaked for 10 minutes). Start with a tucked end, wrap tightly and evenly around the frame pole, catching and holding any loose weave strands as you go. Secure the end with wood glue and clamp until dry.
Step 8 — Allow to Dry and Tighten
Allow all repairs to dry completely before the next step — usually 24 hours at room temperature. As rattan dries, it contracts slightly, which actually tightens the weave and makes the repair more solid. This is normal and desirable. Once dry, check the repaired area: the new strands should match the tension and pattern of the surrounding weave and the edges should feel secure.
Step 9 — Sand and Refinish Repaired Areas
New rattan strands are typically lighter in color than weathered or finished existing material. Sand all repaired areas lightly with 220-grit sandpaper to smooth any rough spots, then stain or paint to match the existing finish. Use a small brush to apply exterior wood stain in a matching tone, feathering the edges into the surrounding areas to blend. Allow to dry, then apply a coat of clear exterior sealer or polyurethane over the repaired sections to protect them from future moisture damage.
Step 10 — Apply a Full Protective Finish (If Outdoors)
For outdoor furniture, a fresh coat of protective finish over the entire piece — not just the repaired areas — ensures uniform protection and appearance. Clean the whole piece with a damp cloth, let it dry, then apply a brush-on exterior sealer or tung oil. For painted outdoor wicker, spot-prime the repaired areas and apply exterior paint to the full piece. A well-sealed piece resists UV fading, moisture, and future strand drying and cracking.
Pro Tips for Rattan and Wicker Repair
- Match your replacement material exactly. Rattan reed and wicker cane come in many widths and profiles. Measure the width of your existing strands before buying replacement material — even small differences in width look obviously wrong in the finished weave.
- Work in small sections rather than trying to repair a large area all at once. Soaked rattan re-dries in about 30 minutes, so work quickly within each section.
- Keep a spray bottle of water nearby to re-moisten material that starts to dry out while you’re still working with it.
- Photograph the weave pattern before removing damaged strands so you have a reference for the correct over-under sequence.
Common Mistakes to Avoid
- Skipping the soak: Dry rattan cracks as you bend and thread it, making a clean repair impossible. Always soak natural rattan before working with it.
- Pulling broken strands before cutting: Yanking out damaged strands before cutting them free can pull adjacent good strands out of the weave, making the repair area larger.
- Ignoring structural damage: Re-weaving over a cracked or wobbly frame just delays the inevitable — the repair fails as soon as the frame shifts. Fix the frame first.
- Using regular wood glue outdoors: Standard PVA wood glue is not water-resistant. Use waterproof or exterior-grade wood glue for any repairs on furniture that lives outside.
Troubleshooting: Common Wicker Repair Problems
- New strands look too light compared to old: Apply exterior wood stain in a tone that matches the weathered original. Test on a scrap piece first — stain on rattan looks different than stain on solid wood.
- Weave looks uneven or puckered: The replacement strand was pulled too tight. Soaking the entire repaired section and gently manipulating it while wet can help even out tension. Alternatively, the strand may need to be removed and re-threaded with less tension.
- Strand ends keep popping out: Apply a drop of super glue (cyanoacrylate) to the tucked end in addition to wood glue, and hold in place for 30 seconds. Super glue creates an immediate bond that holds the end while the wood glue cures.
- Frame joint is still wobbly after gluing: The joint surfaces may have been contaminated with old finish or dried glue. Strip the joint surfaces, clean with sandpaper, and re-glue. For joints under heavy stress, reinforce with a metal L-bracket screwed into the inside corner.
Frequently Asked Questions
What is the difference between rattan and wicker?
Rattan is the plant material — a tropical climbing palm — used to make the furniture. Wicker refers to the weaving technique. So most “wicker furniture” is actually rattan furniture woven in a wicker pattern. Some wicker furniture uses other natural materials like willow, reed, or rush, and modern “all-weather wicker” typically uses synthetic resin strands over a metal frame.
Can I repair synthetic resin wicker?
Yes, but the repair approach differs. Resin wicker strands cannot be soaked and are typically held in place by tension and tuck — they snap into slots or loop around frame members. Replacement resin wicker strands are sold online in rolls; match the color and width to your existing furniture. Broken structural members on resin wicker furniture are best repaired by replacing the section entirely, as adhesives don’t bond well to the resin material.
How do I stop wicker furniture from unraveling further while I gather repair materials?
Apply a thin line of super glue (cyanoacrylate) along the base of the loose strand where it meets the weave, or use a small piece of painter’s tape to hold the loose end in place temporarily. Avoid stretching or bending the loose strands — any movement accelerates unraveling.
Can I paint wicker furniture after repair?
Yes. Clean the piece thoroughly, allow all repairs to dry completely, lightly sand the entire surface with 220 grit, then apply an exterior latex spray paint or brush-on paint. Spray paint is recommended for wicker because the weave pattern makes brush coverage uneven. Use multiple light coats rather than one heavy coat to avoid drips in the weave openings.
Where do I buy rattan and wicker repair materials?
Rattan reed, flat cane, and seagrass materials are available at most craft stores (Michael’s, Hobby Lobby), specialty basket weaving supply stores, and online retailers. Search specifically for “round reed size X” or “flat cane binding” — these terms correspond to the weaving materials used in furniture. Buy slightly more than you think you need to account for waste and mistakes during the repair.
Conclusion
Repairing rattan and wicker furniture is well within reach for a patient DIYer. Soak the replacement material, match the weave pattern, re-thread carefully, secure the ends, let it dry, then refinish to match. The repair process works best when you address problems early — a single broken strand is a 30-minute fix; an unraveled edge becomes a two-hour project if you wait too long.
Once your furniture is repaired, protect it properly. See our guide on How to Clean Wood Furniture for ongoing care tips. If you’re doing a full outdoor furniture refresh, check our article on How to Restore Wooden Furniture for a complete refinishing walkthrough.
