Installing a storm door adds a layer of insulation, ventilation control, and protection to an exterior door in a few hours. The job involves measuring correctly (the most important step), installing the frame or Z-bar to the door jamb, hanging the door, attaching the closer mechanism, and adjusting the sweep and chain. Most storm doors come as complete kits and replace in the same steps whether it’s a new install or a replacement. This guide walks through the full process from measurement to final adjustment.
What You’ll Need
| Tools | Materials |
|---|---|
| Measuring tape | Storm door kit (sized to your opening) |
| Level | Exterior screws (included in kit) |
| Drill/driver with bits | Paintable exterior caulk |
| Hacksaw or tin snips (to cut Z-bar) | Shims (if door jamb is not plumb) |
| Phillips and flathead screwdrivers | Exterior wood primer and paint (for cut Z-bar ends) |
| Pencil | — |
| Safety glasses | — |
Safety and Precautions
- Measure three times before cutting the Z-bar. The Z-bar (the aluminum frame channel) is cut once and cannot be un-cut. Measure the door opening height accurately at both sides and cut to the shorter measurement.
- Wear safety glasses when cutting aluminum. Hacksaw and tin snip cuts on aluminum throw sharp metal shards. Eye protection is mandatory.
- Check the door opening for plumb before installing. If the exterior door jamb is significantly out of plumb, the storm door will bind or gap. Use a level on the hinge side jamb and shim if needed before mounting the Z-bar hinge channel.
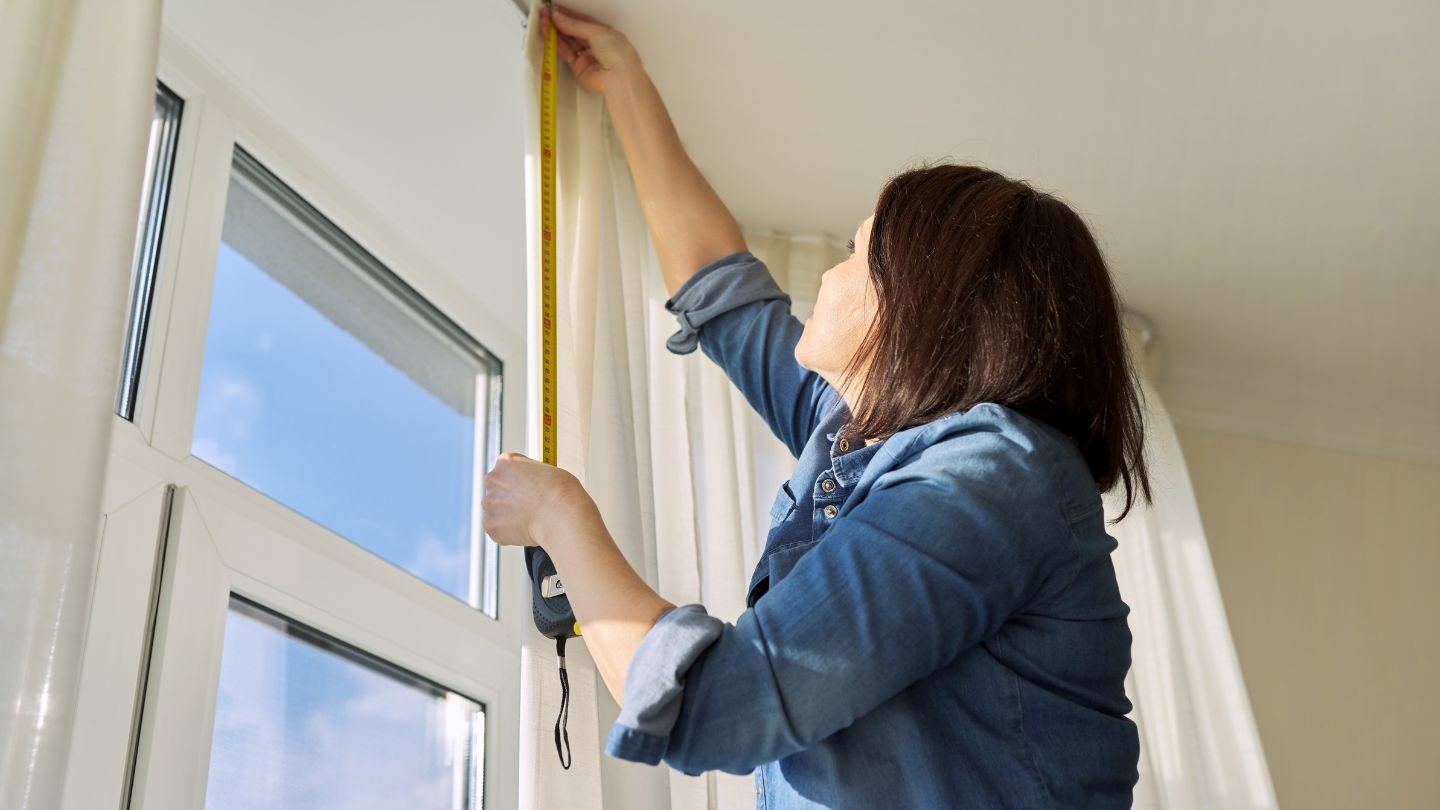
Step 1: Measure the Door Opening
Width and Height Both Need Three Measurements
- Measure the width of the door opening at three points: top, middle, and bottom, measuring between the door stop strips (the stops the main door closes against). Use the narrowest measurement.
- Measure the height on both sides — from the sill to the top of the door stop. Use the shorter measurement.
- Storm doors are sold in standard widths: 32″, 34″, and 36″ are the most common. Buy the size that matches your width measurement. If your opening is between standard sizes, size down (a 36″ door in a 35.5″ opening won’t fit; a 34″ door with weatherstripping will).
- Note the door swing direction: you want the storm door to hinge on the same side as the main door. When standing outside looking at the door — if the main door hinges on the right, the storm door should hinge on the right too.
Step 2: Remove the Old Storm Door (Replacement Only)
If This Is a New Installation, Skip to Step 3
- Open the storm door fully. Remove the closer arm by unscrewing the bracket at the door jamb end.
- Remove the hinge screws from the door — start at the top hinge and work down. Have a helper hold the door to prevent it from falling.
- Pry away any mounting channels (Z-bars) from the door jambs. Use a pry bar and work carefully to avoid damaging the main door casing beneath.
- Clean any old caulk and hardware residue from the door jambs before installing the new door.
Step 3: Install the Hinge-Side Z-Bar
This Is the First and Most Critical Mounting Step
- Cut the hinge-side Z-bar (the aluminum channel the door hinges mount into) to the height measurement of the door opening. Use a hacksaw or tin snips. Cut from the bottom — the top usually has a pre-drilled cap hole.
- Apply a bead of paintable exterior caulk behind the full length of the Z-bar before mounting. This seals the gap between the bar and the door casing.
- Hold the Z-bar plumb against the hinge-side door jamb. Drive the top screw first, then check plumb with a level, then drive the remaining screws. The bar must be plumb — the door hangs from this channel.
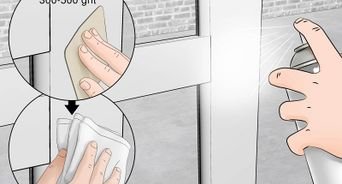
- Paint the cut bottom end of the Z-bar with exterior metal primer or matching paint to prevent oxidation.
Step 4: Hang the Storm Door
Attach the Door to the Hinge-Side Z-Bar
- Most storm doors come pre-hinged to the door panel — you just need to snap or screw the hinge side of the door into the Z-bar channel.
- Lift the door and hook the top hinge into the Z-bar channel slot. Work downward to engage all hinges. Some designs use a simple snap-in mechanism; others require driving screws through the hinge into the Z-bar.
- Test the door swing: open and close it through its full range. It should swing freely with no contact on the main door casing.
Step 5: Install the Latch-Side Z-Bar and Top Cap
Custom-Fit the Latch Side to the Opening Width
- Close the storm door gently against the latch-side door jamb. The gap between the door edge and the jamb should be consistent from top to bottom — adjust by pulling the latch-side Z-bar tight against the door edge.
- Cut the latch-side Z-bar to height (same measurement as the hinge side).
- Hold the Z-bar against the door edge — the bar’s flange should press against the door to create a seal. Mark screw hole positions on the jamb through the Z-bar holes.
- Apply caulk behind the bar, then drive the screws to secure it to the jamb.
- Install the top cap piece: this is a pre-cut aluminum cap that bridges the top of the door opening. Position it against the head jamb with the door closed, caulk behind it, and screw it in place.
Step 6: Install the Door Closer
Adjust Closing Speed to Prevent Slamming
- Attach the closer bracket to the door frame at the position marked in the kit instructions (usually about 8 inches below the top of the door).
- Close the door. Attach the closer arm to both the door bracket and the frame bracket — the arm length and angle determine the closing speed.
- Adjust the closer tension using the adjustment screw at the end of the closer tube. Turn it in to increase closing force (makes the door close harder), or out to slow it down.
- Also attach the safety chain: this limits how far the door can open and prevents the wind from flinging it open beyond its range, which bends the hinges.
Step 7: Adjust the Door Sweep and Caulk
Final Weathersealing for a Tight Installation
- Most storm doors have an adjustable door sweep at the bottom. Loosen the sweep screws, press it firmly against the sill, and re-tighten. It should contact the sill lightly — not drag, but no gap visible.
- Apply a final bead of exterior caulk along all Z-bar edges where they meet the door casing — both the exposed outer faces and any gap between the Z-bar and the main door frame. This is the critical weatherseal step.
- Smooth the caulk with a wet finger and allow to cure per the label before painting over it if desired.
Pro Tips and Common Mistakes
- Size down, not up. When in doubt between two standard storm door sizes, choose the smaller one. Weatherstripping and the Z-bar system will fill the gap. A door that’s too wide for the opening cannot be made to fit.
- Always attach the safety chain. A storm door opened too far in a windstorm will bend the hinge Z-bar immediately. The chain is a cheap insurance policy against a common and entirely preventable damage scenario.
- Caulk everything. Any gap between the Z-bar and the door casing is a moisture and air entry point. Caulk behind the bar before mounting, and finish with a bead along the outer edge after. Exterior caulk is cheap; water damage is not.
- Check for clearance with the main door. The storm door needs about 1.5 inches of depth clearance from the door casing to the door stop. If your main door has a deep handle or security bar, measure this clearance before buying the storm door.
Troubleshooting
| Problem | Likely Cause | Fix |
|---|---|---|
| Door doesn’t close fully / latches partially | Latch-side Z-bar not tight against door edge | Loosen latch Z-bar screws, shift bar inward, re-tighten |
| Air gap at top or bottom of door | Opening not square or door not level | Check top cap alignment; adjust sweep; shim hinge Z-bar |
| Door slams shut or doesn’t close | Closer adjustment wrong | Adjust closer tension screw; reposition bracket |
| Door binding at hinge side | Hinge Z-bar out of plumb | Loosen Z-bar, shim to plumb, re-drive screws |
| Bottom gap letting in air and insects | Sweep not contacting sill | Loosen sweep screws, press firmly to sill, retighten |
Frequently Asked Questions
What size storm door do I need?
Measure the width of your door opening at three points (top, middle, bottom) between the door stop strips and use the narrowest measurement. Storm doors come in 32″, 34″, and 36″ widths. Always size to the opening width or one size down — never up. Also measure the door opening height (from sill to the top of the door stop) to confirm the door you buy will fit.
Can I install a storm door by myself?
Yes, though having a helper for the door-hanging step makes it significantly easier — storm doors are awkward to hold while simultaneously driving screws. The critical prerequisite is measuring correctly and checking that the existing door jamb is plumb. The full installation takes 2–4 hours for most homeowners.
Does a storm door need to be the same size as the main door?
The storm door size is based on the door opening (jamb to jamb), not the main door size. Most standard exterior doors are 32″ or 36″ wide, and storm doors are sold in matching widths. Verify your actual opening measurement rather than assuming it matches the main door size.
How do I prevent my storm door from slamming?
Adjust the closing speed using the adjustment screw on the door closer — turn it counterclockwise to slow the closing speed. If the door is slamming despite a fully loosened closer, the closer may need replacement. Also check that the closer bracket is positioned at the manufacturer-specified location on the door frame.
Can a storm door replace a screen door?
Modern storm doors typically include both a glass panel and a screen — they’re designed to function as both depending on the season. You can slide the glass down and replace it with the screen panel for summer ventilation. Full-view storm doors (all glass) don’t include a screen option.
Conclusion
Installing a storm door is a manageable afternoon project that adds real value — better energy efficiency, a layer of security, and weather protection for the main door behind it. Measure carefully before buying, check the jamb for plumb before mounting the Z-bar, attach the safety chain before ever opening the door fully, and caulk every joint. Done correctly, a well-installed storm door will last 20 years with minimal maintenance beyond occasional hinge and closer lubrication.
Once your storm door is in, consider completing the weatherproofing of the full door area with our guide on how to seal and weatherproof a door for the main door behind it. And if you’re replacing the full exterior door as well, our complete walkthrough on how to hang a door covers the interior/exterior door installation process from hinges to hardware.
