
Hanging a door is a foundational carpentry skill that every DIYer should know. Whether you’re installing a pre-hung door unit (door already mounted in its frame) or hanging a slab door (door blank only) into an existing frame, the job is doable in a single day with basic tools. Pre-hung installs take 2–4 hours; slab hanging takes 4–6 hours including mortising hinges. This guide covers both methods from rough opening prep to the final latch check.
What You’ll Need
| Tools | Materials |
|---|---|
| 4-foot level | Pre-hung door unit or slab door |
| Tape measure | 3-inch #10 wood screws (for hinge frames) |
| Hammer | 16d and 8d finish nails or a finish nailer |
| Pry bar | Shims (cedar shims work best) |
| Circular saw or handsaw | Construction adhesive (for shimming) |
| Chisel (1″ wide) | Exterior caulk (for exterior doors) |
| #2 Phillips screwdriver | Spray foam insulation (exterior doors) |
| Utility knife | Door knob/lockset hardware |
| Drill with bits | Paint or stain (if pre-painting slab) |
| Safety glasses | Threshold and weatherstripping (exterior) |
Safety & Precautions
- Wear safety glasses when cutting. Sawing door casings and shims sends wood fragments flying — especially with a circular saw.
- Two people for door lifting. A solid-core interior door weighs 60–90 lbs; exterior doors can exceed 100 lbs. Have a second person to hold the door while you work on it.
- Check for plumbing and electrical in walls before cutting rough openings. If you’re cutting a new rough opening, verify with a stud finder and check for electrical and plumbing runs before sawing through any wall.
- Support the door frame from twisting during install. A door frame that gets nailed in twisted will never operate correctly. Check level and plumb at every step before driving a nail.
- Pre-paint or prime slab doors before hanging. All six sides of a wood slab door — including top and bottom edges — should be primed or painted before installation. Unfinished edges absorb moisture, causing the door to swell and stick.
Part 1: How to Install a Pre-Hung Door (Easiest Method)
A pre-hung door unit comes with the door already mounted on hinges inside a finished frame. This is the fastest and most foolproof way to install a new door, and it’s what most DIYers should choose.
Step 1 — Prepare the Rough Opening
The rough opening in the wall framing should be 2 inches wider and 2 inches taller than the door size. For a standard 32″x80″ door, the rough opening should be roughly 34″x82″. Check that the rough opening is plumb (vertical sides are truly vertical) and square (corners are 90 degrees) using your level and a framing square. If the floor is not level — common in older homes — measure from a level reference point and shim up as needed. An out-of-level or out-of-plumb rough opening can still accept a door, but you’ll need more shims to compensate.
Step 2 — Remove the Old Door Unit (If Replacing)
If replacing an existing door, remove the casing trim first with a pry bar and utility knife (score the paint line with the utility knife before prying to avoid tearing drywall). Remove the door from its hinges by tapping out the hinge pins from the bottom up. Then pry out the old door frame — the jack studs and the door frame nailed to them. Save the old threshold if it’s in good condition.
Step 3 — Set the Pre-Hung Unit in the Opening
With your partner, lift the pre-hung door unit into the rough opening from the interior side. The door should swing in the correct direction — check before setting. For an exterior door, the threshold rests on the floor/subfloor; for an interior door, the bottom of the frame rests on the subfloor (you’ll add flooring later). Center the unit side-to-side in the opening so the reveal (gap between door and frame) is even on both sides.
Step 4 — Shim and Level the Frame
This is the most critical step. Open the door and check the hinge-side jamb for plumb with your 4-foot level. Insert cedar shims between the jamb and the rough opening framing at the hinge locations. Tap shims in pairs from opposite sides — this keeps the jamb face flat rather than bowing. Adjust until the hinge-side jamb is perfectly plumb. Then check the top (head) jamb for level. Add shims at the latch-side top corner if needed. The gap between the door and the frame should be a consistent 1/8 inch all the way around — a nickel’s thickness is the standard test.
Step 5 — Nail the Frame to the Rough Opening
Once shimmed perfectly, nail through the jamb and shims into the rough opening framing with 16d finish nails — two nails at each shim location (top, middle, and bottom of each jamb side). On the hinge side, drive one of the top hinge screws through the jamb into the rough frame with a 3-inch screw — this is the structural fastener that anchors the hinge side. Open and close the door after each set of nails to confirm it’s still operating freely. Score the protruding shim ends with a utility knife and snap them flush.
Step 6 — Install the Door Casing Trim
Nail the door casing (trim molding) around both sides of the door frame with 8d finish nails. Standard reveal is 3/16 inch of the jamb face showing inside the casing line — mark this with a pencil before nailing. Miter the top corners at 45 degrees for a professional look. Set all nail heads below the wood surface with a nail set and fill with wood filler before painting.
Step 7 — Install the Door Knob and Strike Plate
Install the lockset hardware per the manufacturer’s instructions. Most pre-hung doors come with a 2-3/8″ or 2-3/4″ backset bore hole already drilled. Test the latch engagement — the latch bolt should strike the center of the strike plate opening. If it’s off, adjust the strike plate position by loosening its screws and shifting it slightly; file the strike plate opening if the offset is less than 1/8 inch.
Part 2: How to Hang a Slab Door in an Existing Frame
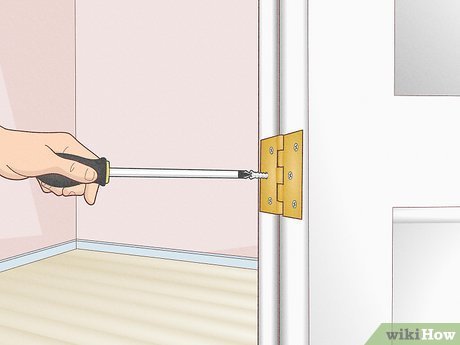
Hanging a slab door means cutting hinge mortises, boring hardware holes, and fitting the door precisely — more work than a pre-hung install, but necessary when the existing frame is in good condition.
Step 1 — Measure and Fit the Door Slab
Measure the existing frame opening height and width. A standard interior door leaves a 1/8-inch gap on each side and a 3/4-inch gap at the bottom (for flooring clearance). Your door slab should be the opening width minus 1/4 inch and the opening height minus 7/8 inch. If the slab is too wide or tall, mark and plane or saw to fit. Always plane or cut from the bottom and latch side — never the hinge side, which you’ll be cutting mortises into. Seal all slab edges with primer before hanging.
Step 2 — Mark Hinge Locations on the Door and Frame
Standard interior door hinge placement: top hinge 7 inches from the top of the door, bottom hinge 11 inches from the bottom, and a middle hinge centered between them (required for doors 80 inches and taller and all solid-core doors). Use a combination square to mark the hinge outline on both the door edge and the frame jamb. Transfer the exact hinge size outline by tracing the hinge leaf directly.
Step 3 — Cut Hinge Mortises
Score the hinge outline with a utility knife first to prevent wood tear-out. Use a sharp chisel to cut the mortise: first score across the grain at the depth of the hinge leaf thickness (typically 1/16″ to 1/8″), then pare thin layers of wood from the mortise field with the chisel flat side down. Test the hinge leaf frequently — it should sit perfectly flush with the door edge surface, not proud or recessed. Cut mortises on both the door and the frame jamb for each hinge location.
Step 4 — Mount Hinges and Hang the Door
Screw hinges to the door edge mortises first, using all provided screws. Then, with your partner holding the door in position in the frame, align the door-side hinges with the frame-side mortises. Start the screws by hand before driving them fully — this keeps the frame mortises from shifting. With all hinge screws started, open and close the door to test the swing and gap consistency. The door should clear the floor, close fully against the stop, and have even reveals on all sides. Make micro-adjustments to hinge depth with cardboard shims if needed.
Step 5 — Bore Hardware Holes and Install Lockset
Mark the lockset center height (typically 36 inches from the floor to the center of the knob), bore the face hole with a 2-1/8″ hole saw, and the edge hole with a 1″ spade bit per the lockset instructions. Install the latch mechanism first, then install the knob/lever assembly. Mark and chisel the latch plate mortise on the door edge. Test the latch before installing the strike plate — mark the strike plate position by applying lipstick to the latch bolt and closing the door to transfer the impression to the frame. Mortise and install the strike plate at that exact position.
Pro Tips for a Perfect Door Hang
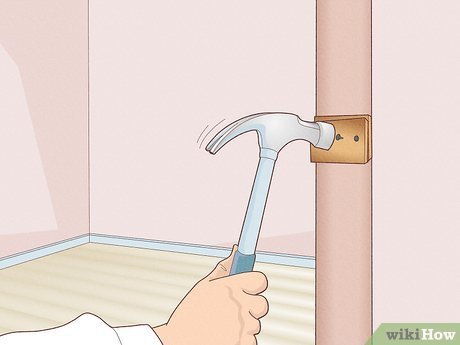
- Always check for plumb first, level second. The hinge-side jamb being plumb is the single most important factor in a door that operates correctly. A level head jamb matters less than a plumb hinge side.
- Use 3-inch screws at hinge locations on the frame side. The standard 3/4-inch screws provided with hinges only anchor into the door jamb — not the structural framing. Drive one 3-inch screw through the jamb into the rough frame at every hinge location for a door that won’t sag.
- Shim behind the strike plate side too. Many installers only shim the hinge side, but the strike plate side also needs solid backing at the strike plate location — or the strike plate screws will never hold properly.
- Test the door at every stage. After shimming, after the first nail, after all nails — open, close, and check the gap every step. It’s much easier to pull two nails than to fix a door that’s been fully cased.
- Don’t skip the middle hinge on tall doors. Any door 80 inches or taller, or any solid-core door regardless of height, needs three hinges. Two hinges on a heavy door will sag within months.
Troubleshooting Common Door Hanging Problems
Door Rubs at the Top Corner After Hanging
The hinge-side jamb is not plumb, or the top hinge is shimmed out too far. Loosen the top hinge screws, adjust the shim, and re-drive. If the frame is fully nailed, see our guide on how to adjust door hinges for post-install corrections.
Gap Is Uneven Between Door and Frame
Caused by a frame that’s not square or a slab that wasn’t fitted precisely. Check the frame with a framing square at all corners. For shimmed frames, add a shim at the corner that has the large gap to push the jamb toward the door. For slab doors, plane the high side of the door edge.
Door Won’t Latch After Installation
The latch bolt and strike plate are not aligning. Apply lipstick or chalk to the latch bolt and close the door to mark where the bolt is hitting the strike plate. Adjust the strike plate up, down, or toward the door stop as needed. For detailed latch fixes, see our guide on how to fix a door that won’t latch.
Door Swings Open or Closed by Itself
The hinge-side jamb is slightly out of plumb. Confirm with a level. If the frame is already nailed, bend the hinge pin slightly or add friction to the middle hinge — full details in our guide on how to adjust door hinges.
Frequently Asked Questions
How long does it take to hang a door?
Installing a pre-hung door in an existing rough opening takes 2–4 hours for an experienced DIYer. Hanging a slab door in an existing frame (including cutting mortises and boring hardware holes) takes 4–6 hours. First-timers should budget a full day for either project. The shimming and fitting steps take far longer than most guides suggest.
Can I hang a door by myself?
The mortise cutting and boring work on a slab door can be done solo with the door propped on sawhorses. However, setting the door into the frame and aligning hinges genuinely requires two people — especially for solid-core or exterior doors that weigh 60–100+ lbs. Don’t skip the second person for the hanging step.
What’s the difference between a pre-hung door and a slab door?
A pre-hung door comes with the door slab already hinged inside a finished three-piece frame (two side jambs and a head jamb). You install the entire unit including the frame. A slab door is just the door panel — no frame. You hang it into an existing frame by cutting your own hinge mortises. Pre-hung installs are faster and more foolproof; slab hanging gives you more control over fit and is used when the existing frame is serviceable.
What size rough opening do I need for a pre-hung door?
Add 2 inches to both the door width and door height for the rough opening. A 32″x80″ door needs a 34″x82″ rough opening. This provides 1 inch of clearance on each side for shimming the frame plumb and level. Some pre-hung door manufacturers specify 2.5 inches clearance — check the product specification sheet for the exact door you’re installing.
How do I know which way a door swings?
Stand on the side where the door swings toward you (the pull side). If the hinges are on your left, it’s a left-hand door. If the hinges are on your right, it’s a right-hand door. For pre-hung doors, this is called the “hand” of the door and must be specified when ordering. Most manufacturers offer both hands. When in doubt, determine the swing direction before purchasing — returning or exchanging a pre-hung door is cumbersome.
Conclusion
Hanging a door comes down to three non-negotiable principles: a plumb hinge-side jamb, consistent 1/8-inch reveals all around, and structural fasteners (3-inch screws) at every hinge point. Get those three right and every other problem is cosmetic and correctable. Pre-hung doors make the job easier for most homeowners — choose a slab only when you have a serviceable frame and want a precise custom fit. Test at every stage, and you’ll have a door that operates perfectly for decades.
Next Step: Once your door is hung, install the hardware with our guide on How to Install a Door Knob, or if an existing door is giving you trouble, start with How to Adjust Door Hinges.
