Installing a garage door opener is a full afternoon project for most homeowners — typically 3–4 hours for a first installation and under 2 hours for a replacement. The process involves assembling the rail, mounting the power unit to the ceiling, connecting to the door with the trolley and arm, and programming the remotes and safety sensors. This guide covers all three drive types (chain, belt, and screw) and works for single-car and standard two-car garage doors.
What You’ll Need
| Tools | Materials |
|---|---|
| Ladder (6-foot or taller) | Garage door opener kit (includes motor, rail, hardware) |
| Drill/driver with bits | 2×4 or 2×6 lumber header bracket blocking (if needed) |
| Measuring tape and pencil | Lag screws or toggle bolts for ceiling mount |
| Level | Electrical outlet (120V) near the opener location |
| Adjustable wrench and socket set | Keypad and remote controls (usually included) |
| Voltage tester | Safety sensor mounting hardware (included in kit) |
Safety and Precautions
- Do not install an opener on a door with a broken spring. The opener motor is not designed to lift a door without spring assistance. Installing an opener before fixing a broken spring will burn out the motor and may cause the door to fall. Fix the spring first.
- Verify the door is balanced before connecting the opener. Disconnect any old opener, pull the release cord, and lift the door manually to the halfway point. It should hold its position. If it drifts, adjust the spring tension before installing the opener.
- The safety sensors (photo-eyes) are mandatory. Federal law (UL 325) requires automatic reversing safety sensors on all garage door openers. Never bypass or disconnect them. Position them no more than 6 inches above the floor, one on each side of the door.
Step 1: Choose the Right Opener Type
Match the Drive Type to Your Garage and Door
| Drive Type | Best For | Pros / Cons |
|---|---|---|
| Chain drive | Detached garages, budget installs | Inexpensive; louder operation |
| Belt drive | Attached garages, living spaces above | Quiet; moderately more expensive |
| Screw drive | Heavy insulated doors | Fewer moving parts; requires lubrication; moderate noise |
| Direct drive | Any garage, premium choice | Quietest; most durable; most expensive |
Also choose the correct horsepower for your door: 1/2 HP for standard single-panel doors, 3/4 HP for heavier two-car or insulated doors, 1 HP or higher for very heavy or oversized doors.
Step 2: Assemble the Rail
Bolt the Rail Sections Together on the Ground
- Lay out all rail sections on the garage floor. Most openers use two or three sections that bolt together end-to-end.
- Slide the trolley (the carriage that moves along the rail) onto the rail before assembling all sections — it can’t be threaded on after the rail is assembled.
- For chain drive: thread the chain through the trolley and connect the chain ends at the drive sprocket and idler pulley. Adjust the chain tension so there is 1/2 inch of sag at the midpoint — not too tight, not too loose.
- For belt drive: thread the belt similarly, connecting at the power unit end. The belt should be taut with minimal sag.
- Attach the front pulley bracket (the idler pulley end) to the rail and confirm all bolts are tight.
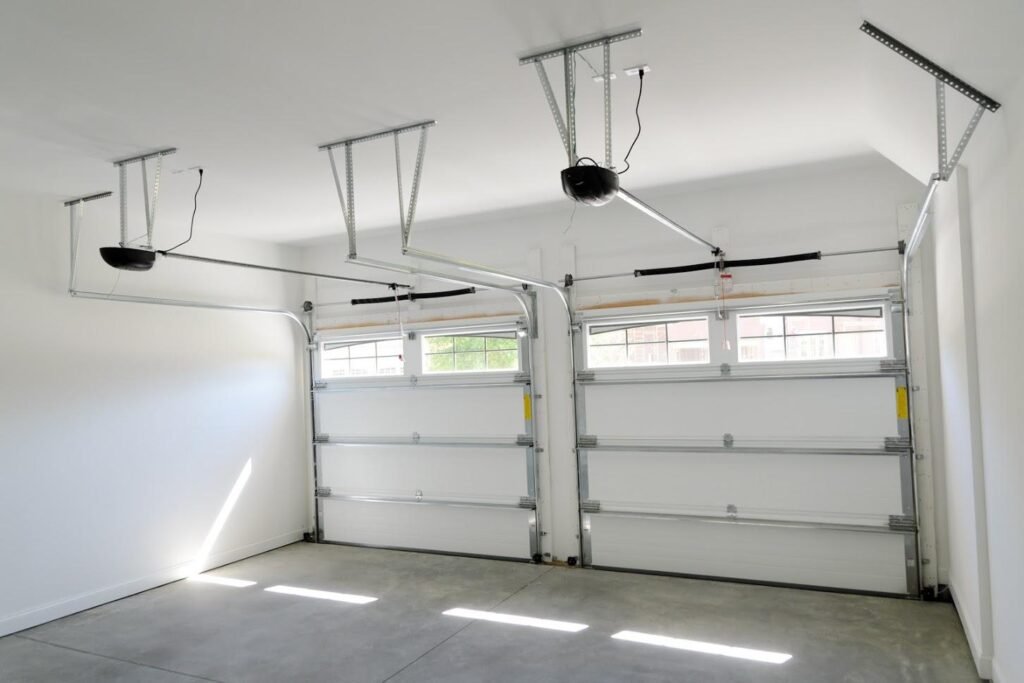
Step 3: Attach the Power Unit to the Ceiling
The Motor Mounts at the Center of the Garage Ceiling
- Mark the center point of the garage door on the ceiling. The rail should run directly above the center of the door.
- Attach the header bracket to the wall directly above the door center, at least 2 inches above the top of the door in its open position. If there is no structural framing at this location, attach a horizontal 2×6 board spanning between the door frame studs to create a solid mounting surface.
- Hang the front of the rail from the header bracket: thread the hanging bracket through the front pulley bracket and hook it to the header bracket.
- Lift the power unit end and mount it to the ceiling using the included angle iron or hanging brackets. Drive lag screws into ceiling joists — never into drywall alone. Use a stud finder to locate joists or use properly rated toggle bolts if joists aren’t accessible.
- Level the rail: it should be horizontal (or slightly angled upward toward the power unit — check the manufacturer’s instruction for your specific model). Adjust the hanging bracket lengths as needed.
Step 4: Connect the Opener to the Door
The Trolley Arm Links the Carriage to the Door
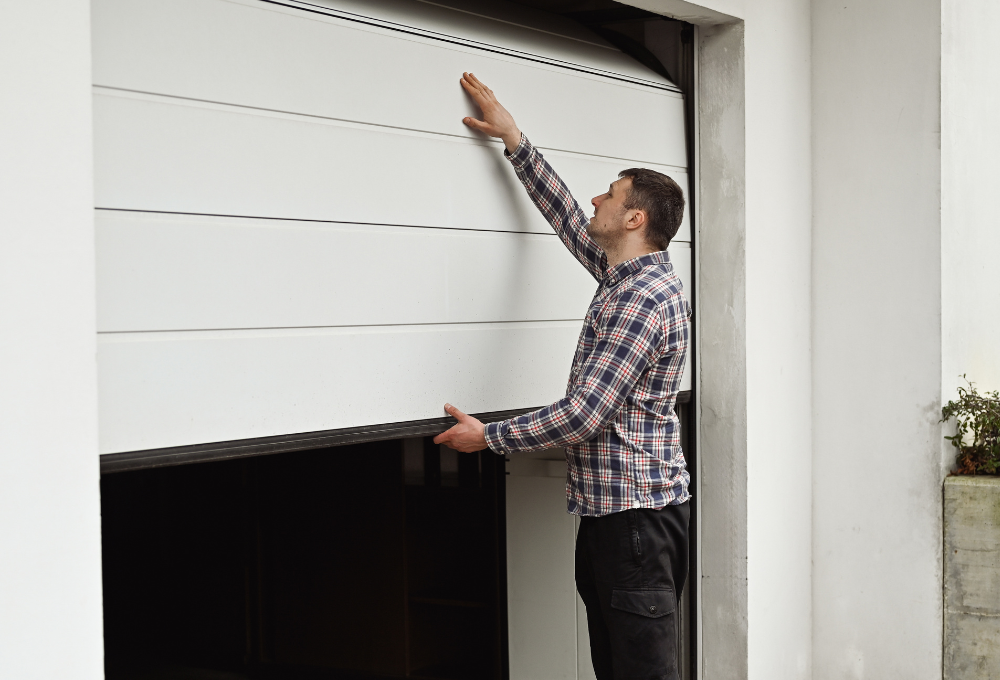
- Locate the door bracket — a metal bracket that attaches to the top section of the door, at the center. Most openers include this bracket. Position it in the center, at the top edge of the top panel, and secure it with the included hardware through the door panel into the door reinforcement struts.
- Connect the straight arm section to the door bracket and the curved arm section to the trolley, joining them with the clevis pin and cotter pin.
- The arm connection should allow a small amount of flex — it’s a hinged joint that allows the door to articulate as it moves through the curved track.
- Do not connect the arm to the trolley until the door is fully closed and the trolley is at the front of the rail in its starting position.
Step 5: Mount and Wire the Safety Sensors
Position Photo-Eyes No More Than 6 Inches Off the Ground
- Mount the sensor brackets on both sides of the door opening, no more than 6 inches above the floor. The sending sensor has a steady light; the receiving sensor blinks when unobstructed.
- Angle both sensors inward so they face each other directly. Run the sensor wires along the door frame to the power unit, stapling the wires to the frame every 12–18 inches.
- Connect the white (neutral) sensor wires to the white terminals and the white/black wires to the white/black terminals on the power unit logic board. Check the specific wiring diagram in the opener’s instruction manual.
- Plug the unit in. Both sensor indicator lights should be solid (green on the receiver, amber on the sender in most brands). If one blinks, the sensors are not aligned — re-aim until both lights go solid.
Step 6: Set Travel Limits and Force Settings
Program Where the Door Stops in the Open and Closed Positions
- Press the “up limit” or “travel” adjustment button (location varies by brand — see manual) and press the button to move the door up. Set the up limit so the door stops fully open with the bottom edge level with the horizontal tracks.
- Set the down limit so the door closes completely and the bottom weather seal presses firmly against the floor without the motor continuing to strain.
- Check the auto-reverse force: close the door and hold your hand flat on the floor where the door will close. The door should reverse immediately on contact. If it doesn’t reverse with light resistance, reduce the down force setting.
- Test the safety sensor reversal: wave a broom handle across the sensor beam while the door is closing. The door must immediately reverse. If it doesn’t, recheck sensor wiring and alignment.
Step 7: Program Remotes and Keypad
Takes Under 5 Minutes for Most Modern Openers
- Locate the “Learn” button on the power unit — usually on the back or side panel, near the antenna wire. It may be under a light cover.
- Press and release the Learn button. The indicator light will turn on for 30 seconds.
- Within 30 seconds, press and hold the button on the remote you want to program until the opener’s light flashes or you hear two clicks. The remote is now paired.
- For a keypad: enter your desired PIN and press and hold the Enter key until the opener light flashes. The keypad is paired.
- Test all remotes and the keypad before closing the garage and considering the job done.
Pro Tips and Common Mistakes
- Verify the spring balance before connecting. This is the most commonly skipped step and the most consequential. An unbalanced door puts severe strain on the opener motor and shortens its life dramatically. Balance test first, every time.
- Run the wiring neatly along framing. Safety sensor wires and wall button wires that hang loosely are a tripping hazard and look unprofessional. Staple wires to framing members as you go.
- Don’t mount to drywall only. Ceiling drywall cannot support the weight and vibration of an opener. Always drive lag screws into joists or use properly rated toggle anchors designed for vibration loads.
- Check the chain or belt tension after the first week. Chain and belt drives can stretch slightly after initial use. Re-adjust tension to the manufacturer’s spec (1/2 inch sag for chain) after the first 100–200 cycles.
Troubleshooting
| Problem | Likely Cause | Fix |
|---|---|---|
| Door reverses immediately after starting to close | Sensor beam broken or sensors misaligned | Check both sensor lights; realign sensors |
| Door won’t fully open or close (stops short) | Travel limits not set correctly | Adjust up or down travel limit setting |
| Opener strains or motor runs hot | Door is unbalanced or spring needs adjustment | Disconnect opener; balance-test the door; adjust spring |
| Remote works only within a few feet | Antenna wire not extended or broken | Hang antenna wire down from unit; check for damage |
| Chain slaps or vibrates loudly | Chain too loose or misrouted | Adjust chain tension to 1/2 inch sag |
Frequently Asked Questions
Can I install a garage door opener by myself?
Yes — this is a manageable solo DIY project, though having a helper makes the ceiling mounting step much easier. The most important prerequisite is a properly balanced door with functioning springs. If the springs are in good shape, most homeowners can complete a replacement opener install in 2–3 hours.
Do I need an electrician to install a garage door opener?
Not typically. Garage door openers plug into a standard 120V outlet. You need an existing outlet within reach of the power unit (usually within 6 feet on the ceiling). If there’s no outlet nearby, you’ll need an electrician to add one — that part requires a licensed electrician in most jurisdictions.
What horsepower do I need for my garage door opener?
1/2 HP handles most standard single-panel or sectional doors up to about 400 lbs. 3/4 HP is recommended for heavier insulated two-car doors or doors above 400 lbs. 1 HP is for oversize or extremely heavy doors. Most residential doors do fine with 1/2 HP if the springs are properly balanced.
How do I know if my garage door is balanced enough for an opener?
Disconnect the opener (pull the red release cord), lift the door manually to the halfway point (about waist height), and release. A properly balanced door should stay at mid-height without drifting up or down by more than 1–2 inches over several seconds. If it drifts significantly, adjust the spring tension before installing the opener.
How long does a garage door opener last?
Most residential garage door openers last 10–15 years with routine maintenance. Belt drive and direct drive models tend to outlast chain drive. Regular chain/belt tension checks, annual lubrication, and replacing the battery backup in remotes and keypads are the main maintenance tasks.
Conclusion
Installing a garage door opener is a satisfying full-afternoon project that improves convenience and security at the same time. The critical checkpoints are: verify door balance before you start, mount to structural framing (not just drywall), install and align the safety sensors correctly, and test the auto-reverse before considering the job complete. Do all four and the opener will perform reliably for years.
If you’re also dealing with a spring issue before the opener install, see our guide on how to fix a garage door spring first. And if you’re adding a new storm door or exterior door as part of a broader upgrade, check our guide on how to install a storm door for the exterior door installation process.
