Window glazing is the process of applying glazing compound — the putty-like material that seals glass into a wood window sash. When glazing cracks or falls out, the glass becomes unsupported and the joint lets in water, cold air, and insects. Re-glazing is a 1–2 hour job per window with a few basic tools, and it significantly extends the life of an older wood window. This guide covers removing old glazing, preparing the sash, applying and smoothing new compound, and painting the finished bead.
What You’ll Need
| Tools | Materials |
|---|---|
| Stiff putty knife | Oil-based glazing compound (Dap, Red Devil, or similar) |
| Heat gun or hair dryer (on low) | Glazier’s points (small metal triangles) |
| Paint scraper | Oil-based exterior primer |
| Needle-nose pliers | Exterior paint to match sash |
| Painter’s tape | Boiled linseed oil (optional — conditions dry wood before glazing) |
| Clean rags | Mineral spirits (for tool cleanup) |
Safety and Precautions
- Wear safety glasses and gloves when removing old glazing. Old glazing compound can contain lead in homes built before 1978. Test with a lead test kit before removing. If positive, use wet methods and follow EPA RRP procedures. Also protect your eyes from flying chips when chipping out old putty.
- Don’t rush the paint drying step. Glazing compound must skin over for at least 7 days before painting. Painting too soon traps volatile solvents in the compound and causes premature cracking. Check the label — some products require longer cure times.
- Support the glass when removing glazier’s points. The glass is only held in place by the glazier’s points while the sash is out of the frame. Handle gently and support from both sides when moving.
Step 1: Remove the Old Glazing Compound
A Heat Gun Makes This Much Faster
- If the window sash can be removed (most double-hung windows have removable sashes), remove it and lay it flat on sawhorses. This is the easiest way to work on glazing — flat work produces better results than working vertically.
- Apply heat with a heat gun (low setting) or hair dryer to a 6-inch section of old glazing. The heat softens the compound and makes it much easier to remove. Don’t overheat — the goal is softening, not burning.
- While still warm, push a stiff putty knife under the glazing at a low angle and pry it up in strips. Work section by section around the perimeter of each pane.
- Remove glazier’s points: after the glazing is removed, use needle-nose pliers to pull out the old metal glazier’s points. These are the small triangular metal pieces embedded in the wood that hold the glass in the frame.
- Scrape the rabbet groove (the channel the glass sits in) completely clean. All old compound and paint buildup must be removed so the new compound can bond to fresh wood.
Step 2: Prepare the Wood Rabbet
The Wood Must Be Primed Before Glazing
- Inspect the rabbet (the groove the glass sits in) for rot or soft spots. Any soft areas must be treated with wood hardener and epoxy filler before glazing — don’t apply glazing to soft wood.
- Lightly sand the rabbet clean. The wood surface should be smooth and uniform.
- Apply a coat of oil-based exterior primer to the rabbet groove. This is an essential step — unprimed wood absorbs oils from the glazing compound, causing the compound to dry out prematurely and crack within a year or two.
- Alternatively: thin boiled linseed oil can be applied to the rabbet in place of primer and allowed to soak in and dry (overnight). This also conditions the wood and prevents it from pulling oil from the compound.
- Allow the primer or linseed oil to dry completely before applying glazing.
Step 3: Set the Glass and Install Glazier’s Points
Glass Goes In Before Glazing Is Applied
- Apply a thin bedding layer of glazing compound in the rabbet before setting the glass. Roll a rope of compound between your palms and press it into the groove around the full perimeter. This “bed coat” cushions the glass and fills the first contact layer.
- Carefully set the glass into the rabbet, pressing it lightly into the bed coat. The glass should be seated evenly — check that it’s not tilted or cocked in the opening.
- Install new glazier’s points: hold one point flat against the glass and use the flat face of a putty knife to push it into the wood at a 90-degree angle to the glass surface. Install one every 6–8 inches around the perimeter.
- Don’t drive the points too deep — the head should sit flat against the glass and the point embeds in the wood, holding the glass in place. Too much force can crack the glass.
Step 4: Apply the Face Glazing
The Visible Bead at 45 Degrees
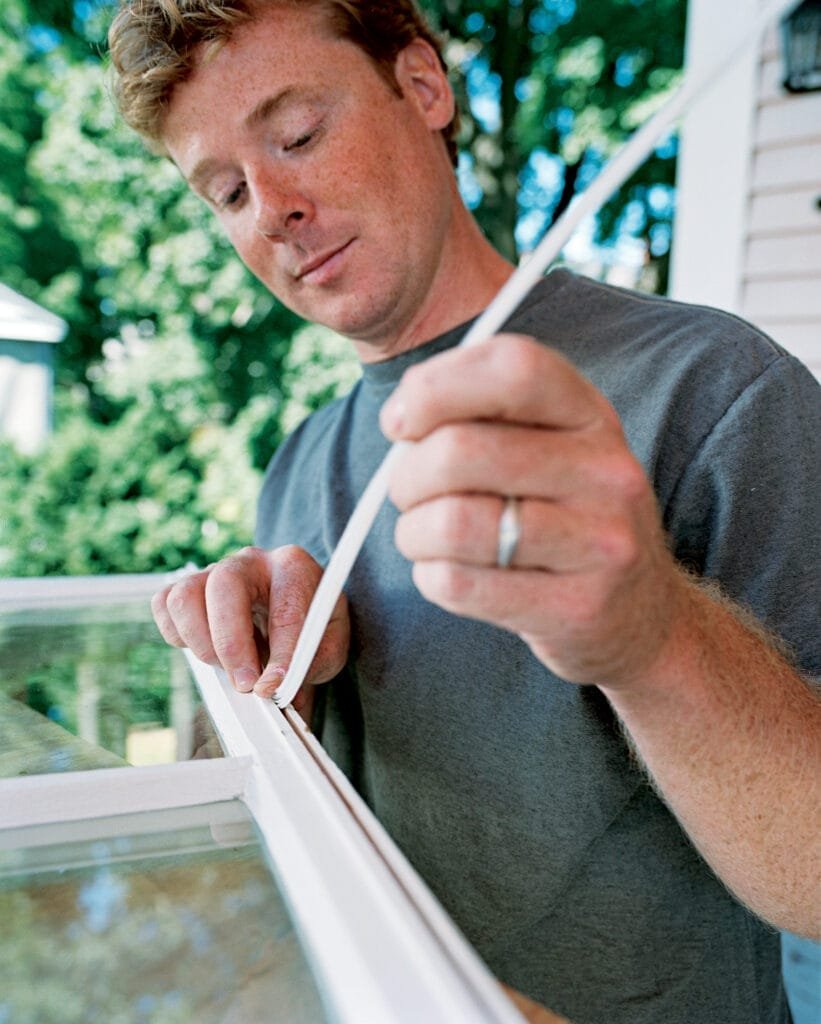
- Take a rope of glazing compound (about the diameter of a pencil) and press it against the glass and the rabbet with your thumb, following the perimeter of the pane.
- Using a clean putty knife held at a 45-degree angle, draw it along the compound in one smooth stroke from corner to corner. The knife should contact both the glass and the top edge of the rabbet simultaneously.
- The finished bead should form a clean triangular profile: flat against the glass on one side, and with the outer edge just below the sight line of the frame (so you can’t see the glazing from inside looking at the glass edge — you only see wood).
- Smooth imperfections with a wet putty knife or dip your finger in mineral spirits and smooth lightly.
- Cut the corners clean with the putty knife — stop the bead exactly at each corner rather than running it continuously around corners (which tends to leave blobs). Miter the compound at 45 degrees at each corner for a clean, professional finish.
Step 5: Allow to Cure and Paint
Patience Is the Key to Long-Lasting Glazing
- Allow the glazing to skin over for a minimum of 7 days (and up to 14 days in cool weather) before applying paint. The surface should feel firm and not tacky when touched.
- Apply oil-based exterior primer over the glazing and onto the glass, overlapping the glass by 1/16 inch. This overlap seals the glass-to-compound joint and is the critical step that keeps water from getting behind the glazing.
- Apply one or two finish coats of exterior paint after the primer has dried. Paint over the compound and onto the glass (the 1/16-inch overlap) for a waterproof seal.
- When fully cured, score and trim the paint overlap on the glass with a razor blade for a clean, professional edge.
Pro Tips and Common Mistakes
- Always prime the rabbet before glazing. This is the most commonly skipped step and the leading cause of premature glazing failure. Unprimed wood pulls oil from the compound, making it hard and cracked within 2–3 years.
- Use oil-based compound, not water-based caulk. Water-based products don’t bond properly to glass in the same way traditional glazing compound does and can peel away at the glass edge. Traditional oil-based glazing compound remains flexible and holds for 20+ years when properly applied and painted.
- Overlap the paint onto the glass. A 1/16-inch paint overlap where the paint runs from the compound onto the glass is the standard practice — it seals the joint that compound alone can’t fully waterproof.
- Work in moderate temperatures. Glazing compound becomes very difficult to work with below 40°F (too hard) and above 90°F (too soft and stringy). Ideal working temperature is 60–75°F.
Troubleshooting
| Problem | Likely Cause | Fix |
|---|---|---|
| Glazing cracks within one season | Wood not primed; compound dried out too fast | Remove, prime rabbet, apply new compound; ensure paint overlap |
| Compound won’t stick to the glass | Glass not clean or grease contamination | Clean glass with rubbing alcohol before applying bed coat |
| Compound is stringy and hard to work | Too cold or compound dried out in can | Warm compound slightly (place can in warm water); knead in a few drops of linseed oil |
| Glass broke when pushing glazier’s points | Too much force or glass seated unevenly | Use a lighter touch; push points with the flat of the knife, not a hammer |
| Paint peeling off glazing | Painted before compound fully cured | Strip peeling paint, let compound cure fully, re-prime and repaint |
Frequently Asked Questions
What is window glazing compound?
Window glazing compound is a putty-like material that seals glass panes into wood window sashes. It’s typically oil-based, remains slightly flexible when cured (which allows it to accommodate glass and wood movement without cracking), and is designed to be painted over. It’s distinct from silicone or acrylic caulk — traditional glazing compound is the correct material for historic wood window restoration.
How long does window glazing last?
Properly applied and painted glazing can last 20–30 years before needing attention. The key factors are: priming the wood rabbet before glazing, overlapping paint onto the glass by 1/16 inch to seal the edge, and maintaining the paint. Unpainted or improperly primed glazing may begin cracking within 3–5 years.
Can I use caulk instead of glazing compound?
Paintable silicone or hybrid caulk can be used for glazing in some situations, particularly for small repairs. However, traditional oil-based glazing compound is recommended for full re-glazing of wood sashes because of its superior adhesion, flexibility, and compatibility with the paint system used on historic wood windows. Caulk doesn’t bond to the glass-wood joint as durably over long periods.
How do I know if my windows need to be re-glazed?
Signs that glazing needs replacement: visible cracks or gaps in the compound, sections of compound missing or fallen out, compound that is hard and no longer adhering to the glass or wood, or drafts and moisture intrusion around the glass pane edge. Any visible gap between the glass and the sash wood is a waterproofing failure that needs addressing.
How long do I need to wait before painting new glazing?
At least 7 days for the surface to skin over properly. In cool weather (below 60°F) or thick applications, wait up to 14 days. Painting too soon traps solvents in the compound and causes premature cracking and paint adhesion failure. Check the compound label for the specific recommended cure time.
Conclusion
Re-glazing a window is a straightforward maintenance task that keeps older wood windows weathertight and structurally sound for decades more. The two steps that matter most are: prime the wood rabbet before applying compound, and paint over the compound and onto the glass with a 1/16-inch overlap to seal the edge. Skip either of those and the glazing will fail prematurely. Do both, and a single re-glaze job will last 20+ years with basic paint maintenance.
For glass replacement alongside the glazing repair, see our complete guide on how to replace a window for the full glass removal and re-installation process. And if the window frames need cleaning and restoration attention while you’re working, our guide on how to clean aluminum window frames covers the oxidation treatment and sealing steps for aluminum-framed windows.
