
An RV fresh water tank and hot water tank need to be sanitized at least once a year — and every time the RV has sat unused for more than a few weeks. Without sanitizing, bacteria, algae, and biofilm grow in the standing water and distribute through every faucet and shower in the RV. The process uses a diluted bleach solution, a complete flush through the entire water system, and a multi-cycle rinse. This guide covers both the fresh water tank sanitization and the hot water heater flush.
What You’ll Need
- Household bleach (unscented, standard 6–8.25% concentration)
- Fresh water source or water hose
- Measuring cup
- Funnel
- Water tank sanitizing wand (optional — for larger tanks)
- Food-safe tank treatment tablets (optional alternative to bleach)
- Rubber gloves
Safety and Precautions
Use only unscented, plain household bleach — no gel bleach, no color-safe bleach, no scented varieties. RV water lines and tank liners are made from materials that can absorb fragrance chemicals. Always flush the system completely before consuming water — never drink or cook with water that has bleach solution remaining in the lines. Do not exceed the recommended bleach concentration — more bleach doesn’t clean better and is harder to flush out. Wear rubber gloves when handling bleach. Before winterizing, always bypass and drain the water heater before adding antifreeze to the system.
Part 1: Sanitizing the RV Fresh Water Tank
Determine the Correct Bleach Amount
The standard concentration for sanitizing an RV fresh water tank is 1/4 cup of unscented household bleach per 15 gallons of tank capacity. Calculate your tank’s capacity (check your RV owner’s manual) and measure accordingly. For example, a 40-gallon tank needs approximately 2/3 cup of bleach. This creates a solution of approximately 50 parts per million chlorine — the standard for potable water sanitization.
Drain the Fresh Water Tank Completely
Open the fresh water tank drain valve and drain all standing water from the tank. If the tank has been sitting with water for weeks or months, the old water may smell or look discolored. Allow it to fully drain before adding sanitizing solution.
Add Bleach to the Tank
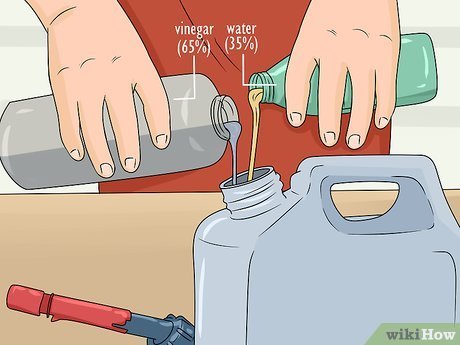
Use a clean funnel to pour the measured bleach directly into the fresh water tank fill inlet. Alternatively, pre-mix the bleach in a gallon of water first, then pour the pre-mixed solution into the tank inlet — this helps the bleach distribute more evenly when you fill the tank.
Fill the Tank Completely
Connect to a fresh water source and fill the fresh water tank to capacity. This dilutes the bleach to the correct concentration and ensures the solution reaches all areas of the tank.
Run Water Through All Faucets and Lines
Turn on the water pump and open every hot and cold faucet in the RV — kitchen sink, bathroom sink, shower, and outdoor shower if equipped. Run water until you smell bleach from each fixture. This draws the sanitizing solution through the entire water delivery system: all lines, the water pump, the water heater inlet, and every faucet and valve.
Let the Solution Sit for 4–12 Hours
Close all faucets and let the bleach solution sit in the system for a minimum of four hours — twelve hours is better for tanks that have significant buildup or have been sitting unused for an extended period. This contact time allows the bleach to kill all bacteria and biological growth throughout the water system.
Drain and Flush Completely
Open the fresh water drain valve and let the tank drain. Then refill the tank with fresh water and run all faucets again until the tank is empty. Refill and flush a second time. Continue until you cannot detect any bleach smell from any faucet. This typically requires two to three complete flush cycles for most systems.
Part 2: Flushing and Cleaning the RV Hot Water Heater Tank
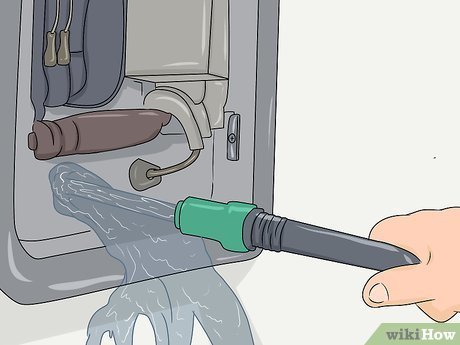
The RV water heater (typically a 6 or 10-gallon Suburban or Atwood unit) develops sediment and scale on the bottom and around the anode rod. Flushing it annually during your fresh water sanitization keeps it efficient and extends its life.
Turn Off the Water Heater and Let It Cool
Turn off the water heater (gas or electric mode) and allow the tank to cool completely before draining — at least two hours after last use. Draining a hot water heater with hot water inside can cause burns and accelerates thermal shock stress on the tank lining.
Bypass the Water Heater (Important)
Most RVs have a water heater bypass valve. Set it to bypass mode before filling with your bleach sanitizing solution. This prevents concentrated bleach solution from contacting the anode rod and tank lining during the fresh water tank sanitization step — you’ll fill the water heater tank separately during the flush step.
Remove the Drain Plug and Anode Rod
Locate the water heater drain plug on the exterior of the RV (look for the water heater access panel). Use a socket wrench to remove the drain plug or anode rod (on models where the anode rod serves as the drain plug). Have a bucket ready — hot water may still be present even after cooling. Let the tank fully drain.
Flush the Tank with Fresh Water
Use a water wand or simply insert a hose and flush water into the empty tank to dislodge sediment from the bottom. Rock the RV slightly if possible — this helps loose sediment move toward the drain opening. Continue flushing until water runs clear from the drain.
Inspect and Replace the Anode Rod
While the tank is drained, inspect the anode rod (if your model has one). If it’s more than 50% depleted — meaning the rod looks thin and heavily corroded — replace it. The anode rod sacrifices itself to prevent tank corrosion. A spent rod means your tank is corroding instead. Replacement rods cost under $20 and are available at RV supply stores.
Reinstall Drain Plug and Re-open Bypass
Apply thread sealant tape to the drain plug threads and reinstall. Return the bypass valve to normal (non-bypass) operating position. The water heater will fill automatically when you restore water pressure. Bleed air from the system by opening a hot water faucet until water flows steadily before turning the heater back on.
How Often to Sanitize Your RV Water System
- At the start of every camping season after winter storage
- After any period of non-use longer than 2–4 weeks
- After using a questionable water source (unknown campground water quality)
- At least once a year for RVs in regular use
- Immediately if water develops any off taste, odor, or discoloration
Pro Tips
- Use a water filter: Installing an inline water filter on your RV city water inlet dramatically reduces sediment and chemical taste from various water sources. Replace the filter cartridge each season.
- Don’t store with water in the tank: After each trip, drain the fresh water tank if the RV will sit for more than a week. Standing water is where bacteria starts.
- Check for pink slime: Pink biofilm inside the water lines or tank is Serratia marcescens bacteria — a sign that sanitization is overdue. The bleach sanitization process eliminates it effectively.
- Pre-mix bleach before adding to tank: Mixing bleach with a gallon of water before pouring into the tank inlet prevents undiluted bleach from sitting in any one spot in the tank and ensures even distribution.
Frequently Asked Questions
How much bleach do I use to sanitize my RV water tank?
Use 1/4 cup of unscented household bleach per 15 gallons of tank capacity. For a 30-gallon tank, use 1/2 cup. For a 40-gallon tank, use approximately 2/3 cup. This creates a solution around 50 ppm chlorine when the tank is full, which is the standard sanitizing concentration for potable water systems.
How do I know when all the bleach is flushed out?
When you can no longer smell bleach from any faucet in the RV after running water through the system, it’s fully flushed. Taste a small amount from a faucet — it should taste completely neutral. If you’re still uncertain, get pool test strips and test the water coming from the tap; it should test at zero free chlorine before using for drinking.
Can I use bleach tablets instead of liquid bleach?
Yes — food-safe water tank sanitizing tablets or pods are available and simplify dosing. They’re formulated specifically for potable water systems and eliminate the guesswork of measuring liquid bleach. They work equivalently to liquid bleach at the same contact time.
What happens if I don’t sanitize my RV water tank?
Bacteria including Legionella, E. coli, and Giardia can grow in standing water in an unsanitized tank and water lines. These contaminate every water source in the RV — faucets, the shower, and potentially the water heater. Regular sanitization prevents these health risks.
Do I need to sanitize a brand-new RV before first use?
Yes. New RVs may have manufacturing residue, dust, or plastic off-gassing in the water tank and lines from production and dealer storage. Run a full sanitization cycle before your first trip to ensure the water system is genuinely potable.
Conclusion
Sanitizing your RV water system is a straightforward once-a-year task that protects your health every time you turn on a faucet in the rig. The bleach flush process — measuring correctly, letting it contact all parts of the system, and flushing completely — takes a few hours of contact time but only about 30 minutes of active work. Add the water heater flush to the same session to address sediment and inspect the anode rod in one pass. For other water system maintenance, our guide on how to clean a plastic water tank covers the same sanitization principles for residential tanks.
