
Plastic water storage tanks — whether used for rainwater harvesting, irrigation, emergency water storage, or whole-home backup supply — require periodic cleaning to remove algae growth, sediment buildup, biofilm, and bacterial contamination. The cleaning process involves draining, scrubbing, disinfecting with a dilute bleach solution, rinsing completely, and refilling. Done annually, this keeps stored water safe and prevents the slimy buildup that clogs fittings and filters downstream.
What You’ll Need
Tools
- Garden hose for rinsing
- Long-handled scrub brush (to reach tank walls and bottom)
- Wet/dry vacuum or submersible pump for draining (if no drain valve)
- Flashlight or headlamp (to inspect inside the tank)
- Rubber gloves and eye protection
Materials
- Household bleach — unscented, 5.25–8.25% sodium hypochlorite
- Dish soap (mild — for scrubbing)
- Clean water for rinsing and refilling
- Baking soda (for odor neutralizing)
Safety Precautions
- Never mix bleach with ammonia or vinegar — creates toxic chloramine or chlorine gas.
- Ventilate confined spaces — if you’re entering a large tank, ensure it’s completely ventilated. Never enter an enclosed tank that has contained standing water without proper confined space protocols — hydrogen sulfide and oxygen depletion are serious risks in large enclosed tanks.
- Use food-grade concentrations of bleach for potable water tanks — the EPA recommends 1/8 teaspoon of 5.25% unscented bleach per gallon of water for disinfecting potable water containers.
- Rinse completely before refilling for drinking water — residual bleach above 4 mg/L is unsafe for consumption. Multiple thorough rinses are required.
How to Clean a Plastic Water Tank Step by Step
Step 1: Drain the Tank Completely
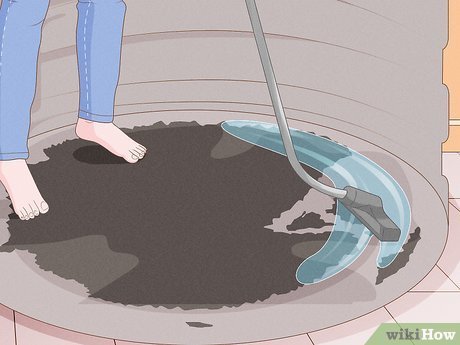
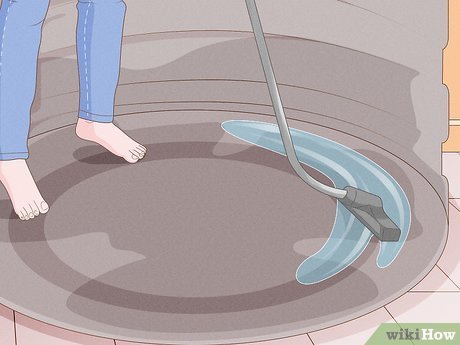
Open the drain valve at the bottom of the tank and allow it to drain completely. If there’s no drain valve, use a submersible pump, a siphon hose, or a wet/dry vacuum to remove all water. For large above-ground tanks, the drain valve is the most practical option. Direct the drained water to an appropriate location — algae-laden water from a storage tank should not go directly into a storm drain in many municipalities.
Step 2: Remove Sediment and Sludge
With the tank drained, use a flashlight to inspect the interior. Most tanks develop a layer of sediment, leaf debris, and sludge at the bottom. Scoop out as much solid material as possible with a small bucket or dustpan. Rinse the tank with a garden hose to loosen remaining sediment, then drain again. Getting the loose material out first prevents it from recontaminating the cleaning water during the scrubbing step.
Step 3: Scrub with Dish Soap Solution
Mix a solution of dish soap and warm water. Using a long-handled scrub brush, scrub all interior walls, the bottom, the inlet area, and around any fittings. Pay particular attention to the waterline — algae grows fastest at the water-air interface and the ring of deposits at the previous water level is often the heaviest buildup area. For tanks with narrow openings, attach the brush to a pole extension. Scrub until no visible slime or discoloration remains on the tank walls.
Step 4: Rinse Thoroughly
Rinse the tank with a garden hose until the rinse water runs completely clear with no soap suds. Drain completely. This step ensures the bleach disinfection step works effectively — organic matter and soap residue react with bleach and reduce its disinfecting power significantly.
Step 5: Disinfect with Bleach Solution
Prepare a disinfecting solution using unscented household bleach:
- For potable water tanks: 1/4 cup of 5.25% bleach per 15 gallons of clean water
- For non-potable irrigation or rainwater tanks: 1 cup of 5.25% bleach per 30 gallons of water
Fill the tank with enough clean water to create this concentration. Using your scrub brush, work the bleach solution against all interior surfaces, the inlet pipe, and the drain valve area. Allow the solution to sit for a minimum of 30 minutes — 2 hours for tanks with heavy algae or biofilm contamination. The bleach kills bacteria, algae spores, and destroys biofilm.
Step 6: Drain and Rinse Multiple Times
Drain the bleach solution completely. Refill the tank with clean water to at least 1/4 capacity, agitate or scrub briefly, and drain again. Repeat this fresh water rinse cycle at least 3 times for potable water tanks. After the final rinse, the water should have no noticeable bleach odor. If you still smell chlorine strongly after 3 rinses, do one more rinse cycle. For non-potable tanks, 2 thorough rinse cycles are sufficient.
Step 7: Inspect Fittings, Lid, and Vent
While the tank is empty and clean, inspect the inlet screen and overflow screen for debris. Clean these with a brush and rinse. Inspect the tank lid gasket — a failed gasket allows insects and debris to enter. Check the vent screen if present — a clogged vent causes vacuum lock during draining and can deform the tank under pressure. Replace any damaged screens or gaskets.
Step 8: Refill
Close the drain valve securely and refill with clean water. For rainwater tanks, confirm the first-flush diverter is functioning if installed — this diverts the first flow of rainwater (which carries the most contamination from roof washing) away from the tank. For municipal water storage, refill normally. Test the water if the tank is for drinking — a basic water test kit checks for pH, chlorine, and bacterial contamination.
Cleaning Frequency
| Tank Use | Cleaning Frequency |
|---|---|
| Drinking water storage | Every 6–12 months; immediately after any flood, contamination event, or long storage period |
| Rainwater harvesting (non-potable) | Annually |
| Irrigation water tank | Annually — before each growing season |
| Emergency water storage (sealed) | Every 2–3 years if properly sealed; annually if frequently accessed |
Pro Tips
- Use a dark-colored or opaque tank — UV light penetrating clear or light-colored tanks accelerates algae growth dramatically. If you have a clear tank, shade it or paint the exterior with UV-blocking paint.
- Install a first-flush diverter on rainwater collection systems — this single addition dramatically reduces contamination entering the tank from roof washing, reducing cleaning frequency.
- Check the inlet screen after every heavy rain — leaves and debris pushed in during heavy flow will decompose in the tank and accelerate sludge buildup between full cleans.
Frequently Asked Questions
How do I get rid of algae in my water tank?
Physical scrubbing removes the visible algae, but the bleach disinfection step kills the spores that cause regrowth. After cleaning, reduce algae regrowth by covering the tank to block sunlight, keeping the tank sealed, and ensuring overflow vents are screened to prevent airborne spore entry. Copper-based algaecides are sometimes used in large tanks but require careful dosing and are not appropriate for potable water systems.
Is it safe to drink rainwater from a clean plastic tank?
Rainwater collected from rooftops is not reliably safe for drinking without treatment even from a clean tank — it picks up bird droppings, lead from old roofing materials, pesticide residue, and atmospheric pollutants during collection. For potable use, rainwater should be filtered and UV-treated or boiled. For non-potable uses (irrigation, toilet flushing, laundry), clean rainwater from a properly maintained tank is generally safe.
How much bleach do I use to disinfect a 1,000-gallon tank?
For a 1,000-gallon tank, use approximately 1 gallon of 5.25% unscented household bleach to create a disinfecting solution. Fill with water to allow mixing and circulation, let sit for 2 hours, then drain and rinse thoroughly. This is a higher concentration suitable for disinfection purposes — not for drinking water directly. After disinfection and multiple rinse cycles, the residual chlorine drops to safe levels.
What causes the black slimy coating inside my tank?
Black slime in a water tank is typically biofilm — a community of bacteria and microorganisms that forms a protective matrix on the tank walls. Biofilm is more resistant to bleach than free-floating bacteria because the matrix protects the organisms inside it. Physical scrubbing to break up the biofilm before disinfection is critical — bleach alone won’t penetrate thick biofilm without mechanical disruption first.
Conclusion
Cleaning a plastic water tank annually prevents the sediment, algae, and biofilm buildup that contaminates stored water and clogs downstream equipment. The process — drain, scrub, bleach, rinse thoroughly, refill — takes 2–4 hours for most residential tanks and ensures the water you’re storing is safe and clean. Pair the cleaning with a check of inlet screens, vents, and lid gaskets and you’ll extend the tank’s life while maintaining water quality.
For related water system maintenance, see our guide on how to clean a water filter to maintain filtration equipment downstream of your storage tank. For pond water maintenance, our guide on how to clean a pond covers larger open water features.
