
Most water filters can be cleaned to extend their useful life — but the method depends on the filter type. Sediment filters and ceramic filters can be rinsed or scrubbed and reused. Carbon block filters and reverse osmosis membranes are consumables that must be replaced on schedule, not cleaned. This guide covers how to clean the filter types that respond to cleaning, and explains when replacement is the only correct option.
What You’ll Need
- Clean water or distilled water
- Soft brush or toothbrush
- White vinegar or citric acid solution
- Mild dish soap (for housing cleaning only)
- Rubber gloves
- Bucket or sink
- Filter housing wrench (if applicable)
- Clean cloth or paper towels
Safety and Precautions
Always shut off the water supply to the filter before disassembling. If cleaning a whole-house filter, relieve pressure in the housing by pressing the pressure relief button (if equipped) or slowly opening a downstream tap. Wash hands thoroughly before handling filter components. Never use bleach to clean activated carbon filters — bleach degrades carbon media. Do not use harsh chemical cleaners on any filter component that will contact drinking water.
Filter Types: What Can Be Cleaned vs. What Must Be Replaced
| Filter Type | Cleanable? | Cleaning Method |
|---|---|---|
| Sediment filter (spun polypropylene) | Sometimes — low turbidity units | Backwash/rinse under running water |
| Ceramic filter | Yes | Brush scrub and rinse |
| Sand/gravel filter | Yes | Backwashing |
| Activated carbon block | No — replace only | — |
| Carbon GAC (granular) | No — replace only | — |
| Reverse osmosis membrane | No — replace only | — |
| UV filter sleeve | Yes — clean outer quartz sleeve | Citric acid soak |
How to Clean a Sediment Filter Cartridge
Shut Off Water Supply and Release Pressure
Turn off the water supply valve feeding the filter. Press the pressure relief button on the filter housing if your model has one, or open a nearby tap to release pressure. This prevents water from spraying when you open the housing.
Remove the Filter Housing
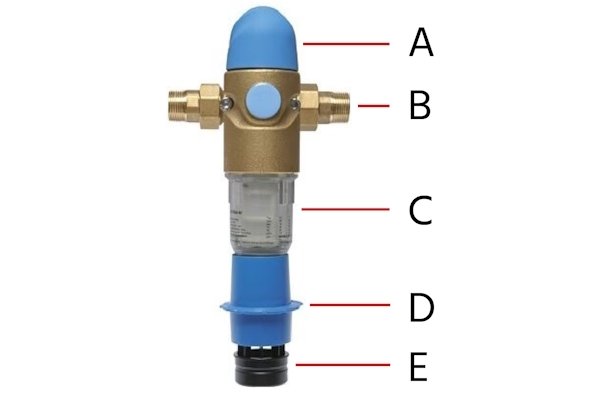
Use a filter housing wrench or grip firmly and unscrew the housing cap counterclockwise. Place a bucket under the housing to catch any residual water. Remove the filter cartridge from the housing.
Rinse the Cartridge Under Running Water
Hold the sediment cartridge under cold running water with the water flowing from the outside inward — the reverse of the normal filtration direction (backwash). This flushes trapped sediment back out the way it came in. Turn and rotate the cartridge while rinsing to clean all surfaces.
Soft Brush Scrub if Needed
If sediment is firmly embedded in the filter pleats or surface, use a soft brush to gently scrub while continuing to rinse. Don’t use hard bristles or abrasive pads — they can damage the filter material.
Inspect Before Reinstalling
Hold the filter up to a light source. If you can see through it reasonably well and the material is intact, it can be reused. If the filter is brown or black throughout, has tears, or water barely passes light through it, replace it — rinsing can remove surface debris but can’t restore a truly spent filter.
Reinstall and Restore Water Supply
Reinstall the cartridge in the housing, making sure it’s seated properly. Hand-tighten the housing cap (use the wrench for the final quarter turn only — overtightening cracks the housing). Restore the water supply, check for leaks at the housing connection, and run water through the filter for two minutes before using for drinking.
How to Clean a Ceramic Water Filter
Remove the Ceramic Filter Element
Ceramic filters are common in countertop gravity filter systems (like Berkey-style units) and some undersink systems. Remove the ceramic element carefully — they’re fragile and chip easily. Handle them over a padded surface or the sink.
Scrub Under Running Water
Hold the ceramic element under cold running water. Use a soft-bristle brush (a dedicated soft toothbrush works well) to scrub the entire outer surface. The outer ceramic layer traps contaminants, and scrubbing removes the top layer along with the trapped particles, exposing fresh ceramic underneath.
Continue Until Water Runs Clear
Keep scrubbing and rinsing until the water running off the ceramic element runs completely clear. The scrubbing turns the water brown or gray at first — that’s the contamination layer being removed.
Soak in Citric Acid for Mineral Deposits
If the ceramic element has heavy white mineral scale, mix one tablespoon of citric acid powder per quart of water and soak the element for 30 minutes. This dissolves calcium deposits that reduce flow rate without damaging the ceramic media. Rinse thoroughly after soaking.
Reinstall and Prime
Reinstall the ceramic element following your manufacturer’s assembly instructions. Run water through the filter for several minutes before using for drinking to flush any loosened particles or residue from the cleaning process.
How to Clean a Sand Filter (Pool or Whole-House)
Sand filters in pool systems and some whole-house systems are cleaned by backwashing — reversing the water flow through the filter to flush trapped particles out the waste line. Turn the multiport valve to the backwash setting, run until the sight glass clears (typically two to three minutes), then switch to rinse for 30 seconds before returning to the filter position. Perform this process when the pressure gauge reads 8–10 psi above the clean starting pressure. Full sand replacement is needed every five to seven years regardless of backwashing frequency.
How to Clean a UV Filter Quartz Sleeve
UV filters kill bacteria using ultraviolet light through a quartz sleeve surrounding the UV lamp. The quartz sleeve itself can develop mineral scale that reduces UV penetration and effectiveness. Soak the quartz sleeve in a citric acid or vinegar solution for 30 minutes, then wipe clean with a soft cloth. Never touch the UV lamp with bare hands (skin oils reduce UV output) — handle it with clean cloth or gloves only.
How Often to Clean Water Filters
- Sediment cartridge filters: Inspect monthly; clean or replace every 2–6 months depending on turbidity
- Ceramic filters: Clean every 4–6 weeks during use, or when flow rate noticeably decreases
- Sand filters (pool/whole house): Backwash when pressure rises 8–10 psi above baseline
- Carbon filters: Replace every 3–6 months — these cannot be cleaned
- Reverse osmosis membrane: Replace every 1–2 years
- UV quartz sleeve: Clean annually; replace UV lamp annually
Pro Tips
- Keep a filter log: Write down when you installed or last cleaned each filter. Filters that aren’t tracked on a schedule tend to get forgotten until they fail.
- Clean housings too: When you change or clean a filter cartridge, wipe out the inside of the housing with a cloth dampened with a mild vinegar solution. Slime and biofilm can grow in the housing, not just on the filter itself.
- Don’t over-clean sediment filters: A sediment filter that you rinse and reuse too many times may look clean but has lost its filtration efficiency. If in doubt, replace it.
Frequently Asked Questions
Can you clean and reuse a carbon water filter?
No. Activated carbon filters work by adsorption — contaminants bind to the carbon media. Once the carbon is saturated, it cannot be regenerated by household cleaning. Rinsing a carbon filter may restore some flow but does not restore filtration capacity. Replace carbon filters on schedule.
How do I know when my water filter needs cleaning or replacement?
Signs include reduced water flow or pressure, unusual taste or odor in filtered water, the filter indicator light turning on, or reaching the manufacturer’s recommended service interval (check your manual). For sediment filters, visual browning of the cartridge is a clear indicator.
Is it safe to drink water right after cleaning a filter?
After cleaning a sediment or ceramic filter, always flush water through the system for two to five minutes before drinking. This removes any loosened particles from the cleaning process. For chemical cleaning methods, ensure all citric acid or vinegar residue is fully flushed out.
Can I use bleach to clean a water filter?
Never use bleach on activated carbon or carbon block filters — bleach degrades the carbon media and contaminates it. For ceramic filters and sediment housings, diluted food-safe sanitizers are acceptable. Always check your filter manufacturer’s cleaning guidelines before using any chemical.
What happens if I don’t clean or replace my water filter?
A clogged or expired filter stops removing contaminants effectively and can actually become a source of contamination — bacteria and biofilm can grow on saturated filter media. Reduced flow, pressure problems, and worsening water taste are early warning signs of a filter that needs service.
Conclusion
Keeping water filters clean and on replacement schedule is one of those maintenance tasks that’s easy to overlook but directly affects your household’s water quality. The rule is straightforward: ceramic and sediment filters can be cleaned and extended; carbon and RO filters must be replaced. Either way, the housing around the filter also needs regular cleaning — a clean cartridge in a slimy housing defeats the purpose. For a related task, see our guide on how to clean a water dispenser to keep the complete water delivery system in top shape.
