
A water dispenser should be cleaned every one to two months to prevent bacteria, algae, and mold from growing inside the reservoir and water lines. The cleaning process takes about 30 minutes using diluted vinegar or a food-safe bleach solution. You’ll clean the reservoir, flush the lines, scrub the spigots, and wipe the exterior — this guide covers both countertop and freestanding water cooler dispensers.
What You’ll Need
- White distilled vinegar or unscented household bleach
- Clean water
- Small brush or bottle brush
- Soft cloth or sponge
- Toothbrush (for spigot scrubbing)
- Rubber gloves
- Bucket or large bowl
- Dish soap
Safety and Precautions
Unplug the water dispenser before cleaning — especially important for models with heating and cooling elements. If using bleach, wear rubber gloves and work in a ventilated space. Never mix bleach and vinegar. If your dispenser has a hot water function, the heating tank must cool down completely before you drain or disassemble any parts. Always run multiple clean water flushes after sanitizing to ensure no bleach or vinegar residue remains in the water lines before use.
How to Clean a Countertop or Bottom-Load Water Dispenser
Unplug and Empty the Dispenser
Unplug the unit from the wall. Drain all remaining water by pressing both the hot and cold spigots until water stops flowing. For bottom-load dispensers, remove the water bottle and drain any water from the pump area. Removing all remaining water before cleaning prevents the cleaning solution from being diluted.
Remove and Clean the Reservoir or Water Bottle Holder
On top-load dispensers, remove the water bottle and take out the drip tray. On bottom-load models, remove the water bottle and any internal components as specified in your model’s manual. Wash the drip tray and any removable parts in warm soapy water, scrub with a soft brush, rinse, and set aside to dry.
Make the Cleaning Solution
For a vinegar clean: mix one cup of white distilled vinegar with one gallon of clean water. For a bleach sanitization: mix one tablespoon of unscented household bleach per gallon of water. Use one or the other — not both in the same cleaning session.
Pour Cleaning Solution into the Reservoir
Pour the cleaning solution into the water reservoir (the internal tank where water is held before dispensing). Fill the reservoir fully. Allow the solution to soak for five minutes to let it reach all interior surfaces.
Flush Through the Spigots
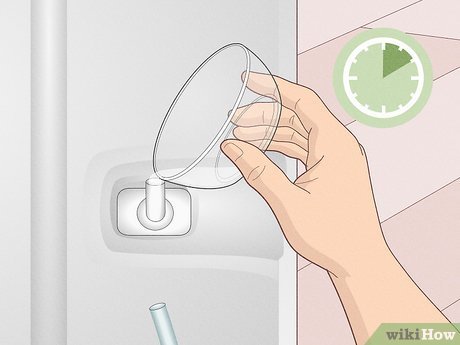
Place a large bowl or bucket under the spigots. Open both the hot and cold spigots and let the cleaning solution flow through the lines until the reservoir is empty. This flushes the solution through the internal water lines, killing bacteria and removing slime buildup in the tubes that you can’t reach with a brush.
Scrub the Spigots
Remove the spigot nozzles if they detach on your model. Use a toothbrush dampened with cleaning solution to scrub inside and around the spigot openings — these are the highest-contact areas and accumulate the most bacteria. Rinse the nozzles under running water before reattaching.
Rinse with Clean Water — Multiple Times
Refill the reservoir with clean water and flush through both spigots. Repeat this clean water flush at least three times. The water coming out should taste and smell completely neutral — no vinegar or bleach. Run an extra flush cycle if you can still detect any cleaning solution taste or smell.
Wipe Down the Exterior
Wipe the entire exterior of the dispenser with a clean damp cloth dampened with a mild soap solution. Pay attention to the spigot handles, the top loading area, and the sides where splashes and hand oils accumulate. Follow with a clean damp cloth to remove soap, then dry with a clean towel.
Reassemble and Reconnect
Replace the drip tray and any components you removed. Reinstall the water bottle (top-load) or reconnect the bottom-load pump to a fresh bottle. Plug the unit back in and allow it to cool and heat back to operating temperature before dispensing water for drinking — typically 15 to 20 minutes.
How to Clean a Freestanding Water Cooler Dispenser
Freestanding water cooler dispensers follow the same cleaning sequence as countertop models, but have a few additional considerations. The larger reservoir and longer internal lines benefit from a longer soak — leave the cleaning solution in for 10 minutes instead of five before flushing. Some freestanding coolers have a rear drain plug for emptying — consult your manual to locate it, as using it makes draining much easier than running all the water through the spigots. Clean the reservoir area where the water bottle sits (the baffle collar at the top) with a bottle brush and vinegar solution — this area often develops a slimy biofilm that’s easy to miss.
How Often to Clean Your Water Dispenser
- Every 1–2 months: Full cleaning cycle as described above
- Every water bottle change: Wipe the baffle collar and spigot nozzles with a clean damp cloth
- Weekly: Empty and wipe out the drip tray
- Immediately: Clean if you notice slime, unusual taste, or visible growth inside the reservoir
Pro Tips
- Clean when replacing the bottle: The easiest time to clean is right when the old bottle empties — the reservoir is already nearly empty, minimizing the amount of water to drain.
- Use citric acid instead of vinegar: Citric acid powder dissolved in water (one tablespoon per gallon) works as well as vinegar with less odor — helpful if the vinegar smell lingers after rinsing.
- Don’t forget the drip tray: The drip tray holds standing water and is one of the first places mold appears. Empty and wash it every week.
- Check the water quality in your area: Hard water leaves mineral deposits inside dispensers faster. If your tap water is hard, clean your dispenser every four to six weeks rather than every two months.
Troubleshooting
- Water tastes or smells off after cleaning: You haven’t rinsed enough. Run three more full clean-water flush cycles through both spigots before using.
- Visible black or green growth inside reservoir: This is mold or algae. Use the bleach sanitization method and scrub all accessible interior surfaces with a bottle brush before flushing.
- Water dispenses slowly after cleaning: Air may have entered the lines during the cleaning process. Fully open both spigots and run water through until normal flow resumes.
- Persistent bad taste after multiple flushes: The internal lines may have a buildup that won’t flush out. Contact the manufacturer or consider a professional service cleaning.
Frequently Asked Questions
How often should I clean my water dispenser?
Clean it every one to two months during regular use. If multiple people use it daily, lean toward monthly cleaning. The NSF (National Sanitation Foundation) recommends cleaning water coolers every six to twelve weeks, but monthly is better for household health.
Can I use apple cider vinegar to clean a water dispenser?
White distilled vinegar is the correct choice. Apple cider vinegar contains organic acids and residues that can leave a taste and potentially promote bacterial growth. Always use clear, distilled white vinegar.
Is it safe to drink from a water dispenser that hasn’t been cleaned in a while?
Potentially not. Water dispensers that haven’t been cleaned can harbor bacteria including Legionella, E. coli, and mold. If your dispenser has been unused or uncleaned for more than three months, run a full cleaning and flush cycle before drinking from it.
Do I need to clean a brand-new water dispenser before using it?
Yes — run a cleaning flush cycle before first use. New dispensers may have manufacturing residues or dust inside the reservoir and lines. A single vinegar-and-water flush before first use is sufficient.
My water dispenser has a filter — do I clean that too?
Water dispenser filters are typically replaced rather than cleaned. Check your manufacturer’s guidance for the replacement schedule — most filters are replaced every three to six months. A clogged or expired filter can reduce water quality and flavor even with a clean reservoir.
Conclusion
A clean water dispenser delivers safe, fresh-tasting water and protects everyone who uses it from invisible bacterial growth inside the tank and lines. The monthly cleaning routine takes about 30 minutes, and the biggest payoff is the multiple flush cycles that ensure no cleaning solution carries over into your drinking water. If you have other water-connected appliances at home, our guide on how to clean a plastic water tank covers the same principles for larger residential tanks.
