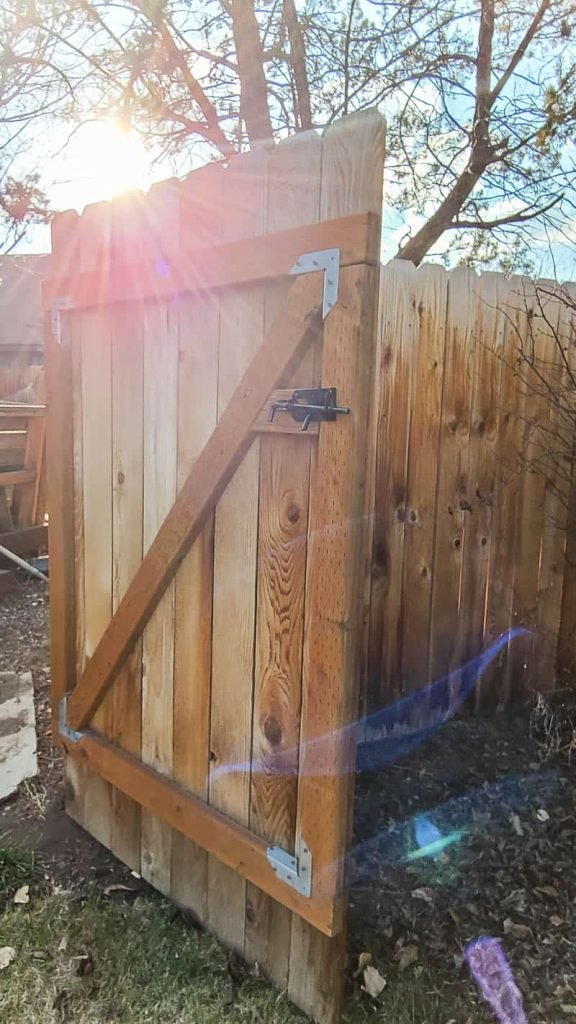
A sagging, dragging gate is one of the most common and most avoidable fence problems. The solution is in the initial build: a properly framed gate with a diagonal tension brace, heavy-duty hinges, and a strong gate post will swing smoothly and stay square for years. A sagging gate without the tension brace will drag within the first season. This guide covers how to build, brace, and hang a single wood gate — the right way the first time.
What You’ll Need
Tools
- Circular saw or miter saw
- Drill/driver and bits
- Carpenter’s square and level
- Tape measure and pencil
- Clamps (bar clamps)
- Safety glasses and work gloves
Materials
- 2×4 lumber (for gate frame stiles and rails)
- 1×6 cedar pickets (to match your fence)
- 3/8-inch galvanized or stainless steel tension wire and turnbuckle (for anti-sag diagonal brace) OR a premade anti-sag gate kit
- Heavy-duty gate hinges (3.5-inch strap hinges or heavy T-hinges rated for gate weight)
- Gate latch (ring-pull, thumb latch, or bolt latch)
- 3-inch exterior screws (for frame) and 2-inch exterior screws (for pickets)
- Post anchor hardware (for gate post)
Safety and Precautions
- Size hinges to the gate weight. A 36-inch by 6-foot cedar gate weighs 40–70 lbs. Use hinges rated for at least twice the gate’s anticipated weight — undersized hinges are the leading cause of premature gate failure.
- Use a dedicated gate post that is at least one size larger than your fence posts — 4×6 or doubled 4×4. A gate post carries the full dynamic load of the swinging gate plus the fence load, and must be set deeper and more solidly than standard fence posts.
- The diagonal tension brace is not optional. Every wood gate wider than 24 inches will sag without a diagonal tension brace — gravity, wood weight, and the lever arm of an open gate pulls the latch-side corner down. The brace counteracts this force.
- Pre-drill all screw locations in cedar to prevent splitting the pickets at the edges.
Understanding Gate Sag Prevention
Gates sag because the latch corner droops under the weight of the gate extending away from the hinge post. A diagonal brace from the bottom hinge corner to the top latch corner (running under tension) resists this force. The hinge corner is the anchor; the diagonal brace pulls the latch corner back up. The brace can be a wood diagonal member (in compression) or a tension wire with turnbuckle (in tension) — both work, but the wire/turnbuckle system allows adjustment as the gate settles over time.
Step-by-Step: How to Build a Wooden Gate
Step 1 — Measure the Gate Opening
Measure the clear distance between the hinge post and the latch post at the top and bottom of the gate opening — these measurements are often not identical (posts can be slightly out of plumb). Build your gate to the smaller dimension with a 1/2-inch gap on each side (1-inch total) for swing clearance. Build the gate to the desired height — typically matching the fence height. Larger gates (48 inches wide or more) should be built with this gap in mind since wood expands in humidity.
Step 2 — Cut the Gate Frame Members
From 2×4 lumber, cut: two vertical stiles at the full gate height, and two horizontal rails at the net width (gate width minus the two stile widths). The top rail and bottom rail sit between the stiles. This creates the basic rectangular frame. For a gate over 48 inches wide, add a middle horizontal rail for additional stiffness.
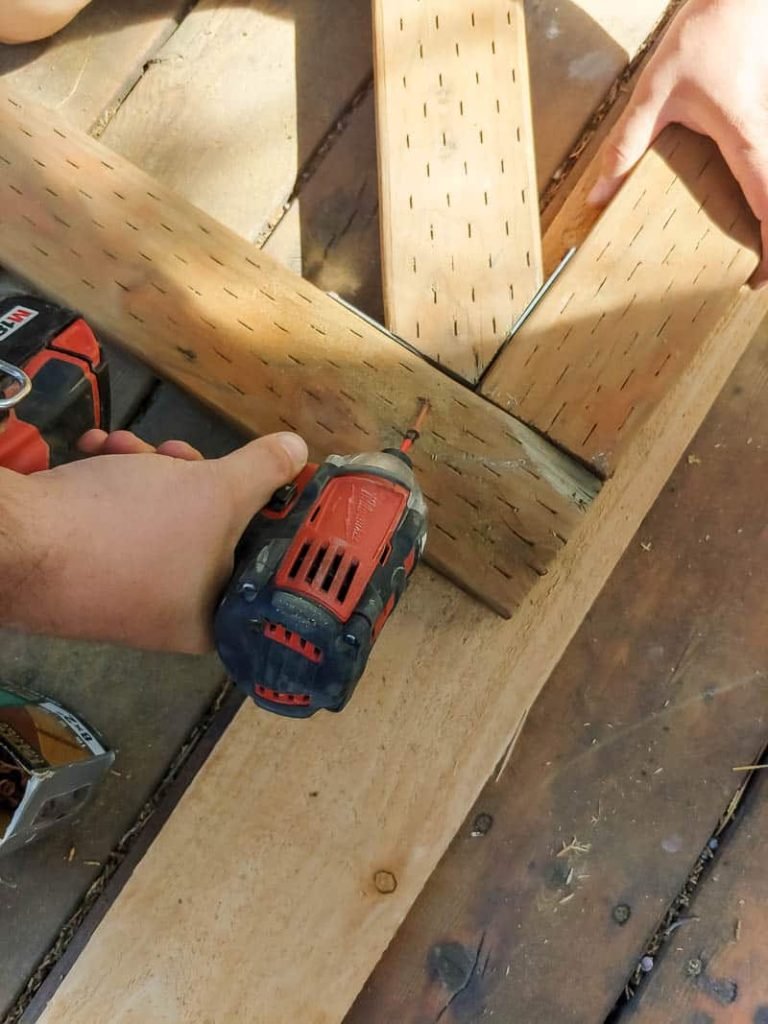
Step 3 — Assemble the Frame
Lay the frame members on a flat, level surface (a garage floor or large workbench). Position the two rails between the two stiles, flush with the top and bottom of the stiles. Drill two pocket holes at each end of both rails (or predrill for 3-inch screws), apply a bead of exterior wood glue at each joint, and drive screws to join the frame. Use a carpenter’s square to check every corner — the frame must be perfectly square before attaching pickets. If a corner is out of square, clamp it square before the glue sets.
Step 4 — Add the Diagonal Tension Brace
Option A — Steel wire and turnbuckle: Install a screw eye at the bottom hinge-side corner of the frame (the corner that will be at the bottom near the hinges) and another screw eye at the top latch-side corner (the top opposite corner). Run a length of galvanized or stainless wire between the two screw eyes and connect through a turnbuckle. Tighten the turnbuckle until the wire is moderately taut — this is your anti-sag tension system. The turnbuckle allows future adjustment if the gate settles.
Option B — Wood diagonal brace: Cut a 2×4 diagonal at matching angles from the top latch-side corner to the bottom hinge-side corner and screw it into the gate frame. This works in compression but is less adjustable than the wire system. Note: a wood diagonal works in COMPRESSION — it must run from the BOTTOM hinge corner to the TOP latch corner to resist sag correctly. Running it the opposite direction provides no sag resistance.
Step 5 — Attach Pickets to the Frame
Lay the gate frame flat and attach pickets (1×6 cedar) to the front face of the frame with exterior screws. Pre-drill each screw hole to prevent splitting. Drive two screws per picket at the top rail and two at the bottom rail — this is a minimum of four fastening points per picket. Space pickets consistently, matching the spacing of your fence. Trim the first or last picket as needed to fill the frame to the correct width, cutting it rip-wise on a table saw or with a straight-edge guided circular saw.
Step 6 — Install the Gate Post
A gate post must be stronger than a standard fence post. Use a 4×6 post (or two 4×4 posts bolted together) set at least 3 feet in the ground in concrete — deeper than your standard fence posts. Allow the concrete to cure fully (24 hours minimum) before hanging the gate. A gate post set too shallow or without adequate concrete will eventually lean from the repeated load of the swinging gate, causing the gate to bind and drag.
Step 7 — Mark and Install Hinges
Hold the gate in its open position against the hinge post, propped at the correct height with blocks — leave 2 inches of clearance above the ground at the bottom of the gate, and align the top of the gate with the fence top. Mark the hinge positions on the gate stile and the post. For a standard 36-inch wide, 6-foot tall gate, use three hinges: one 10 inches from the top, one 10 inches from the bottom, and one in the middle. Remove the gate and mount the hinge leaves to the gate stile first, then carry the gate to the post and screw the post-side hinge leaves to the post. Three-leaf heavy-duty hinges (strap hinges) work best for wooden gates — use 3/8-inch lag screws, not wood screws, for hinge attachment to the post.
Step 8 — Hang the Gate and Check Swing
With the hinges installed on both the gate and the post, test the swing. The gate should swing freely and smoothly from fully open to fully closed without binding at the top, bottom, or corners. Check the gap is consistent on the latch side from top to bottom. If the gate binds at the top-latch corner, the gate is sagging — tighten the turnbuckle or check that the diagonal brace is oriented correctly. If it binds at the bottom, check that the hinge post is plumb.
Step 9 — Install the Gate Latch
Install the latch hardware on the gate and the post. A spring-loaded ring latch is simple and reliable for pedestrian gates; a slide bolt or barrel bolt provides more security. For a gate with children, consider a safety latch installed high on the post (above child reach) in addition to the standard latch. Test the latch from both sides — it should engage positively when the gate swings closed and release smoothly from the inside.
Step 10 — Add a Gate Stop and Finish
Install a gate stop — a rubber doorstop bumper or wooden block mounted on the latch post — to prevent the gate from swinging open beyond 90 degrees and damaging the hinges. Apply exterior wood sealer, stain, or paint to the gate, matching the fence finish. Pay particular attention to sealing the end grain at the top and bottom of the gate — these surfaces absorb the most moisture and are the first to deteriorate.
Pro Tips for Wooden Gate Building
- Always use stainless steel or hot-dipped galvanized hardware for gates — zinc-plated screws and hinges rust quickly outdoors and leave staining rust streaks on cedar pickets.
- Build the gate in the shade or on a cool day when possible — wood dimensions change slightly with temperature and humidity, and a gate built in the heat of summer may be marginally smaller when temperatures cool.
- Make the turnbuckle adjustment easy to access after installation — a turnbuckle that’s inaccessible after the gate is hung is useless for future adjustment.
- Limit gate width to 6 feet for a single gate. Gates wider than 6 feet should be double gates (two separate gate panels meeting in the middle) — a single gate wider than 6 feet is very difficult to brace adequately and puts enormous stress on the gate post.
Frequently Asked Questions
Why does my wooden gate sag?
Gate sag has two causes: (1) no diagonal tension brace (or the brace is running the wrong direction — it must go from bottom-hinge-corner to top-latch-corner), or (2) an undersized or undersupported gate post that has shifted. Fix a sagging gate first by adding or adjusting the tension brace. If the post has moved, re-setting the post is the only permanent fix.
How do I prevent a wooden gate from warping?
Use quality, stable lumber — vertical grain cedar is the most stable. Seal all surfaces (including the back face and all end grain) with exterior stain or sealer. The frame structure with diagonal brace also prevents warping by keeping the gate square as the wood moves with humidity changes. Avoid leaving the gate in a wet environment without adequate ventilation.
What size hinges do I need for a wooden gate?
For a gate up to 3 feet wide and 6 feet tall: two heavy-duty strap hinges (3-3.5 inch leaf width). For a gate 3–4 feet wide: three heavy-duty strap hinges. Heavy T-hinges or 3-inch ball-bearing hinges also work. The key is using lag screws (not wood screws) for attachment into the post — wood screws pull out; lag screws don’t.
How do I make a wooden gate that self-closes?
Install a spring hinge (a hinge with an internal coil spring mechanism) in place of one of the standard hinges. Adjust the spring tension by rotating the adjustment collar. Spring hinges automatically return the gate to the closed position after each use — useful for pool gates and backyard gates where you want automatic closure. They’re available in sizes matching standard strap hinge dimensions.
How do I align a gate that won’t close correctly?
If the gate closes fine at the top but gaps at the bottom (or vice versa), the gate post is out of plumb. Check the hinge post with a level and shim the base if needed. If the gate is square but the gap is inconsistent from top to bottom, adjust the hinge positions: loosen the screws, move the hinge slightly, and re-tighten. European-style adjustable hinges allow easier fine-tuning after installation.
Conclusion
Building a wooden gate that stays square and swings smoothly for years comes down to three things: a strong, properly set gate post; a well-braced gate frame with a diagonal tension brace running from the bottom hinge corner to the top latch corner; and correctly sized hardware installed with lag screws. Get these three elements right and your gate will outlast the fence around it.
For the complete fence around your gate, see our guide on How to Build a Wood Fence. And if you’re building shed doors using similar framing techniques, check out our How to Build Shed Doors guide.
