Waxing a floor protects it from scratches, moisture, and daily wear while giving it a deep, hard shine. Not every floor type needs or accepts wax — tile, vinyl composition tile (VCT), and unfinished or lightly finished hardwood are the primary candidates. The process is straightforward: strip the old wax buildup, clean thoroughly, apply thin coats of fresh wax, allow to dry, and buff to a shine. Done correctly, a freshly waxed floor can go 6–12 months before needing another full strip-and-rewax.
What Floors Can (and Cannot) Be Waxed
Before you start, confirm your floor type accepts wax:
- Can be waxed: Unfinished hardwood, lightly finished hardwood (if wax was previously used), vinyl composition tile (VCT — common in commercial kitchens and laundry rooms), and some linoleum floors.
- Cannot be waxed: Polyurethane-finished hardwood (wax won’t bond and creates a slippery mess), laminate (wax causes buildup and dulling — it cannot be stripped without damage), luxury vinyl plank (LVP) and sheet vinyl (wax is unnecessary and causes buildup), and ceramic or porcelain tile (wax clogs grout and causes slipping).
If your hardwood has a polyurethane finish, it does not need wax — it needs periodic recoating with polyurethane, not wax. The test: put a few drops of water on the floor. If they bead up and sit on the surface, the floor has a surface finish (polyurethane) and should not be waxed. If the water soaks in slowly, the floor may have an old penetrating oil or wax finish and can be rewaxed.
What You’ll Need
For Stripping
- Commercial floor stripper (ammonia-based or dedicated wax stripper — check your wax product’s matching stripper)
- Mop and bucket
- Floor scrubbing pad (black or red commercial scrub pad) or a floor buffer with a stripping pad
- Rubber gloves and eye protection
- Floor squeegee or wet-dry vacuum (to remove stripper residue)
For Waxing
- Floor wax appropriate to your floor type (Trewax Paste Wax for hardwood, Johnson Paste Wax, or Holloway House Quick Shine for VCT/vinyl)
- Flat mop or wax applicator pad
- Clean applicator lambswool pad or flat foam mop (for liquid wax)
- Floor buffer or electric polisher (for buffing — strongly recommended over hand-buffing)
- Soft buffing pad (white or tan — not black or red stripping pads)
Safety Precautions
Floor strippers are strong ammonia or solvent-based chemicals. Wear rubber gloves and eye protection, and ensure excellent ventilation — open windows and run a fan directed out of the room. Never mix floor stripper with bleach or other cleaning chemicals. The floor will be extremely slippery during and immediately after stripping — keep others out of the work area. Waxed floors are slippery until buffed; never walk on unwaxed wet wax coats. Keep pets and children out of the room during the entire process and until the final buffed coat is fully dry.
How to Wax a Floor Step by Step
Step 1: Clear and Clean the Floor
Remove all furniture, rugs, and items from the room. Sweep and vacuum thoroughly — any grit left on the floor will be trapped under the wax. Damp-mop the floor with your regular cleaner to remove surface dirt and oils. Allow the floor to dry completely before proceeding — wax applied over a damp surface won’t bond properly and will appear cloudy or milky after drying.
Step 2: Strip the Old Wax (If Rewaxing)
If the floor has been waxed before, strip the old wax before applying fresh coats. Old wax buildup (especially in corners and along baseboards) looks yellow or brown and feels sticky or rough underfoot. Dilute your floor stripper per the label directions — typically 1 part stripper to 3–4 parts water — and mop it onto the floor. Let it dwell for 5–10 minutes (check label) to soften the old wax. Scrub with a floor scrub pad in circular motions, working from far corners toward the exit. For large areas, a rented floor buffer with a stripping pad dramatically speeds this step. Use a floor squeegee or wet-dry vacuum to remove the stripped wax emulsion — don’t just mop it around. Rinse the floor thoroughly with clean water and allow to dry completely. This step is critical: residual stripper prevents the new wax from bonding.
Step 3: Apply the First Coat of Wax
Pour a small amount of liquid floor wax into the mop bucket (do not dilute — use full-strength unless the label specifies otherwise). Dip your applicator mop or lambswool pad and wring lightly — you want a thin, even application, not puddles. Apply in thin, even coats working from the far corner backward toward the exit. Spread the wax in long, overlapping strokes following the direction of wood grain (for hardwood) or in straight overlapping passes for tile and vinyl. Keep coats thin — thick coats dry cloudy and don’t buff to a shine. Thin is better: two or three thin coats outperform one thick coat in every way.
Step 4: Allow to Dry Completely
Let the first coat dry for 30–45 minutes — or per the product label. The wax will change from milky or translucent to clear as it dries. Do not apply the next coat until the first is fully clear and dry to the touch. Rushing this step traps moisture in the wax layer and causes cloudiness. Avoid foot traffic completely during drying — even a footprint in wet wax will show through the final buffed coat.
Step 5: Apply Additional Coats
For hardwood floors: 2–3 thin coats. For VCT and vinyl: 3–5 thin coats (commercial VCT wax is applied in more coats because of higher traffic wear expectations). Allow each coat to dry fully before applying the next. Do not sand between coats — floor wax coats bond to each other without mechanical preparation. If a coat shows streaks, apply the next coat in a perpendicular direction to fill the gaps.
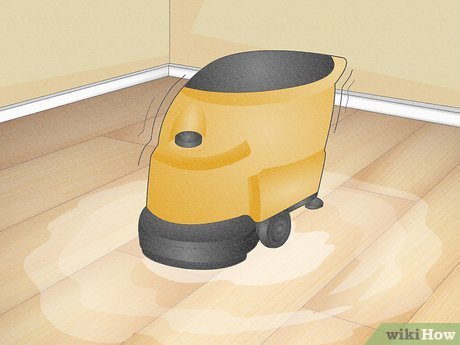
Step 6: Buff to a Shine
Once all coats are dry (allow the final coat to dry at least 1 hour), buff the floor to bring out the shine. Use a floor buffer with a white or tan buffing pad — not the black or red stripping pad. Work in overlapping circular passes across the entire floor. The heat and mechanical action of buffing removes micro-imperfections and hardens the wax surface into a deep, durable shine. For a higher-gloss result, make two buffing passes. For large areas without a buffer, use a weighted floor brush in a back-and-forth pattern, but a power buffer produces dramatically better results with far less effort.
Maintaining a Waxed Floor

Between full strip-and-rewax cycles, maintain the waxed floor by: sweeping daily with a microfiber dust mop, damp-mopping with a pH-neutral floor cleaner only (never use ammonia-based cleaners — they strip wax), and spot-buffing scuffed areas with a soft cloth. When the floor loses its shine in high-traffic areas but is not yet dirty enough for a full strip, apply a single maintenance coat of wax to those areas, allow to dry, and buff. A well-maintained waxed floor should need a full strip-and-rewax only once every 1–2 years.
Pro Tips and Common Mistakes
- Never wax over a polyurethane finish: Wax won’t bond to polyurethane and creates a hazardously slippery surface that can’t be easily removed. Know your floor finish before starting.
- Thin coats only: Thick coats are the number-one cause of cloudy, yellow-looking waxed floors. Thin, even coats that dry clear are what produce a deep, transparent shine.
- Strip completely before rewaxing: Applying fresh wax over old, yellowed wax buildup just seals the problem in. Strip fully — especially in corners and along walls where buildup is always heaviest.
- Buff after every coat, not just the last: Some professional floor finishers lightly buff between coats (with a soft white pad) to level the coat before applying the next. This produces a higher-quality final result.
- Keep doors and windows closed while wax dries: Dust settling onto wet wax creates a rough, dusty surface that won’t buff smooth. Minimize air movement during drying.
Troubleshooting
The Wax Dried Cloudy or Milky
Cloudy dried wax means the floor was damp when the wax was applied, the coat was too thick, or the wax dried too quickly from cold temperatures or a draft. Strip the cloudy coat with a light application of diluted floor stripper, let dry completely (in a warm room), and reapply a thinner coat. Check that the floor is fully dry before reapplying.
The Floor Is Yellowing
Yellowing is old wax buildup — typically 3–5 or more layers of wax have accumulated without being stripped. The old wax oxidizes and discolors. The only fix is a full strip — apply full-strength floor stripper, scrub with a stripping pad, remove with a wet-dry vac, rinse thoroughly, and start fresh. This is the most common problem with older commercial buildings and rental properties.
The Floor Is Slippery Even After Buffing
Over-waxed floors (too many coats without stripping) become slippery because the top layer is too thick to bond fully. Strip back to bare floor and rebuild with 2–3 thin coats. Properly applied and buffed wax is not slippery — it should feel grippy underfoot. If the floor feels slippery, there’s too much wax on it.
Frequently Asked Questions
How often should you wax hardwood floors?
For wax-finished hardwood (not polyurethane): apply a maintenance coat annually in high-traffic areas, and do a full strip-and-rewax every 2–3 years. Spot-buff scuffed areas as needed between full wax cycles.
What is the best floor wax for hardwood?
Trewax Paste Wax and Johnson Paste Wax are both well-regarded for hardwood. They’re solvent-based paste waxes that penetrate the wood slightly and produce a warm, hard finish. For a water-based liquid wax (easier application), Bona Hardwood Floor Polish is a popular choice, though it’s marketed as a “polish” rather than a traditional wax.
Can you wax over a polyurethane floor finish?
No — wax does not bond to polyurethane. It will sit on top as a slippery, hard-to-remove coating. Polyurethane floors need to be refreshed with a new coat of polyurethane when they lose their sheen, not waxed. See our guide on How to Fix Scratches on Hardwood Floors for polyurethane floor restoration options.
How long does floor wax take to dry?
Most floor waxes are dry to the touch in 30–45 minutes per coat in normal room temperature (65–75°F). Full cure — meaning the wax has reached maximum hardness — takes 24 hours. For foot traffic, wait at least 1 hour after the final coat before light walking, and 24 hours before moving furniture back.
Can I use car wax on hardwood floors?
Car wax (like Turtle Wax) is formulated for painted metal surfaces and uses different chemical compounds than floor wax. While some people have used it with short-term success, it’s not recommended — it may not bond properly to wood, can create a hazy finish, and is much harder to strip than dedicated floor wax. Use a product specifically formulated for floors.
Conclusion
Waxing a floor is one of the more satisfying floor maintenance projects — the transformation from dull and scratched to deeply shining is dramatic and immediate. The keys are knowing your floor type (don’t wax polyurethane!), stripping completely before rewaxing, applying thin coats, and buffing with a power buffer. Follow these steps and your waxed floor will look stunning and stay protected for a year or more. For related floor care projects, see our guides on How to Fix Scratches on Hardwood Floors and How to Repair Laminate Floor Scratches.
