Sweeping and mopping are the two most fundamental floor care tasks — but doing them wrong can scratch hardwood, streak laminate, and leave tile grout gray and dingy. The right technique depends on your floor type, the right mop, and using a well-wrung mop rather than a soaking wet one. This guide walks you through the correct sweeping and mopping method for hardwood, laminate, vinyl, tile, and stone floors, including the right cleaners for each.
What You’ll Need
For Sweeping
- Microfiber dust mop (best for all hard floors — traps dust and pet hair instead of spreading it)
- OR soft-bristle broom with angled head
- Dustpan with a rubber lip edge
- Vacuum with hard-floor setting (optional but excellent for pet hair)
For Mopping
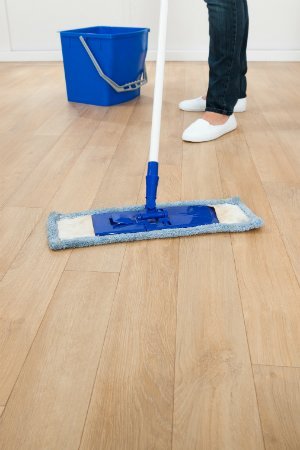
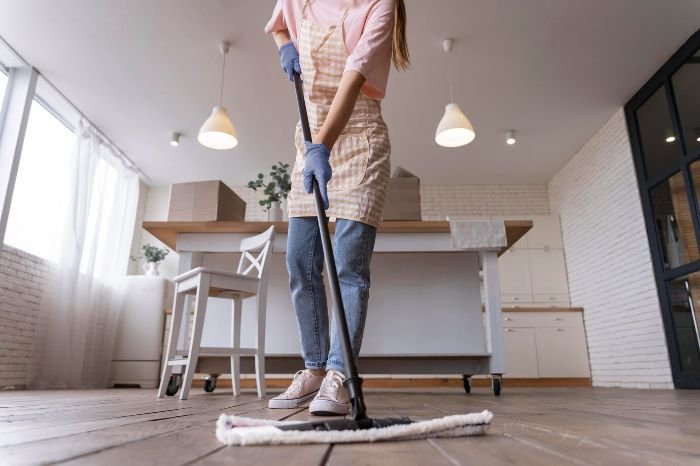
- Flat microfiber mop (for hardwood, laminate, vinyl plank)
- Sponge mop or string mop (for tile and stone)
- Bucket with wringer
- Cleaning solution appropriate to your floor type (see floor-by-floor guide below)
- Warm water
Safety Precautions
Wet floors are slipping hazards — especially tile and polished hardwood. Keep the area clear of others while mopping, and use a “Wet Floor” sign or barrier at room entries if the space is shared. Wring the mop thoroughly before each pass; mopping with a soaking wet mop leaves more water on the floor and takes longer to dry, increasing the slip window. Never mop toward yourself — always mop backward toward the exit so you’re not walking over your own wet work.
Step 1: Sweep Before You Mop — Always
Mopping over unswept floors drags grit and debris across the surface, which scratches hardwood and laminate. Always sweep or vacuum first. The order is: sweep → mop → dry. Never skip sweeping under the excuse that “the mop will pick it up” — it won’t. The mop will push grit into corners and scratch delicate floor finishes.
For best results, use a microfiber dust mop rather than a traditional broom. Microfiber electrostatically attracts dust, pet hair, and fine particles — a broom just rearranges them. Work from the far end of the room toward the exit, gathering debris into a pile as you go. Use a dustpan with a rubber lip that sits flat on the floor to pick up every last particle without leaving a line of debris.
How to Mop Every Floor Type
Hardwood Floors
Hardwood is the most moisture-sensitive floor and requires the most restrained mopping technique. Use a flat microfiber mop with a spray bottle rather than a bucket-and-mop system — spray a light mist of cleaner on a 4×4-foot section, then immediately wipe with the mop before the liquid can sit. Never let liquid pool on hardwood. Use a pH-neutral hardwood floor cleaner (Bona Hardwood Floor Cleaner, Method Squirt + Mop, or a few drops of dish soap in warm water). Dry completely after mopping — no visible moisture should remain. Mop hardwood no more than weekly; excessive wet mopping damages wood finish over time.
Laminate Floors
Laminate is even more water-sensitive than hardwood because the core is MDF or HDF that swells and disintegrates when wet. Use a flat microfiber mop that is barely damp — wring it until no water drips. Use the same spray-and-wipe approach as hardwood: spray a small section, wipe immediately, move on. Cleaner: a few drops of dish soap in warm water, or a dedicated laminate cleaner (Bona Laminate Floor Cleaner). Never use steam mops on laminate — the heat and moisture penetrate the surface and cause swelling and delamination. See our guide on How to Clean Laminate Floors for more detail.
Vinyl Plank (LVP) and Sheet Vinyl
Luxury vinyl plank is the most forgiving floor type for mopping — it’s waterproof, so you can use a slightly wetter mop than for hardwood or laminate. Still, avoid standing water and wring the mop well. Use a flat microfiber mop with warm water and a few drops of dish soap, or a dedicated LVP cleaner. Do not use abrasive cleaners or wax-based products on vinyl — wax builds up in the texture and becomes impossible to remove. See our guide on How to Clean Vinyl Tile Floors for full detail on vinyl cleaning.
Ceramic and Porcelain Tile
Tile is the most forgiving floor for mopping — it tolerates more water than wood-based floors. Use a sponge mop or a flat mop with a terry cloth head. Fill the bucket with warm water and a pH-neutral tile cleaner or a 1/2 cup of white vinegar per gallon of water. Mop in overlapping figure-eight strokes (not back-and-forth — figure-eights lift rather than push dirt). Rinse with plain water after cleaning with any soap-based solution to prevent soapy film buildup in the grout. Change mop water when it becomes visibly dirty — mopping with dirty water makes tile look dull rather than clean.
Natural Stone (Marble, Travertine, Slate)
Natural stone is acid-sensitive — never use vinegar, citrus-based cleaners, or any acidic product on marble, travertine, or limestone. It will etch the surface permanently. Use only a pH-neutral stone cleaner (Granite Gold Daily Cleaner, Black Diamond Stone & Tile, or plain warm water). Use a damp flat mop, never a soaking one. Dry the stone surface after mopping to prevent water spotting, particularly on polished marble.
The Right Mopping Technique
Step 1: Fill the Bucket and Wring Well
Fill your mop bucket with warm — not hot — water and the appropriate cleaner. Dip the mop, then wring it until it is barely damp. For hardwood and laminate, this means wringing so thoroughly that the mop feels almost dry to the touch. For tile and vinyl, a more damp (but not dripping) mop is acceptable.
Step 2: Start at the Far End of the Room
Begin mopping at the farthest corner from the exit and work backward toward the door. This ensures you never have to walk over your own wet work to exit the room. Mop in sections of about 4×4 feet, overlapping each pass by 3–4 inches to ensure full coverage.
Step 3: Use the Right Stroke for Your Floor
For hardwood and laminate: mop with the grain direction (following the plank direction) in straight, overlapping strokes. Going against the grain pushes water into the seams between planks. For tile: use figure-eight or S-shaped strokes that lift debris rather than push it. For large stone or vinyl areas: straight overlapping passes work well.
Step 4: Change Water When Dirty
Visibly dirty mop water redeposits soil on the floor, leaving it dull instead of clean. Change the water when it turns cloudy or brown — for a large kitchen, this may be every 150–200 square feet. Clean water is the most overlooked component of effective mopping.
Step 5: Rinse (For Tile and Stone)
For tile and stone floors: after mopping with your cleaning solution, mop again with plain warm water to rinse off all cleaner residue. Soap residue dulls tile finish and attracts fresh dirt more quickly. For hardwood, laminate, and LVP, rinsing adds unnecessary moisture — use cleaners that don’t require rinsing instead.
Step 6: Allow to Dry Fully
Open windows or run a fan to speed drying. No one should walk on the floor until it’s completely dry — wet floor surfaces, especially polished hardwood and tile, are extremely slippery. On humid days, drying can take 20–30 minutes; in dry conditions, 5–10 minutes. For hardwood, ensure the surface is fully dry before putting rugs back down — trapping moisture under a rug over hardwood causes cupping and mold.
How Often to Sweep and Mop
| Floor Type | Sweep/Vacuum | Mop |
|---|---|---|
| Kitchen (all floor types) | Daily or every other day | Weekly |
| Bathroom tile | Weekly | Weekly |
| Hardwood (low-traffic) | 2–3x per week | Monthly (or as needed) |
| Laminate (any room) | 2–3x per week | Monthly (barely damp) |
| LVP/vinyl | 2–3x per week | Weekly or bi-weekly |
| Stone floors | Weekly | Weekly (pH-neutral only) |
Pro Tips and Common Mistakes
- Never use a soaking wet mop on any floor: Even tile benefits from a wrung-out mop — excess water leaves mineral deposits and dulls the surface. Wring every time before applying the mop to the floor.
- Replace mop heads regularly: A dirty or worn mop head spreads bacteria and redistributes grime instead of removing it. Microfiber mop heads should be laundered after every use and replaced when they stop picking up debris effectively.
- Don’t use multi-surface cleaners on natural stone: Many popular “floor cleaners” are slightly acidic and safe for tile but destructive to marble and travertine. Check the label every time for stone compatibility.
- Move furniture to clean underneath: Dust, pet hair, and food debris accumulate under furniture and drift back onto clean floors within hours if not removed. Slide furniture or use furniture sliders to clean under sofas and tables at least monthly.
- Use two buckets for tile: Professional tile cleaners use a two-bucket system — one with cleaner, one with rinse water — to prevent contaminating the cleaning solution with dirty rinse water. This keeps the cleaning solution effective for the whole room.
Troubleshooting
The Floor Looks Duller After Mopping Than Before
Dullness after mopping is almost always soap residue or dirty mop water redeposited on the surface. Mop again with plain warm water only, wring thoroughly, and dry with a clean microfiber cloth. For persistent dullness on hardwood or laminate, the surface may have buildup from previously used wax or oil-based cleaners — use a dedicated floor cleaner formulated to remove residue (Bona Pro Series Floor Cleaner is widely recommended for this).
The Grout Lines Stay Gray Even After Mopping
Mopping alone doesn’t clean grout — the mop glides over the grout surface without penetrating it. To clean grout, you need a stiff-bristle brush and a grout cleaner (or baking soda paste). Scrub the grout lines directly, then mop to rinse. See our guide on How to Clean Grout Between Floor Tiles for a full grout cleaning process.
The Hardwood Floor Feels Sticky After Mopping
Stickiness means too much cleaner was used — it left a residue that didn’t fully dry or evaporate. Mop again with a barely damp mop and plain water, and dry immediately with a clean cloth. Going forward, reduce cleaner concentration by half — a few drops of dish soap per gallon is all that’s needed for most hardwood floor cleaners.
Frequently Asked Questions
What is the best mop for hardwood floors?
A flat microfiber spray mop (like Bona, Swiffer WetJet on wood setting, or O-Cedar ProMist) is the best choice for hardwood. These deliver a fine, controlled mist and pick up dirt with the microfiber pad without applying excess water. Traditional string mops and sponge mops are too wet for hardwood.
Can I use a steam mop on hardwood or laminate floors?
No — steam mops should never be used on hardwood or laminate floors. The high-temperature steam penetrates the finish and the seams between planks, causing warping, delamination, and finish cloudiness. Steam mops are safe only for tile and grout, and even there, read the manufacturer’s guidance for sealed stone.
How do I mop a floor without leaving streaks?
Streaks come from: too much cleaner in the solution (reduce to a few drops per gallon), dirty mop water (change more often), or mopping in a back-and-forth pattern that drags residue. Use overlapping S-strokes or figure-eights, change water frequently, and do a final pass with a barely damp clean mop to pick up any residue.
Should I sweep or vacuum before mopping?
Either works — both are effective at removing loose debris before mopping. Vacuuming is superior for pet hair and fine particles. A microfiber dust mop is faster for daily maintenance sweeping. Whatever method you use, always remove loose debris before any wet mopping.
What’s the difference between a sponge mop and a string mop?
A sponge mop has a flat rectangular absorbent pad that wrings with a lever — excellent for tile and vinyl where you want good coverage and controlled water application. A string mop (traditional cotton or microfiber strings) covers area quickly and is good for large tile spaces, but is harder to wring thoroughly and can leave more water on the floor. For hardwood and laminate, neither is ideal — use a flat microfiber spray mop instead.
Conclusion
The difference between a clean floor and a damaged floor often comes down to two things: using the right amount of water for your floor type, and using the right cleaner. Sweep first, wring the mop thoroughly, work from the back of the room to the exit, change mop water when dirty, and let the floor dry completely. Master those five habits and you’ll have clean, protected floors that last for decades. For floor-specific cleaning deep dives, see How to Clean Laminate Floors, How to Clean Sticky Hardwood Floors, and How to Clean a Floor.
