Color washing furniture means applying a thinned, semi-transparent coat of paint over wood so the natural grain shows through the color. The result is a soft, aged, rustic look — somewhere between a solid paint finish and a stain. It works beautifully on dressers, cabinets, side tables, and chairs, and it’s forgiving enough for beginners. You don’t need to strip the old finish — just clean, lightly sand, and apply.
What You’ll Need
Tools
- Paintbrush (2–3 inch, flat bristle or natural bristle)
- Large rag or old cotton T-shirt
- Mixing container or bucket
- Stir stick
- 220-grit sandpaper
- Tack cloth or microfiber cloth
- Painter’s tape
- Drop cloth
Materials
- Latex or chalk paint in your chosen color
- Water (for diluting latex paint) or glazing medium (for better control)
- Primer (if painting over dark stain or glossy finish)
- Clear sealer or furniture wax (to protect the finished piece)
- Sandpaper (120 grit for prep, 220 grit for between coats)
Safety and Precautions
- Work in a ventilated area — even latex paint releases fumes while wet. Open windows or work outdoors.
- Protect your work surface with a drop cloth before starting. Diluted paint is runny and splashes easily.
- Wear old clothes — diluted paint splatters and drips more than undiluted paint and is difficult to remove from fabric.
- Keep pets and children away from wet paint and sanding dust.
- Dispose of paint rags properly: Lay flat to dry before discarding — wet rags bunched together can generate heat.
Step-by-Step: How to Color Wash Furniture
Step 1 — Clean and Prepare the Furniture
Color washing works best on clean, dry furniture. Wipe down every surface with a damp cloth and a little dish soap to remove grease, dust, and oils that would prevent paint adhesion. Pay extra attention to drawer fronts and armrests — areas that get touched frequently have built-up hand oils. Allow the piece to dry completely, usually one to two hours. Remove any hardware like handles and knobs and set them aside.
Step 2 — Sand Lightly for Adhesion
You don’t need to strip the existing finish for a color wash — but you do need to scuff it so the paint has something to grip. Use 120-grit sandpaper and lightly scuff all surfaces you plan to paint. Sand with the grain in long, smooth strokes. You’re not removing the finish — just dulling the sheen. After sanding, wipe the entire piece with a tack cloth or slightly damp microfiber cloth to remove all sanding dust. Any dust left on the surface will cause the color wash to look gritty or blotchy.
Step 3 — Apply Primer if Needed
If you’re working over a dark wood stain, a very glossy finish, or a piece with tannins that bleed through (like oak or mahogany), apply a thin coat of primer first. Use a water-based bonding primer, apply with a brush or roller, and allow it to dry fully per the manufacturer’s instructions (usually one to two hours). If you’re working over raw wood or a light-colored piece, you can skip the primer and go directly to the color wash.
Step 4 — Mix the Color Wash
A color wash is simply paint thinned to a semi-transparent consistency. The standard ratio is one part latex paint to one part water (1:1) for a light wash, or one part paint to two parts water (1:2) for a very sheer wash. If you want more control over drying time (which helps with blending), replace some or all of the water with a glazing medium — available at any paint store. Stir thoroughly until you have a uniform, slightly milky liquid. Chalk paint requires less dilution because it’s already more porous — try a 1:1 ratio as a starting point.
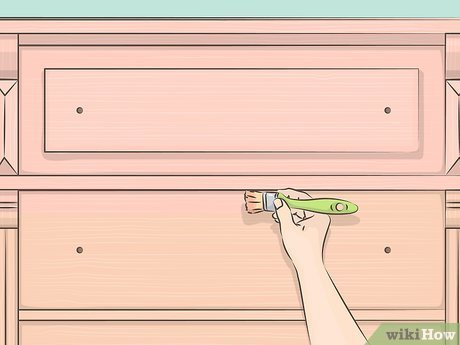
Step 5 — Apply the Color Wash in Sections
Dip your brush into the color wash and apply it generously to one section of the furniture — work one face (like a drawer front or one side panel) at a time. Brush on the color wash in the direction of the wood grain, using long, smooth strokes. The mixture will look opaque initially — that’s fine. Immediately move to the next step before it dries.
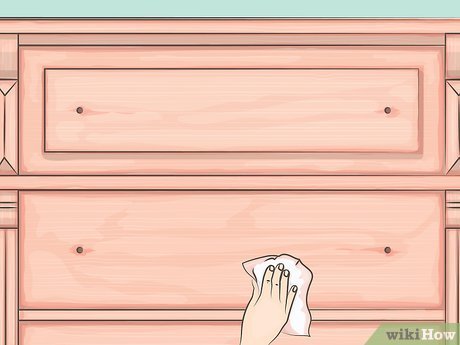
Step 6 — Wipe Back with a Rag
While the color wash is still wet, take your rag and wipe it back — gently rubbing in the direction of the grain. This is the defining step of color washing. The wiping removes most of the paint from the surface while leaving it in the wood grain, pores, and crevices. The result is a soft, translucent color that lets the wood grain show through. Control the opacity by how much you wipe: wipe aggressively for a very subtle, barely-there wash; wipe lightly for a more saturated color effect.
Step 7 — Work Section by Section
Always apply and wipe back one section before moving to the next. If you apply color wash to the entire piece at once, the first sections will dry before you can wipe them back, resulting in an uneven look. Keep a wet edge — slightly overlap each new section into the still-wet edge of the previous one to blend the sections seamlessly. Work top to bottom to catch any drips.
Step 8 — Add Depth with a Second Pass (Optional)
Once the first coat is dry (30 to 60 minutes), you can add depth and dimension by applying a second color wash. For a layered, antiqued look, use a slightly darker shade of your original color for the second pass. Apply and wipe back the same way, but this time leave a little more paint in the recessed areas — joints, corners, grooves, and carvings — to create shadow and depth. This step is optional but elevates the finish significantly on pieces with architectural detail.
Step 9 — Lightly Sand Between Coats
Once the color wash is fully dry, run 220-grit sandpaper lightly over the surface to knock down any raised grain or brush marks. Use very light pressure — you’re just smoothing, not removing color. Wipe away dust with a tack cloth. This step ensures the sealer or wax topcoat bonds well and creates a smooth final finish.
Step 10 — Seal or Wax to Protect
A color wash must be sealed to last. For most furniture, apply a clear water-based polycrylic or furniture sealer in a matte or satin finish — this preserves the soft, textured look of the color wash without adding a hard plastic sheen. Apply in thin coats with a clean brush, allow to dry, then apply a second coat. Alternatively, apply a thin coat of clear or tinted furniture wax with a cloth, let it haze, then buff to a soft sheen. Wax gives a more authentic, handmade feel and works especially well over chalk paint color washes.
Pro Tips for Color Washing Furniture
- Chalk paint is the easiest base for color washing because it absorbs into wood quickly and wipes back cleanly, giving you more control and forgiveness.
- Work quickly — diluted paint dries faster than full-strength paint. On hot days or in direct sunlight, add more water to extend your working time.
- Use contrasting colors for drama: Color washing a dark navy over a light oak piece creates rich, layered depth. A white wash over dark walnut creates a driftwood look.
- Brush marks are part of the charm — don’t chase a perfectly smooth finish. The hand-applied look is exactly what makes color washing beautiful.
- Test your dilution ratio on cardboard first to see how the color looks before applying it to your furniture.
Common Mistakes to Avoid
- Applying too much paint at once: Thick, undiluted paint doesn’t wipe back evenly and dries patchy. Thin your paint to the recommended ratio before applying.
- Waiting too long to wipe back: Diluted paint dries quickly. If it dries before you wipe, you lose the translucent effect entirely. Work one section at a time.
- Skipping sanding between coats: Unsanded layers trap dust and raise the grain, making the finish look rough and uneven.
- Not sealing the final finish: An unsealed color wash will wear, chip, and stain with regular use. Always protect your work with a topcoat or wax.
Frequently Asked Questions
What kind of paint should I use for color washing furniture?
Latex paint and chalk paint are both excellent choices. Chalk paint requires less prep (no sanding or priming in most cases) and wipes back beautifully. Latex paint is more widely available and comes in thousands of colors. Oil-based paint is not recommended for color washing — it dries too slowly and requires solvents for cleanup.
Can I color wash over stained or painted furniture?
Yes, with preparation. Lightly sand the existing surface to scuff it for adhesion, wipe away dust, then apply your color wash. If the existing finish is very dark or high-gloss, apply a coat of bonding primer first to prevent the old finish from bleeding through or repelling the new color wash.
How is color washing different from whitewashing?
Whitewashing is a specific technique using white paint (or a white paint-water mixture) to create a bleached, coastal, or farmhouse look while letting wood grain show through. Color washing is the same technique but applied with any color — not just white. The process is identical; only the paint color differs.
How do I fix blotchy or uneven color washing?
Apply a diluted coat of the same color wash over the blotchy areas and wipe back evenly. You can also sand very lightly with 220 grit and apply a fresh color wash over the entire piece for a more uniform result. Blotchiness is usually caused by inconsistent dilution or letting the paint dry before wiping.
Does color washing work on laminate or MDF furniture?
Color washing works best on solid wood and wood veneer because the wood grain absorbs the paint and creates the textured effect. On laminate or MDF, the grain isn’t visible, so the effect is less dramatic. However, you can apply a lightly thinned coat over laminate (with primer first) for a soft, matte color effect — it just won’t have the same grain texture.
Conclusion
Color washing furniture is one of the most beginner-friendly DIY finish techniques: thin your paint, brush it on with the grain, wipe it back while wet, and seal when dry. The result is a soft, layered, handmade look that transforms outdated or plain wood pieces without hiding the natural character of the wood. Work in sections, keep your rag ready, and don’t overthink it — imperfection is part of what makes color washing beautiful.
Ready to tackle another furniture transformation? Check out our guide on How to Lacquer Furniture for a high-gloss alternative finish. If your piece needs repair before painting, see How to Restore Wooden Furniture for prep steps.
