
Vinyl furniture — sofas, chairs, dining benches, outdoor patio sets — is durable and affordable, but it does need regular cleaning and conditioning to stay soft, crack-free, and looking its best. Dirt and body oils break down the plasticizers in vinyl over time, causing stiffness and cracking. Clean it with the right solution (never bleach or acetone), then condition it to restore flexibility and add UV protection. This guide walks you through the full process for any vinyl piece, indoors or out.
What You’ll Need
For Cleaning
- Mild dish soap (Dawn or equivalent)
- Warm water
- White vinegar (for mildew or stubborn stains)
- Rubbing alcohol (for ink or grease spots)
- Soft microfiber cloths or sponges (2–3)
- Soft-bristle brush (old toothbrush for seams and stitching)
- Bucket
For Conditioning
- Commercial vinyl conditioner (303 Aerospace Protectant, Armor All Original, or Marine 303)
- Clean microfiber cloth for application
- Clean microfiber cloth for buffing
What NOT to Use
- Bleach — degrades plasticizers, causing premature cracking
- Acetone or nail polish remover — dissolves vinyl surface
- Petroleum-based solvents — strip the protective coating
- Abrasive scrubbers — scratch the surface finish
- Silicone-based sprays (cooking spray, WD-40) — attract dirt and leave a greasy residue that’s hard to remove
Safety Precautions
Rubbing alcohol is flammable — do not use near open flames or in poorly ventilated spaces. When cleaning outdoor vinyl furniture that has grown mildew, wear gloves and work in a ventilated area. Avoid getting cleaning solutions in your eyes, and rinse all cleaning agents off thoroughly before conditioning — residual soap or vinegar can prevent the conditioner from bonding properly to the vinyl surface.
How Often Should You Clean and Condition Vinyl Furniture?
Indoor vinyl furniture: wipe down monthly with a damp cloth, deep clean every 3–6 months, and condition 2–3 times per year. Outdoor vinyl furniture: wipe down weekly if used regularly, deep clean monthly during the season, and condition every 4–6 weeks in sun-exposed environments — UV is the primary enemy of outdoor vinyl and conditioning is your main defense against it. Before winter storage, deep clean and condition outdoor vinyl thoroughly before covering or storing.
How to Clean Vinyl Furniture
Step 1: Remove Loose Debris
Before applying any liquid, brush off or vacuum all loose dirt, crumbs, and pet hair from the surface and seams. Use a soft-bristle attachment on your vacuum for seams and tufting. Skipping this step causes dirt to become a paste when wet, which can scratch the vinyl surface during wiping.
Step 2: Mix Your Cleaning Solution
In a bucket, mix 1 teaspoon of mild dish soap into 1 quart of warm water. This dilution is effective on everyday dirt and body oils without being harsh enough to strip the vinyl’s surface coating. For outdoor furniture with mildew growth, add 1/4 cup white vinegar to the mix — vinegar kills mildew spores without the damage that bleach causes to vinyl. Do not use hot water — it can soften and distort some vinyl formulations.
Step 3: Wipe Down the Entire Surface
Dampen a microfiber cloth in the cleaning solution and wring it out — the cloth should be damp, not soaking wet. Wipe the vinyl surface in long, even strokes, working from top to bottom and left to right so you’re not pushing dirt back over cleaned areas. Apply moderate pressure on stained areas but do not scrub aggressively — vinyl surface is soft and scratches more easily than it looks. Re-dampen the cloth frequently with fresh solution so you’re lifting dirt rather than redistributing it.
Step 4: Address Seams, Piping, and Stitching
Dirt accumulates heavily in the seams, welted edges, and stitching of vinyl furniture. Dip an old toothbrush in your cleaning solution and scrub gently along all seams. Work in short strokes along the seam direction, not perpendicular to it. Wipe away the loosened dirt immediately with a damp cloth — don’t let it dry back into the seam.
Step 5: Treat Stubborn Stains
For ink or dye stains: apply a small amount of rubbing alcohol (isopropyl, 70%) to a clean cloth and dab — never rub — the stain. Alcohol dissolves ink and many dyes effectively. Test on a hidden area first, as some colored vinyls can lighten slightly with alcohol. For grease or oil stains: a paste of baking soda and water applied for 5 minutes, then wiped away, lifts most grease without chemicals. For mildew black spots: dab white vinegar directly with a cloth, let sit 2 minutes, then wipe and rinse. For permanent marker: use a dry-erase marker applied directly over the permanent marker, wait 10 seconds, then wipe — the dry-erase solvent lifts the permanent marker pigment.
Step 6: Rinse Thoroughly
Using a second clean cloth dampened with plain warm water, wipe down the entire surface to remove all soap residue. Soap left on vinyl attracts more dirt and can leave a dull film after drying. For outdoor furniture, a light rinse with a garden hose is acceptable — just avoid high-pressure spraying directly into seams, which can force water into the furniture cushioning.
Step 7: Dry Completely Before Conditioning
Wipe the vinyl dry with a clean, dry microfiber cloth. Allow the furniture to air dry fully — at least 30 minutes in a warm room or in direct sun — before applying conditioner. Conditioning over damp vinyl traps moisture under the conditioner film, which can cause mildew growth inside the vinyl substrate.
How to Condition Vinyl Furniture
Step 1: Choose the Right Conditioner
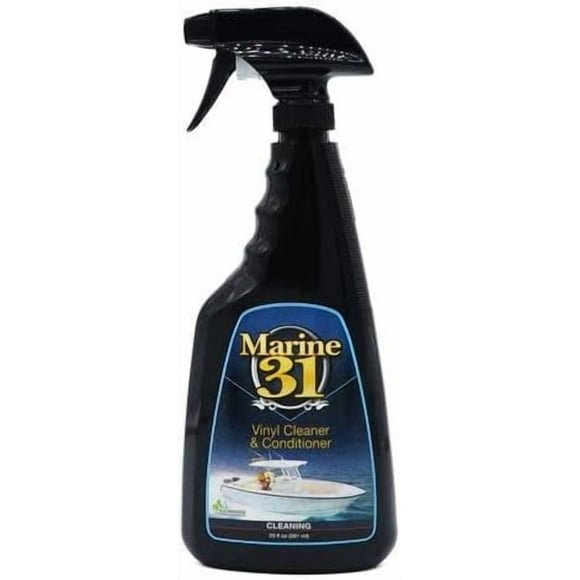
Use a dedicated vinyl conditioner — not leather conditioner (different chemistry), not baby oil (petroleum-based, degrades vinyl long-term), and not coconut oil (goes rancid in warm environments). Recommended products: 303 Aerospace Protectant (best UV protection, ideal for outdoor vinyl), Armor All Original Protectant (widely available, good for indoor vinyl), and Chemical Guys VRP (excellent for darker vinyl colors). All of these restore plasticizers and add UV inhibitors.
Step 2: Apply Conditioner With a Microfiber Cloth
Squeeze a golf ball-sized amount of conditioner onto a clean microfiber cloth — never apply directly to the vinyl, which causes over-application and uneven coverage. Work the conditioner into the cloth slightly, then wipe it onto the vinyl surface in straight, overlapping strokes. Apply evenly across the entire surface, including the sides and back of cushions. Work conditioner into seams and crevices with a soft brush or fingertip — these areas dry out fastest and benefit most from conditioning.
Step 3: Let It Penetrate for 5–10 Minutes
Allow the conditioner to sit on the surface for 5 to 10 minutes. During this time the plasticizers and UV inhibitors penetrate the surface layer of the vinyl. You’ll see the vinyl visibly darken and become more supple as the conditioner absorbs. If any white residue appears in textured areas, work it in gently with a soft brush.
Step 4: Buff Off the Excess
Using a fresh, dry microfiber cloth, buff the entire surface to remove any excess conditioner. The final surface should feel slightly tacky-to-smooth — not greasy or slippery. A slippery finish means too much conditioner was applied; buff more aggressively or wipe with a lightly damp cloth to remove the excess. Over-conditioned vinyl becomes a dirt magnet and can make upholstered seating uncomfortably slick.
Step 5: Allow to Cure Before Use
Wait 30 minutes before sitting on or using conditioned furniture. This allows the conditioner to fully set and prevents it from transferring to clothing. For outdoor furniture treated with 303 or similar UV protectant, the UV-blocking properties are active immediately but reach full performance after the first hour.
Restoring Cracked or Stiff Vinyl
If your vinyl furniture is already cracking or stiff, it means the plasticizers have significantly depleted. Cleaning alone won’t restore it — you need deep conditioning. Apply a generous coat of 303 Aerospace Protectant, cover the furniture with plastic wrap to prevent evaporation, and leave it for 4–8 hours (or overnight). The extended contact time allows maximum plasticizer restoration. Wipe off and buff as normal. Repeat 2–3 times over a week for severely dried-out vinyl. This won’t reverse existing cracks, but it will stop progression and dramatically soften stiff areas.
For cracks that have already opened, use a vinyl repair kit (available at auto supply stores — the chemistry is the same for furniture and automotive vinyl). These kits include a flexible repair compound that fills small cracks and a texture tool to match the surrounding grain pattern.
Pro Tips and Common Mistakes
- Never use bleach on vinyl: Even diluted bleach attacks the plasticizer compounds in vinyl, causing accelerated brittleness and color fading within months.
- Condition outdoor vinyl year-round: UV degrades vinyl even in winter — condition before covering for winter storage to prevent cold-weather cracking.
- Less conditioner is more: Over-application leaves a greasy surface that attracts dirt and transfers to clothing. Apply thin, even coats and buff thoroughly.
- Test any new product on a hidden area: Vinyl formulations vary — alcohol, vinegar, and even some commercial conditioners can lighten or dull certain colors. Always test on the underside of a cushion first.
- Don’t skip seams and creases: These areas bend constantly during use and dry out fastest. They’ll crack first if not regularly conditioned.
Troubleshooting
The Vinyl Looks Dull After Cleaning
Dullness after cleaning means soap residue was not fully rinsed off. Wipe the surface again with a clean cloth dampened with plain water only, dry thoroughly, and then apply conditioner — the conditioner will restore the surface sheen.
Mildew Keeps Returning on Outdoor Vinyl
Mildew recurs when vinyl stays damp — usually from high humidity, poor airflow, or a covered storage situation. After cleaning with vinegar solution, allow furniture to dry completely in direct sun before covering. Ensure storage covers allow air circulation (avoid fully sealed plastic covers). Conditioning with 303 Aerospace Protectant creates a surface that resists mildew adhesion.
The Conditioner Left White Residue in Textured Vinyl
This is conditioner pooling in the texture grain. Work it in with a soft-bristle brush (old toothbrush), then buff more vigorously with a dry cloth. Warming the surface slightly (place in sun for 5 minutes) thins the conditioner and makes it easier to work into textures.
Frequently Asked Questions
Can I use leather conditioner on vinyl furniture?
No — leather conditioners contain oils and waxes formulated for animal hide (collagen fibers), not for synthetic PVC vinyl. They can leave a greasy residue and may not provide any meaningful plasticizer restoration to vinyl. Always use a product specifically formulated for vinyl.
How do I remove a permanent marker stain from vinyl furniture?
Apply rubbing alcohol to a clean cloth and dab directly on the mark. The alcohol dissolves the permanent marker pigment without harming vinyl when used briefly. Alternatively, a dry-erase marker applied over the permanent mark, then immediately wiped off, uses the dry-erase solvent to lift the permanent pigment. Always test on a hidden area first.
Is 303 Aerospace Protectant better than Armor All for vinyl furniture?
303 Aerospace Protectant is generally considered superior for UV protection — it blocks a higher percentage of UV radiation and doesn’t contain the silicone compounds in original Armor All that can cause surface buildup over time. For outdoor vinyl, 303 is the better choice. For indoor vinyl with no UV concern, both products perform similarly.
How do I clean white or light-colored vinyl that has yellowed?
Yellowing in light vinyl is often oxidation, not dirt. Apply a plastic oxidation remover (such as Meguiar’s PlastX) with a microfiber cloth and work in circular motions — this is a very mild abrasive that removes the oxidized surface layer. Rinse thoroughly, dry, and condition immediately after. For severe yellowing, a product containing hydrogen peroxide gel designed for plastic restoration can lighten oxidized vinyl with 1–2 applications.
Can I use a steam cleaner on vinyl furniture?
With caution — a handheld steam cleaner on the lowest setting is effective for killing mildew spores and sanitizing vinyl without chemicals. However, prolonged direct steam application can soften and distort vinyl, particularly at seams. Keep the steamer moving at all times and never hold it in one spot. Always condition the vinyl after steam cleaning, as heat accelerates plasticizer evaporation.
Conclusion
Vinyl furniture is one of the easiest materials to maintain when you use the right products and a consistent schedule. Clean monthly with mild soap and water, treat stains promptly with alcohol or vinegar, and condition every few months with a quality vinyl protectant. These three steps cost almost nothing and will double the lifespan of any vinyl piece — indoors or out. For more vinyl care, see our guide on How to Clean Vinyl Tile Floors and How to Repair Vinyl Flooring for related vinyl maintenance topics.
