A clogged faucet aerator is one of the easiest plumbing fixes in the house — and most homeowners don’t realize the aerator is even the problem. If your kitchen or bathroom faucet has reduced water flow, an uneven spray pattern, or water spraying sideways, the aerator is almost certainly clogged with mineral deposits, sediment, or debris. Cleaning it takes 10–15 minutes, requires no special tools in most cases, and immediately restores full water pressure. Here’s exactly how to do it.
What You’ll Need
- White vinegar
- Small bowl or cup
- Old toothbrush or small scrub brush
- Needle or safety pin (to clear individual holes)
- Adjustable pliers or aerator key (optional)
- Plumber’s tape (Teflon tape) for reassembly (optional)
- Clean cloth or rag
Safety and Precautions
- Turn off the faucet before removing the aerator — obvious, but worth saying. You’ll lose small components into the drain if the water is running.
- Cover the drain. The aerator contains small screens, washers, and O-rings that can fall down the drain easily. Plug the drain or work with a bowl beneath the faucet to catch any dropped pieces.
- Don’t overtighten on reassembly. Aerators are threaded and can be hand-tightened adequately — using heavy force with pliers can crack the faucet spout or strip the threads.
- Note the order of parts when disassembling. Aerators have 3–5 components that must go back in the correct order and orientation. Photograph them before you remove them.
Step-by-Step: How to Clean a Faucet Aerator
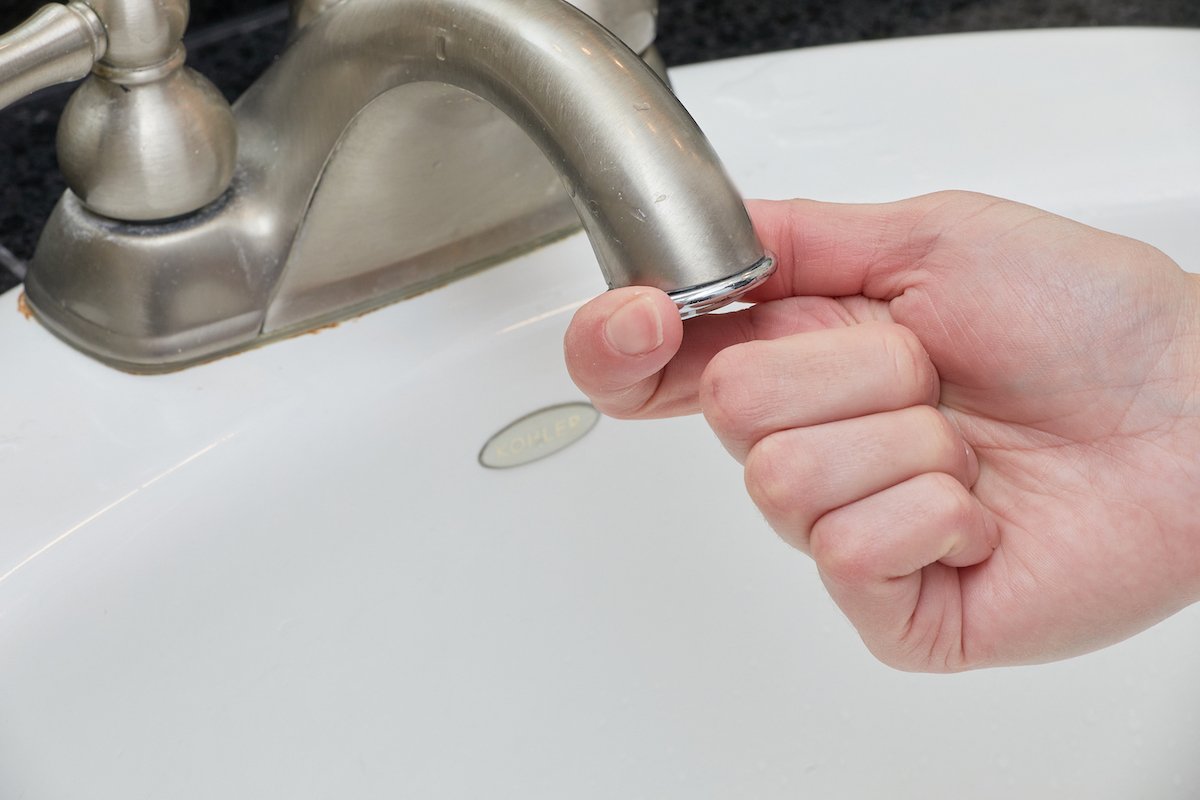
Remove the Aerator
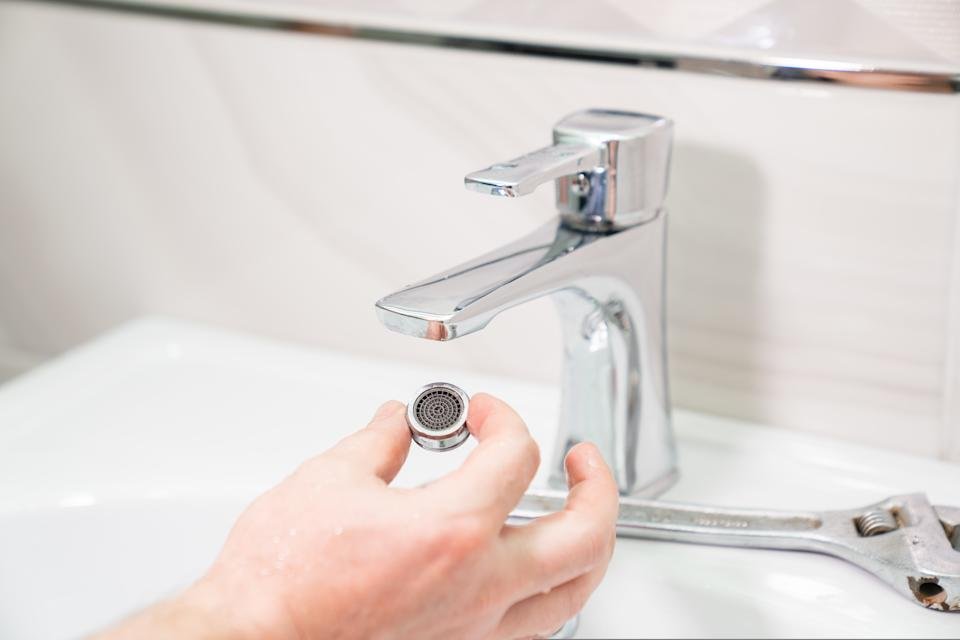
Most aerators unscrew by hand by turning counterclockwise. If it’s tight from mineral buildup, wrap the aerator housing in a cloth to protect it and use pliers to loosen. Some modern faucets (like many Moen and Kohler models) use a recessed aerator that requires a special aerator key — these are usually small and come with the faucet, or can be purchased at a hardware store for a few dollars.
Disassemble and Photograph the Components
Once removed, carefully disassemble the aerator into its individual components — typically an outer housing, one or two mesh screens, a flow restrictor (if present), and rubber washer/O-ring. Before separating them, take a photo with your phone so you know the exact order and orientation for reassembly. Lay the parts out in order on a clean cloth.
Soak in White Vinegar
Place all aerator components in a small bowl filled with undiluted white vinegar. Let them soak for 30 minutes to 2 hours depending on the level of mineral buildup. For heavy calcium and lime scale deposits (white or light gray crusty buildup), extend the soak to 4–8 hours or overnight for complete dissolution. The acetic acid in vinegar dissolves calcium carbonate mineral deposits effectively without damaging metal or plastic components.
Scrub the Screens and Components
After soaking, use an old toothbrush to scrub the mesh screens and housing inside and out. The brush bristles work into the mesh openings to dislodge loosened mineral deposits and debris. For any holes that are still blocked after brushing, use a needle or safety pin to carefully clear each individual hole in the screen. Hold the screen up to light to verify all holes are open.
Rinse Thoroughly
Rinse all components under clean running water to remove vinegar and loosened debris. Hold the screens up to a light source and check that water flows freely through all the mesh holes. Any that are still blocked can be re-soaked or cleared with a pin.
Reassemble in the Correct Order
Reassemble the aerator components in reverse order using your reference photo. Make sure the rubber washer and O-ring are correctly seated — these provide the water seal and their orientation matters. Inspect the rubber parts for cracks or deterioration; replace if damaged (aerator washers are very inexpensive at hardware stores).
Reattach the Aerator
Thread the aerator back onto the faucet spout by hand, turning clockwise. Hand-tight is usually sufficient — if you want extra security, use pliers with a cloth wrap for just 1/4 turn more. If the old aerator was stripped or damaged during removal, replacement aerators are available at hardware stores for $3–10, and most are universal-fit or can be matched by brand.
Test Water Flow
Turn on the faucet and check the water flow and spray pattern. It should be full, even, and straight. If flow is still reduced, remove the aerator again and check for any remaining blockage. If cleaning doesn’t fully resolve the issue, the flow restrictor inside the aerator may be overly restrictive for your water pressure situation — this piece can be removed permanently if needed.
How to Clean an Aerator Without Removing It
If the aerator is stuck due to heavy mineral buildup and you don’t want to risk forcing it off, you can clean it in place using the bag method:
- Fill a small plastic bag with undiluted white vinegar.
- Place the bag over the faucet head so the aerator is submerged in vinegar.
- Secure the bag around the faucet spout with a rubber band.
- Let it soak for 1–4 hours (or overnight for heavy buildup).
- Remove the bag and turn the water on full to flush any loosened deposits through.
This method doesn’t allow scrubbing of the individual screens but works well for moderate mineral deposits and for cleaning the aerator exterior and faucet tip simultaneously.
When to Replace an Aerator
Clean aerators annually in hard water areas — the mineral deposits will return, and regular maintenance prevents the buildup from becoming impossible to remove without damage. Replace an aerator when:
- The rubber washer is cracked or deteriorated
- The mesh screen has holes or tears
- The housing threads are stripped
- Cleaning no longer fully restores water flow
Replacement aerators are inexpensive ($3–10 at hardware stores) and quick to install. Always bring the old one with you to match the thread size (typically 15/16″ for male threads on standard faucets).
Pro Tips for Faucet Aerator Care
- Clean annually in hard water areas. If your water leaves white mineral deposits on fixtures and shower walls, clean aerators every 6–12 months before clogging becomes severe.
- Use a water softener to reduce buildup rates. Hard water (high mineral content) is the primary cause of aerator clogging. A whole-house water softener or point-of-use filter significantly reduces how often aerators need cleaning.
- Keep track of aerator key storage. For recessed aerators, tape the aerator key to the inside of the cabinet under the sink so it’s always findable when needed.
- Check aerators after any plumbing work. New or recently disturbed plumbing can send debris into the water lines. Aerators are the first place to check if water flow drops after any pipe work.
Frequently Asked Questions
How often should I clean my faucet aerator?
In hard water areas, clean aerators every 6–12 months. In soft water areas, once a year or when you notice reduced flow is sufficient. Kitchen faucets typically need more frequent cleaning than bathroom faucets due to heavier use and exposure to food particles.
Why is my faucet spraying water sideways after I cleaned the aerator?
Sideways spraying means some holes in the screen are still blocked, causing uneven pressure distribution. Remove the aerator, hold the screen up to light, and use a pin to clear any blocked holes individually. Re-soak in vinegar if needed and scrub again with a toothbrush.
Can I use CLR instead of vinegar to clean an aerator?
Yes — CLR (Calcium Lime Rust remover) is effective for severe mineral buildup that vinegar alone can’t dissolve. Dilute per product directions and soak for 2–3 minutes only (CLR is stronger than vinegar). Rinse thoroughly several times after using CLR. Vinegar is safer for regular maintenance; CLR is for severe, long-neglected buildup.
My aerator is stuck and won’t unscrew — what do I do?
For a stuck aerator, try the bag-soak method first to soften the mineral deposit binding it. After a few hours, try unscrewing again with pliers (with a cloth wrap to protect the finish). If it still won’t budge, hold a heat gun or hair dryer on low heat near the aerator for 30 seconds to expand the metal slightly and break the mineral bond, then try again.
What is the flow restrictor in a faucet aerator?
The flow restrictor is a small disc or insert inside the aerator that limits maximum water flow for water conservation purposes. Federal regulations require low-flow fixtures in new construction, and the flow restrictor enforces this. If your water pressure feels too low even after cleaning, removing the flow restrictor increases flow — though this does increase water consumption.
Conclusion
Cleaning a faucet aerator is one of the most impactful 15-minute home maintenance tasks you can do. Reduced faucet flow and uneven spray are almost always an aerator problem, and vinegar soaking plus a toothbrush scrub solves it 95% of the time. Check all the aerators in your home annually — kitchen, bathrooms, and laundry room — especially if you’re on a well or have hard municipal water. A clean aerator means full pressure, lower water bills from even flow, and a longer-lasting fixture overall.
For related plumbing maintenance guides, check out our article on how to clean limescale from a showerhead and taps. If you’re dealing with mineral deposits throughout your home, our guide on how to clean mineral deposits covers all the common problem areas.
