The fastest way to clean a microwave is the steam method: fill a microwave-safe bowl with 1 cup of water and 1 tablespoon of white vinegar, heat on high for 3–5 minutes, let it sit for 5 minutes with the door closed, then wipe every surface clean. No scrubbing needed. This guide covers every part — walls, ceiling, glass door, turntable, exterior, and over-the-range vents — so your microwave stays spotless and odor-free year-round.
What You’ll Need
- Microwave-safe bowl — Glass or ceramic only; never metal or thin plastic
- White vinegar — Natural degreaser and deodorizer
- Fresh lemon or lemon juice — Alternative to vinegar; leaves a fresh scent
- Baking soda — For stubborn stuck-on food and odor absorption
- Cream of tartar — Safe for polishing stainless steel exterior
- Microfiber cloths or soft sponge — Non-abrasive for all interior surfaces
- Mild dish soap — For turntable and roller ring
- Toothbrush — Optional, for door gasket and vent grooves
- Rubber gloves — To protect hands when handling hot bowls
Avoid: Steel wool, abrasive scrubbers, bleach, and melamine foam pads. These scratch the interior coating, which can chip into food and eventually cause microwave arcing.
Safety and Precautions
- Never spray liquids directly onto the control panel. Moisture behind the buttons can cause electrical shorts. Always spray your cloth first, then wipe.
- Never run the microwave empty. Running it with nothing inside can damage the magnetron — always have the bowl of water inside when steam-cleaning.
- Let the bowl cool before handling. Water in a microwave-safe bowl can reach boiling temperature. Use oven mitts or wait 1–2 minutes before removing it.
- Unplug the microwave before cleaning the exterior, vents, or filter to avoid accidental activation.
- Never use metal objects to scrape baked-on food — even if it looks like a good idea, metal inside a microwave is always a fire risk.
- Check your owner’s manual before cleaning convection combo units. Some microwave-oven combos have heating elements that require specific care.
Step-by-Step: How to Clean Your Microwave
Step 1 — Remove and Pre-Soak the Turntable and Roller Ring
Before anything else, lift out the glass turntable and the plastic roller ring beneath it. Set them aside in a sink filled with warm, soapy water to soak. This 10-minute soak will dissolve built-up grease by the time you finish cleaning the inside.
Critical tip: If your turntable is hot from recent use, let it cool to room temperature before submerging it in water. Thermal shock — placing hot glass into cold water — can shatter the tray entirely. This step is rarely mentioned by other guides, but it prevents a costly accident.
Step 2 — Steam Clean the Interior (Vinegar or Lemon Method)
Pour 1 cup of water and 1 tablespoon of white vinegar into your microwave-safe bowl. Place it on the floor of the microwave (turntable removed). Heat on high power for 3–5 minutes — you want steam to visibly fog up the interior window.
When the timer goes off, do not open the door yet. Leave it closed for 5 full minutes. This is the most overlooked step in every competitor guide: the “dwell time” is what actually does the cleaning. The trapped steam rehydrates dried-on food, turning cement-hard splatters back into soft, wipeable residue.
Prefer lemon? Cut a lemon in half, squeeze the juice into 1 cup of water, then drop in the halves. Steam for 3–5 minutes. The citric acid cuts grease and the lemon peel oils naturally deodorize — great for neutralizing burnt popcorn or fishy smells.
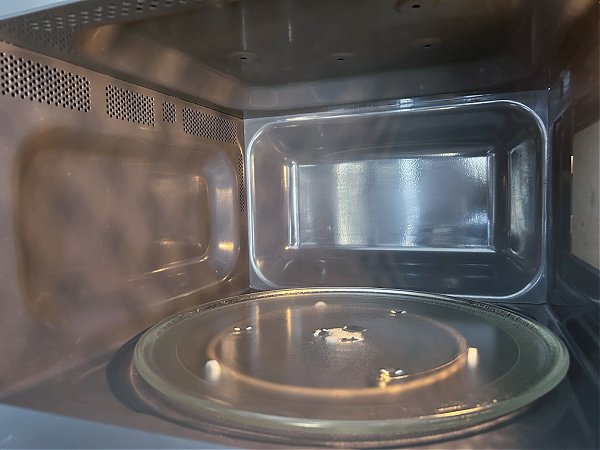
Step 3 — Wipe the Ceiling, Walls, and Floor
Carefully remove the hot bowl using oven mitts. Starting at the top, wipe the ceiling of the microwave first — this is the most neglected spot and often holds the most dried splatter from soups and sauces. Work your way down the side walls, then finish with the floor. Use a damp microfiber cloth for each pass.
For stubborn spots that didn’t fully loosen, dip your cloth directly into the warm vinegar water from the bowl and apply it to the stuck area. Let it sit for 60 seconds, then wipe again. Repeat the steam cycle if needed for heavily soiled microwaves.
Step 4 — Clean the Glass Door (Inside and Out)
The interior glass window collects grease splatters that show every time the light turns on. If the steam didn’t fully cut through, make a thin paste using 2 tablespoons of baking soda and 2 tablespoons of warm water. Spread it across the inside of the glass, let it sit for 5 minutes, then wipe in circles using a cloth dampened with white vinegar. The mild fizzing reaction lifts the residue without scratching.
For the exterior glass, spray white vinegar onto your cloth (not the door directly) and wipe clean to remove fingerprints and dust. Never forget to wipe the door seal (gasket) — the rubber ring around the door edge. A dirty, greasy gasket can prevent a proper seal and reduce heating efficiency. Use a toothbrush dipped in warm soapy water to clean it thoroughly.
Step 5 — Wash the Turntable and Roller Ring
After soaking, scrub the glass tray and roller ring with a non-scratch sponge and dish soap. Most glass turntables are dishwasher-safe (top rack, cool cycle) — check your owner’s manual to confirm. The plastic roller ring and its small wheels should be hand-washed to prevent warping in dishwasher heat.
Check the roller ring’s wheels carefully — food crumbs pack into the grooves and cause a grinding or crunching sound when the tray rotates. A toothbrush clears this out in 30 seconds. Dry both pieces completely before placing them back in the microwave.
Step 6 — Clean the Exterior and Control Panel
The exterior handle and control panel are high-touch areas that harbor bacteria and grease. For the keypad, activate the Control Lock feature first (check your model’s manual — most have this). This prevents accidental button presses while you clean.
Dampen a cloth with water and a drop of dish soap, then wipe the entire exterior. For stainless steel models, always rub in the direction of the grain to prevent streaks. Finish with a dry cloth to remove any moisture. Avoid commercial window cleaners on control panels as the chemicals can degrade button coatings.
For stubborn fingerprints and smudges on stainless steel, make a paste with cream of tartar and water. Rub with the grain, wipe clean with a damp towel. It’s gentler than vinegar on stainless surfaces and won’t strip any protective coating.
Step 7 — Clean Over-the-Range Vents and Filters (If Applicable)
If your microwave is mounted above the stove, this step is critical — and almost no cleaning guide covers it properly. Over-the-range microwaves have two types of filters that need regular maintenance:
- Grease filters (metal mesh): Located on the underside of the microwave. These catch aerosolized fat from stovetop cooking. Slide them out and soak in hot, soapy water for 10 minutes, then gently scrub. Many are dishwasher-safe on the bottom rack. Clean monthly, or more often if you cook with a lot of oil.
- Charcoal filters: Found on models that recirculate air rather than venting outside. These cannot be cleaned — they must be replaced every 6 months. Worn charcoal filters are the #1 cause of persistent kitchen odors that don’t go away. Check your model number and order replacements on the manufacturer’s website.
To avoid getting water into the vent openings on the interior ceiling of the microwave, always spray your cleaning cloth — never spray directly at the vents.
Pro Tips to Keep Your Microwave Clean Longer

- Use a microwave splatter cover. A silicone or BPA-free plastic cover placed over your bowl or plate contains splatters at the source. A $5–8 investment that eliminates 90% of interior mess.
- Wipe spills immediately. Fresh splatters wipe off in seconds with a damp paper towel. Once they cool and harden, the same job takes 10 minutes of steam cleaning. The “immediate wipe” habit is the single most effective microwave maintenance tip.
- Do a 2-minute steam reset weekly. Keep a cup of water and vinegar in the microwave for 2 minutes every Sunday. This weekly maintenance run prevents grease from compounding into a thick, sticky layer.
- Leave the door slightly open after cooking fish or garlic. Trapping food odors inside allows them to bake into the walls the next time you use it. Cracking the door for 5 minutes lets odors dissipate naturally.
- Place an open box of baking soda inside overnight (microwave off, door closed) to absorb lingering burnt smells like popcorn or reheated seafood.
Common Mistakes to Avoid
- Skipping the dwell time. Opening the door immediately after steaming wastes the entire effort. The 5-minute wait is what softens the grime — don’t rush it.
- Using the wrong cleaner on stainless steel. White vinegar is acidic enough to damage stainless steel finishes over time. Use cream of tartar paste or a dedicated stainless steel cleaner for the exterior.
- Forgetting the door gasket. A grimy seal leads to poor closure and reduced efficiency. Clean it monthly with soapy water and a toothbrush.
- Ignoring the charcoal filter. On recirculating over-the-range models, a clogged charcoal filter makes your whole kitchen smell. Replace every 6 months — it takes 5 minutes and costs about $10–20.
- Washing a hot turntable in cold water. Always let it cool completely first to avoid cracking or shattering the glass tray.
Troubleshooting: Stubborn Stains and Odors
| Problem | Solution |
|---|---|
| Burnt popcorn smell won’t go away | Steam with baking soda solution (2 tbsp in 1 cup water), then leave an open box of baking soda inside overnight |
| Baked-on tomato sauce on ceiling | Apply baking soda paste directly to the spot, let sit 10 minutes, then wipe in circles |
| Persistent fishy odor | Steam with lemon halves, then place a bowl of dry coffee grounds inside overnight to absorb the smell |
| Yellow staining on interior walls | Wipe with a cloth dampened with undiluted white vinegar, let sit 2–3 minutes, then wipe clean |
| Turntable makes grinding noise | Remove roller ring and clean the wheel grooves with a toothbrush — food crumbs are causing the friction |
| Exterior has water streaks on stainless | Buff with a dry microfiber cloth in the direction of the grain; add a drop of baby oil for a polished finish |
How Often Should You Clean a Microwave?
Most cleaning guides say “clean it regularly” without giving a usable schedule. Here’s a specific, realistic routine for US homeowners:
- After every use: Wipe up any visible splatters with a damp paper towel
- Weekly: 2-minute vinegar steam + wipe-down of all interior surfaces and the door seal
- Monthly: Full deep clean (all steps in this guide) including turntable soak, exterior polish, and grease filter cleaning
- Every 6 months: Replace charcoal filter (over-the-range models with recirculating vents only)
Frequently Asked Questions
Can I use dish soap to clean the inside of my microwave?
Yes, mild dish soap is safe on the interior walls. However, the steam method is recommended first because it loosens grime without requiring soap residue. If you use soap, always follow up with a clean damp cloth rinse — soap residue left behind can scent your next meal.
My microwave still smells after cleaning. What should I do?
If the odor persists after vinegar steam, place an open box of baking soda inside the microwave (power off, door closed) overnight. For burnt smells specifically, steam a bowl of water with 2 tablespoons of baking soda for 5 minutes, then leave the door open for 30 minutes. Dry coffee grounds also work well for absorbing deeply set carbon smells.
Is it safe to put the turntable in the dishwasher?
Most glass microwave turntables are dishwasher-safe, but always verify in your owner’s manual first. The key safety rule: the tray must be at room temperature before it touches water. Placing a hot glass tray into cool dishwater can cause thermal shock and shatter it. The plastic roller ring should be hand-washed to prevent heat warping.
How do I clean a microwave that I haven’t touched in months?
Start with two back-to-back steam cycles (5 minutes each) to soften all that hardened buildup. After the second dwell time, apply baking soda paste directly to any remaining stuck-on spots and let it sit for 10 minutes before wiping. For the absolute worst cases, leave a damp cloth pressed against the interior overnight — the sustained moisture softens even cement-hard grime by morning.
What’s the difference between cleaning a countertop microwave and an over-the-range microwave?
The interior cleaning process is identical. The difference is the exterior. Over-the-range models have grease filters on the underside that need monthly cleaning, plus charcoal filters (on recirculating models) that need replacing every 6 months. These filters do not exist on countertop units. Over-the-range models also have interior vent openings on the ceiling — never spray liquid directly at these openings during cleaning.
Can I use bleach to clean my microwave?
No. Bleach is too harsh for microwave interiors. It can weaken plastic components, damage the interior coating, and leave behind toxic fumes that can be heated and circulated into food during the next use. Stick to vinegar, lemon juice, baking soda, and mild dish soap — these are effective, food-safe, and won’t damage your appliance.
Conclusion
A clean microwave is less about scrubbing and more about timing. The steam method does the heavy lifting — your job is just to wait, then wipe. Build in a weekly 2-minute steam reset and immediately wipe any fresh splatters, and deep cleaning becomes a 15-minute task instead of an hour of elbow grease.
If you use an over-the-range microwave, don’t overlook the grease and charcoal filters — they’re the most commonly skipped step and the most common cause of persistent kitchen odors.
Once your microwave is sparkling clean, consider giving the rest of your kitchen appliances the same treatment. Check out our guide on complete kitchen cleaning tips for a full room reset, or if your oven also needs attention, our oven cleaning tips guide walks you through every method — from baking soda paste to commercial cleaners to self-cleaning cycles.
