
Most bathroom cleaning hacks fail because they treat every surface the same. The toilet needs disinfection, the mirror needs a streak-free method, the showerhead needs descaling, and the grout needs a completely different approach from the tile. This surface-by-surface guide gives you the right hack for the right surface — with the science behind why each one works, so you can adapt it when things go wrong.
What You’ll Need
| Surface | Best Cleaning Agent | Tools |
|---|---|---|
| Toilet bowl | Toilet bowl cleaner or baking soda + vinegar | Toilet brush, rubber gloves |
| Mirror & glass | White vinegar + water (50/50) | Microfiber cloth, squeegee |
| Showerhead | White vinegar (undiluted) | Plastic bag, rubber band |
| Grout lines | Baking soda + hydrogen peroxide paste | Stiff grout brush or old toothbrush |
| Faucets & chrome | Lemon juice or white vinegar | Microfiber cloth, old toothbrush |
| Shower curtain | Washing machine + baking soda | Washing machine, towels |
| Tile surfaces | All-purpose spray or diluted dish soap | Non-scratch sponge, squeegee |
| Exhaust fan | Compressed air or vacuum attachment | Step stool, screwdriver |
| General surfaces | Disinfectant spray | Microfiber cloths (color-coded by area) |
Safety Precautions — Read Before You Start
Bathroom cleaning involves some of the harshest chemicals in your home. The single most important rule: never mix bleach with vinegar, ammonia, or hydrogen peroxide. Each combination creates toxic gases — chlorine gas from bleach plus vinegar, and chloramine vapor from bleach plus ammonia. These can cause respiratory damage even in small amounts in an enclosed bathroom space. Always read product labels before mixing any two cleaners.
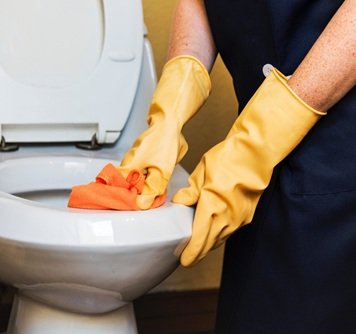
Ventilation is critical. Open the bathroom window and run the exhaust fan before you begin any chemical cleaning, and keep them running throughout. Wear rubber gloves for all cleaning tasks — disinfectants, toilet cleaners, and even vinegar solutions can cause skin irritation with repeated bare-hand contact. Switch gloves between the toilet area and sink/tub areas to prevent cross-contamination. Keep children and pets out of the bathroom until surfaces are completely dry and the room is aired out.
When using a step stool to clean the exhaust fan or light fixtures, ensure all four feet are on a flat, dry surface — bathroom floors are frequently wet and slippery.
Bathroom Cleaning Hacks — Surface by Surface
Step 1: Start With the Toilet — The Right Order Matters
Always start with the toilet. Squirt toilet bowl cleaner under the rim and let it sit — this is the dwell step that does the actual disinfecting work, and most people skip it by cleaning immediately. While the cleaner dwells (5–10 minutes), wipe the toilet exterior from top to bottom: tank lid, tank sides, handle, seat top and bottom, bowl exterior, and the floor around the base. This order means you never spread germs from the dirtiest part (the base) back to cleaner surfaces. Use a separate cloth for the toilet exterior — never the same one you’ll use on the sink.
Scrub the bowl last with a toilet brush, paying attention to the waterline where staining accumulates and under the rim where the cleaner has been dwelling. Flush to rinse. For persistent hard water rings, pour 1–2 cups of undiluted white vinegar into the bowl, let it sit for 30 minutes, then scrub. The acidity dissolves mineral deposits without harsh chemicals. See our guide on drain odors if the toilet area smells even after cleaning — the source is often the floor drain, not the toilet itself.
Step 2: Shower and Tub — Attack Soap Scum the Smart Way
Soap scum is a combination of soap residue and calcium deposits from hard water — and this combination is why scrubbing alone doesn’t remove it. You need either an acidic cleaner (vinegar, lemon juice) or a surfactant-based cleaner that breaks down the soap component. Spray the shower walls and tub with your cleaner and let it dwell for at least 3–5 minutes before scrubbing. This alone cuts scrubbing effort by more than half.
For a completely natural approach: spray undiluted white vinegar on all surfaces, wait 5 minutes, then sprinkle baking soda directly onto a damp sponge and scrub. The fizzing reaction helps lift soap scum from textured surfaces without scratching. Rinse thoroughly. After every shower — not just during cleaning — run a squeegee across shower walls for 10 seconds. This single habit prevents 80% of soap scum buildup from forming in the first place. For stubborn orange or pink staining in the shower, our guide on removing orange shower stains covers the specific bacteria-based cause and the solution.
For shower tile and grout specifically, the shower tile cleaning guide goes deeper into surface-specific techniques.
Step 3: Showerhead — The Vinegar Bag Trick (Done Right)
A clogged or underperforming showerhead almost always means limescale buildup — mineral deposits from hard water that block the spray jets. The vinegar bag method works because acetic acid dissolves calcium carbonate (the mineral in limescale) on contact. Fill a plastic bag with enough undiluted white vinegar to fully submerge the showerhead face. Secure the bag with a rubber band wrapped around the pipe arm — not the head itself. Leave for 1 hour minimum; 3 hours for heavy buildup. Remove the bag, turn on the shower at full pressure for 30 seconds to flush loosened deposits through the jets, then scrub any remaining residue with an old toothbrush. For chrome finishes, limit vinegar soaking to 1 hour — extended exposure can dull the finish. For a thorough process, see our dedicated showerhead cleaning guide.
Step 4: Grout Lines — The Baking Soda + Peroxide Method
White vinegar lightens surface mildew on grout but won’t restore deeply stained or blackened grout lines. For real results, make a paste of 3 tablespoons baking soda and 1 tablespoon of 3% hydrogen peroxide. Apply directly to grout lines with an old toothbrush or grout brush. Let it sit for 15–20 minutes — the oxygen released from the peroxide reaction is what lifts the staining out of the porous grout surface. Scrub, then rinse with clean water. For grout that has turned black from mold, apply a diluted bleach solution (1 part bleach to 10 parts water) and let dwell 10 minutes before scrubbing — but never on colored grout, as bleach will discolor it. Our complete grout cleaning guide covers every grout color and tile type.
Step 5: Mirrors and Glass — Streak-Free Every Time
Paper towels leave lint on mirrors. Ammonia-based glass cleaners evaporate too quickly in warm bathrooms, leaving streaks before you can wipe. The two most reliable streak-free methods: equal parts white vinegar and water in a spray bottle, wiped with a clean microfiber cloth in a Z-pattern (not circles); or a barely damp microfiber cloth with no product at all for light dust. Never clean mirrors when sunlight is directly hitting the glass — the heat causes the solution to dry before you can wipe, which is the most common cause of streaks. For the exhaust fan-fogged mirror problem (mirrors that fog every shower), wipe the clean mirror with a tiny amount of shaving foam and buff off completely — the residue prevents fogging for 2–3 weeks.
Step 6: Faucets and Chrome — Eliminate Water Spots
White water spots on chrome faucets are calcium deposits from hard water — the same mineral that clogs showerheads. Cut a lemon in half and rub the cut face directly on the faucet, squeeze slightly to release juice, and let it sit for 2 minutes before rinsing and buffing dry with a microfiber cloth. For heavier buildup at the faucet base and around handles where toothbrush-inaccessible areas trap deposits, dampen an old toothbrush with vinegar and scrub into crevices, then rinse. After drying, buff chrome with a dry microfiber cloth — this removes any residue and restores the shine. Never use abrasive scrubbers on chrome — they create micro-scratches that trap future deposits and are impossible to remove.
Step 7: Shower Curtain — Machine Wash Without Ruining It
Fabric shower curtains and plastic/vinyl liners can both go in the washing machine. For fabric curtains: cold or warm water, gentle cycle, regular detergent plus half a cup of baking soda added to the drum for deodorizing. Add half a cup of white vinegar to the rinse cycle as a fabric softener alternative. For plastic or vinyl liners: warm water (not hot — heat warps vinyl), gentle cycle with regular detergent and a few towels in the load — the towels act as scrubbers. Remove promptly and hang to dry immediately; do not put vinyl in the dryer. The mildew smell on shower curtains comes from the liner, not usually the fabric curtain — replace the liner every 3–6 months for a consistently fresh bathroom.
Step 8: Exhaust Fan — The Most Neglected Surface
A dust-clogged exhaust fan is less efficient, meaning the bathroom stays humid longer after each shower — which accelerates mold and mildew growth on every other surface you just cleaned. Remove the fan cover (most pull straight down and release from two mounting clips). Wash the cover in warm soapy water, rinse, and let air dry. For the fan mechanism itself, use a vacuum with a brush attachment to remove dust from the fan blades and housing — never spray liquid directly into the fan unit. Reassemble once the cover is completely dry. Clean the exhaust fan every 3 months to maintain full airflow. This single maintenance task measurably reduces how often you need to scrub the shower walls.
Pro Tips and Common Mistakes
- Always use color-coded microfiber cloths: One color for the toilet area, a different color for sink and countertop, another for glass. This eliminates cross-contamination that re-deposits bacteria even after you’ve cleaned.
- Spray cleaner, then move on — come back to wipe: Apply cleaner to the toilet bowl, then spray the sink, then spray the mirror. By the time you circle back, each product has had its dwell time. Most bathroom cleaning takes twice as long as it should because people spray and immediately wipe.
- Don’t over-scrub grout: Aggressive scrubbing on old or damaged grout can widen grout lines and loosen grout from joints. Use a stiff brush, not a wire brush, and let the chemical do the work rather than the muscle.
- Ventilate for 30 minutes after cleaning: Even after surfaces look dry, chemical vapors linger in an enclosed bathroom. Run the exhaust fan for 30 minutes post-cleaning before using the space.
- Hard water areas need more acid, not more scrubbing: If you have hard water (white chalky deposits on all fixtures), increase the vinegar concentration or dwell time — not scrubbing force. The mineral deposits require acid to dissolve, and no amount of abrasion substitutes for chemistry.
- Dry surfaces after cleaning, not just after showers: Bacteria and mold regrow on wet surfaces within hours. After cleaning, dry countertops, faucets, and the tub rim with a dry cloth to slow re-contamination.
Troubleshooting Common Bathroom Cleaning Problems

Bathroom Still Smells After Full Cleaning
The most common hidden odor sources are: (1) the toilet base seal — if the wax ring seal around the toilet base has deteriorated, sewer gases escape at floor level; (2) the p-trap in the sink drain drying out if the sink is rarely used — pour a cup of water down it to restore the water seal; (3) mold behind or under the toilet tank; and (4) a dirty exhaust fan redistributing mold spores. Check the smelly drain troubleshooting guide for drain-specific sources.
Glass Shower Door Always Has Haze Even After Cleaning
A permanent haze on a glass shower door is usually etched mineral deposits — calcium that has been repeatedly wet and dried and has bonded to the glass surface. Standard cleaners won’t remove this. Apply undiluted white vinegar with a non-scratch pad and scrub firmly — harder than you would on regular soap scum. For severe etching, Bar Keepers Friend (oxalic acid-based) applied with a damp cloth and left for 2 minutes before scrubbing is more effective. Polish the glass with a dry microfiber cloth afterward to assess whether the haze has cleared. For detailed guidance, see our hard water stain removal guide.
Grout Turns Gray Again Within Days of Cleaning
If cleaned grout regains its gray color quickly, the porous grout surface is absorbing soap scum and water minerals from daily shower use. The long-term solution is sealing the grout after cleaning — a clear grout sealer (available at any hardware store) fills the pores and prevents future absorption. Apply with a small brush along each grout line and wipe away excess after the specified dwell time. Reapply annually for maintained protection.
Frequently Asked Questions
What’s the fastest bathroom cleaning hack for a quick guest-ready clean?
For a 10-minute guest-ready clean: spray the toilet bowl and let it sit; wipe the mirror with a damp microfiber cloth; wipe the faucet and sink; wipe the toilet exterior; flush the toilet bowl. Done in that order, your bathroom looks genuinely clean because you’ve addressed all the high-visibility surfaces. Spray a small amount of your regular cleaning spray on the floor near the toilet base for odor control. The surfaces people actually look at when they walk in are the mirror, sink, and faucet — prioritize those.
Can I use vinegar on all bathroom surfaces?
Vinegar is safe on glass, chrome, ceramic tile, porcelain fixtures, and plastic. Do not use vinegar on natural stone surfaces like marble, travertine, or limestone — the acid etches and permanently damages stone. Do not use vinegar on grout repeatedly without rinsing, as long-term acid exposure gradually degrades grout. And never use vinegar on colored grout or grout that has been sealed — it can discolor and degrade the sealant.
How often should I deep clean the bathroom versus maintain it?
A full deep clean (grout, showerhead, exhaust fan, inside cabinets, behind toilet) every 2–4 weeks keeps a bathroom in excellent condition. For daily maintenance: run the squeegee after every shower (30 seconds), wipe the faucet and sink after use (20 seconds), and give the toilet a quick wipe every 2–3 days. These micro-habits make the monthly deep clean significantly shorter and easier.
Why does my bathroom get moldy so fast even after cleaning?
Recurring mold usually means the bathroom isn’t drying out between uses. Solutions: run the exhaust fan for 20–30 minutes after every shower (not just while showering); leave the bathroom door open after showering; squeegee walls and glass to remove standing water; and address the exhaust fan — if it’s dusty or undersized for the room, it’s not removing enough moisture. A fan rated for the cubic footage of your bathroom is the most impactful long-term fix.
Is baking soda or vinegar better for bathroom cleaning?
They serve different purposes. Baking soda is a mild abrasive and deodorizer — it works mechanically to scrub surfaces and absorb odors. Vinegar is an acid that dissolves mineral deposits and cuts through soap scum chemically. For most bathroom surfaces, you want both: baking soda for scrubbing power and deodorizing, vinegar for dissolving mineral and soap buildup. The fizzing reaction when you combine them is visually satisfying but neutralizes both — use them sequentially rather than simultaneously for the most effective clean.
Conclusion
Bathroom cleaning works when you match the hack to the surface and give every cleaner the dwell time it needs. Toilet bowl first, squeegee after every shower, vinegar for mineral deposits, baking soda for scrubbing, and a monthly exhaust fan clean — that combination keeps every surface in the bathroom in better shape with less effort than random scrubbing. For your next step, tackle the bathroom mold removal guide or see our complete bathroom tile cleaning walkthrough to address the surfaces this guide covers in more depth.
