Cleaning a central air conditioner involves two separate units: the outdoor condenser and the indoor evaporator coils. For the outdoor unit, shut off power, clear vegetation, vacuum the fins, straighten any bent fins, and rinse the coil with a garden hose. For the indoor evaporator, apply a no-rinse coil cleaner spray and clear the condensate drain. Do both once a year — preferably in spring before cooling season — and your AC will run measurably more efficiently and last significantly longer.
How Much Does a Dirty AC Actually Cost You?
The U.S. Department of Energy estimates that dirty condenser coils alone can reduce an air conditioner’s efficiency by 30% or more. On an average American household’s cooling bill of $500–$700 per summer, that’s $150–$210 in wasted electricity every year — just from a dirty outdoor unit. Throw in a clogged air filter and restricted airflow from dirty indoor coils, and the number climbs higher.Annual DIY cleaning costs under $25 in supplies and takes about two hours. The math makes it one of the best ROI maintenance tasks a homeowner can do.
What You’ll Need
Item
Purpose
Approx. Cost
Wet/dry vacuum with brush attachment
Vacuuming condenser fins and debris
Own or ~$40 purchase
Garden hose with spray nozzle
Rinsing outdoor condenser coil
Already own
AC fin comb (fin straightening tool)
Straightening bent aluminum fins
$8–$15
No-rinse evaporator coil cleaner spray
Indoor coil cleaning
$8–$12
Bleach solution (1:16 bleach to water)
Flushing condensate drain
Already own
Replacement air filter (correct size)
Always replace during AC cleaning
$5–$25
Flathead and Phillips screwdrivers
Opening outdoor unit top grille
Already own
Utility knife and aluminum foil tape
Resealing evaporator coil access panel
$5–$8
Work gloves and safety glasses
Protection from sharp fins and cleaning chemicals
Already own
Safety Precautions
Always shut off power to the outdoor unit at the disconnect box first — the metal box mounted on the exterior wall near the unit with an ON/OFF switch or removable fuse block. Then also turn off the circuit breaker at the main panel that controls the AC. Both shutoffs together eliminate all possibility of the unit starting while you’re working inside it.
The aluminum fins are extremely sharp. Work gloves are essential — a fin cut is a deep, clean slice that bleeds freely.
Never use a pressure washer on the condenser fins. High-pressure water bends and crushes the delicate aluminum fins, permanently restricting airflow and creating an expensive repair.
Never spray water directly at electrical components — motor, capacitor, or wiring. Direct water spray at the coil fins from the inside out only.
After cleaning, wait 24 hours before running the AC if the power has been off for more than 4 hours. The compressor needs its internal lubricant warmed by the crankcase heater before startup. Running it cold can cause compressor damage. (Full details in Step 8.)
Wear a dust mask when working on the indoor evaporator coil — years of dust, mold spores, and allergens are concentrated there.
Step-by-Step: Cleaning the Outdoor Condenser Unit
Step 1 — Shut Off All Power
Locate the disconnect box mounted on the exterior wall near the condenser unit — typically a gray or beige metal box. Open the cover and pull out the fuse block or flip the switch to OFF. Then go to your main breaker panel inside the house and also flip off the breaker labeled for the AC condenser or outdoor unit.Wait 5 minutes after shutting off power before touching anything inside the unit. The capacitor stores an electrical charge that dissipates over several minutes — this is an invisible hazard that injures people who jump in immediately after cutting power.
Step 2 — Clear the Area Around the Unit
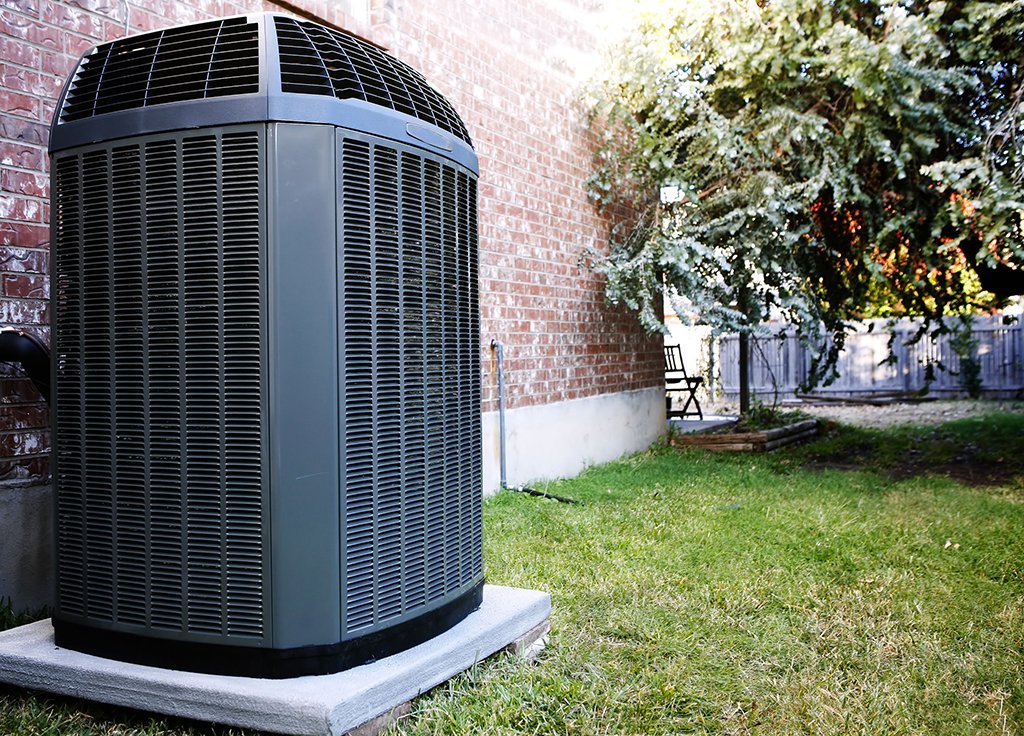
The condenser needs at least 18–24 inches of clear space on all sides for proper airflow. Trim back any shrubs, grass, or vines that have encroached on that clearance zone. Clear any leaves, twigs, cottonwood fluff, or debris that has accumulated on top of or around the unit. This alone often makes a meaningful difference in performance.
Step 3 — Vacuum the Condenser Fins
The condenser coil is the honeycomb of thin aluminum fins that wraps around the outside of the unit. Use your wet/dry vacuum with the brush attachment and vacuum the fins from top to bottom — never side to side. The fins are oriented vertically, so vacuuming with the direction of the fins is safe. Moving perpendicular to the fins bends them.Work all the way around the unit. You’ll be surprised at how much cottonwood, pet hair, grass clippings, and airborne debris the fins have captured.
Step 4 — Straighten Any Bent Fins
Walk around the unit and look for sections where the aluminum fins are bent flat — these appear as darker, solid-looking patches on the coil where individual fin gaps have collapsed together. Each bent fin section is airflow that your AC is not getting.Use an AC fin comb — a specialized plastic tool with different comb spacings that match common fin pitches. Insert the comb into an unaffected section above the bent area to establish the correct pitch, then drag the comb downward through the bent section. This takes patience and a gentle touch. Do not force fins that are bent more than 45 degrees — you risk snapping them.
Step 5 — Remove the Top Grille and Clean the Fan
The top grille of the condenser unit is secured with 4–6 screws around its perimeter. Remove them and set aside. The fan may be attached to the grille — lift it straight up and to the side, supporting the grille’s weight carefully to avoid stretching the electrical wires connected to the fan motor. Do not detach the wires unless you are comfortable reconnecting them in reverse.Wipe the fan blades with a damp cloth to remove accumulated grime. Vacuum any debris from inside the top of the unit. Do not spray water at the motor.
Step 6 — Rinse the Condenser Coil
With the fan grille lifted and set aside (supporting the wires), position your garden hose with spray nozzle inside the unit. Spray water outward through the fins from the inside out — this pushes debris out in the direction it entered, rather than packing it further in. Work from top to bottom. A moderate to strong spray is fine; avoid extreme pressure.Continue rinsing until the water running off the fins runs clear. Rinse the outside of the coil from outside as well. Allow the unit to drain for 15–20 minutes before replacing the top grille. Reattach the grille and tighten all screws.
Step 7 — Replace the Air Filter Indoors
While the outdoor unit dries, go inside and replace the air filter in your air handler or furnace return duct. Note the airflow direction arrows printed on the filter and align them correctly with the air movement direction. A clogged filter is the indoor equivalent of bent condenser fins — it restricts airflow throughout the entire system and negates the outdoor cleaning you just did.Write the installation date on the edge of the new filter with a marker so you know when it’s due for replacement (typically every 1–3 months).
Step-by-Step: Cleaning the Indoor Evaporator Coil
Step 1 — Locate and Access the Evaporator Coil
The evaporator coil is housed in the air handler or furnace unit — the indoor component of your central AC system. It’s located above the furnace burner in most setups, inside a sealed metal panel in the duct system adjacent to the blower. Look for a removable access panel, usually held in place by 2–4 screws or a locking tab.If the panel is sealed with aluminum foil tape, score and remove the tape with a utility knife. Keep the tape for resealing after cleaning.
Step 2 — Inspect and Spray the Coil
Shine your flashlight on the coil surface. If you see gray dust and grime on the fins, a no-rinse coil cleaner is the right call. If you see any black or green mold growth, call an HVAC professional — mold in the evaporator coil requires antifungal treatment and professional assessment, as it can spread throughout your home’s ductwork.Spray the no-rinse evaporator coil cleaner evenly across the entire coil surface according to the product’s directions. The foaming cleaner penetrates the fin gaps, loosens contamination, and drains into the condensate pan below as it works. No rinsing or wiping required — the self-rinsing formula is designed to drain itself.
Step 3 — Clean the Condensate Drain Pan and Drain Line
Below the evaporator coil sits a drain pan that collects condensation. Over time, algae, slime, and mineral deposits accumulate in this pan and can clog the drain line — causing the pan to overflow and water damage to your ceiling or floor.Wipe out the drain pan with a cloth dampened with your bleach solution (1 part bleach to 16 parts water). Then pour 1 cup of the bleach solution slowly down the drain line — the plastic pipe draining from the pan. This kills algae and clears partial blockages. If the pan is actively full of standing water, the drain line is fully blocked and requires clearing with a wet/dry vacuum at the exterior drain outlet.
Step 4 — Reseal the Access Panel
Allow the no-rinse cleaner 15–20 minutes to work and drain before sealing the panel. Replace the access panel and secure all screws. If the original aluminum foil tape was removed, apply fresh tape around all panel seams to maintain the airtight seal of the duct system. Unsealed duct leaks waste 20–30% of cooled air before it reaches your living areas.
If your outdoor unit has been powered off for more than 4 hours, do NOT immediately restart it in cooling mode. Here’s why: central AC compressors use oil to lubricate their internal moving parts. When the power is off, the crankcase heater (a small heating element that keeps the compressor’s oil liquid and in place) is also off. Oil can migrate out of the compressor after several hours of being cold, and starting a cold compressor causes metal-to-metal wear.The correct restart procedure:
Set your indoor thermostat to OFF (not just a higher temperature — actually OFF).
Restore power at the outdoor disconnect box and the main breaker.
Leave the system in this state for 24 hours to allow the crankcase heater to warm the compressor oil.
After 24 hours, set the thermostat to COOL and your desired temperature.
If you cleaned the unit and restarted it the same day and the power was only off for 2–3 hours, you’re likely fine — the risk window is primarily for extended outages and cold ambient temperatures.
Pro Tips and Common Mistakes
Do this in spring before first use, not in summer when it’s already hot. Working on a unit that’s been sitting idle in a cool garage is far more comfortable than servicing one in 95°F heat, and spring timing catches any issues before cooling season starts.
Always spray fins from inside out, not outside in. Spraying from outside pushes debris further into the coil, packing it tighter.
A fin comb is not optional if you have bent fins. Ignoring bent fins is leaving money on the table every month — each bent section represents airflow you’re paying for but not getting.
The outdoor unit should be level. After cleaning, check that the unit is sitting level on its pad — dirt migration can cause subtle tilting. A unit out of level has compressor oil distribution issues over time. Add or remove gravel under the pad as needed.
Don’t plant shrubs within 18 inches of the unit. Landscaping near the condenser is a maintenance problem you’re creating for yourself every year.
Frequently Asked Questions
How often should I clean my central air conditioner?
The outdoor condenser should be cleaned once a year — spring is ideal. The indoor evaporator coil can be cleaned every 1–2 years unless you have pets, live in a dusty area, or the system runs continuously; in those cases, annual indoor cleaning is better. The air filter needs replacing every 1–3 months regardless of season.
Can I use a pressure washer to clean the condenser coil?
No. A pressure washer will bend or crush the delicate aluminum fins on the condenser coil. This permanently reduces airflow and cannot be fully corrected even with a fin comb. Use a regular garden hose with a spray nozzle — moderate pressure, from inside the unit spraying outward.
My AC is running constantly but not cooling well — will cleaning fix it?
It’s a likely contributor. Dirty condenser coils, a clogged filter, or bent fins all reduce cooling efficiency and cause the system to run longer to reach setpoint. Clean all three (condenser, filter, check for bent fins) before calling for service. If cleaning doesn’t resolve it, low refrigerant or a failing compressor are the next suspects — both require a licensed HVAC technician.
What if I find mold on the evaporator coil?
Do not attempt to clean mold yourself with household products. Mold in an evaporator coil can spread spores throughout your entire home’s ductwork every time the system runs. Call a licensed HVAC technician who can perform a proper antifungal cleaning and assess whether the mold has spread to the ductwork. This is the right situation for a professional.
How much can I save on my electric bill by cleaning my AC?
A dirty condenser coil can reduce AC efficiency by 30% or more according to the Department of Energy. On a typical summer cooling bill of $500–$700, that’s $150–$210 in wasted electricity annually. Most homeowners who do a proper annual cleaning notice the difference on their first post-cleaning electric bill. The cleaning itself costs under $25 in supplies.
Clean AC, Lower Bills This Summer
Annual AC cleaning is one of those maintenance tasks with an almost guaranteed payoff — lower energy bills, fewer breakdowns, and a system that reaches its full rated lifespan instead of failing early. Two hours in spring buys you a full summer of efficient cooling.If you’re doing your spring home maintenance sweep, don’t miss our guide on cleaning your bathroom exhaust fan — another ventilation system that silently degrades when ignored.
{
“@context”: “https://schema.org”,
“@type”: “HowTo”,
“name”: “How to Clean a Central Air Conditioner”,
“description”: “Annual DIY cleaning guide for central AC outdoor condenser and indoor evaporator coil to improve efficiency and reduce energy costs.”,
“totalTime”: “PT2H”,
“estimatedCost”: {“@type”:”MonetaryAmount”,”currency”:”USD”,”value”:”20-30″},
“step”: [
{“@type”:”HowToStep”,”name”:”Shut Off All Power”,”text”:”Turn off outdoor disconnect box and main breaker. Wait 5 minutes before working inside unit.”},
{“@type”:”HowToStep”,”name”:”Clear Area and Vacuum Fins”,”text”:”Clear 18-inch clearance zone. Vacuum condenser fins top to bottom with brush attachment.”},
{“@type”:”HowToStep”,”name”:”Straighten Bent Fins”,”text”:”Use AC fin comb to restore collapsed fin sections to correct pitch.”},
{“@type”:”HowToStep”,”name”:”Remove Grille and Clean Fan”,”text”:”Unscrew top grille, wipe fan blades, remove interior debris.”},
{“@type”:”HowToStep”,”name”:”Rinse Condenser Coil”,”text”:”Spray garden hose inside-out through fins until runoff is clear.”},
{“@type”:”HowToStep”,”name”:”Replace Indoor Air Filter”,”text”:”Install new filter with correct airflow direction.”},
{“@type”:”HowToStep”,”name”:”Clean Evaporator Coil”,”text”:”Spray no-rinse coil cleaner on indoor coil. Clean condensate drain pan with bleach solution.”},
{“@type”:”HowToStep”,”name”:”Safe Restart”,”text”:”After 24-hour wait, restore power and switch thermostat to Cool mode.”}
]
}
About the Author
I'm Steve Davila, founder of GuideGrove. I started this site after years of running into home cleaning and DIY guides that skipped the important steps or assumed too much. Every guide here is written the way I wished I'd found it — with the full process, the common mistakes, and the details that actually make the difference.