Cleaning a bathroom exhaust fan takes under 30 minutes and requires nothing more than a screwdriver, a vacuum, and soapy water. Turn off power at the circuit breaker, pull down the cover, vacuum the grille and fan blades, wash the cover in soapy water, wipe down the housing, and snap everything back together. Do this every 6–12 months and your fan will run quieter, move more air, and last years longer — and your bathroom will be measurably less prone to mold.
Why a Dirty Bathroom Fan Is a Bigger Problem Than You Think
Your bathroom exhaust fan has one job: pull moisture and airborne contaminants out of the room before they can settle on your walls, ceiling, and tile grout. When the fan’s grille and blades are coated in dust, it can’t move air efficiently — a heavily clogged fan can lose 60–70% of its rated CFM (cubic feet per minute) airflow rating. The result is slower moisture removal, which directly contributes to mold growth on grout, peeling paint, rust on metal fixtures, and even structural damage to the framing behind your walls over time.Bathroom exhaust fans are required by most local building codes for exactly this reason. A clean fan is a code-compliant bathroom. A dusty one is just slowly growing problems you’ll eventually need to fix anyway.There’s also a motor longevity angle. Dust that coats the fan motor acts as insulation, causing it to run hotter than designed. This shortens the motor’s lifespan significantly — the difference between a fan that lasts 10 years and one that burns out in 5 is often just whether it was cleaned regularly.
What You’ll Need
Flathead screwdriver (for covers with screws)
Phillips screwdriver (for removing the motor assembly)
Vacuum with brush attachment and crevice tool
Can of compressed air (optional but very effective)
Mild dish soap and warm water
Soft sponge or cloth
Microfiber cloth (for the motor and housing)
Step ladder or step stool
Safety glasses and a dust mask
Small bowl or bucket
Cost: If you have these items already, this job costs $0. A can of compressed air costs about $6–$8 at any hardware or office supply store and is the one useful purchase if you don’t own one.
Safety Precautions
Turn off power at the circuit breaker — not just the wall switch. The wall switch interrupts power to the fan, but the circuit remains live. A breaker shutoff eliminates shock risk entirely while you’re working with your hands near the wiring.
Confirm power is off by flipping the wall switch after killing the breaker. If the fan doesn’t come on (it won’t), you’re safe to proceed.
Wear safety glasses. Dislodging ceiling dust and debris while looking up is a recipe for eye irritation.
Wear a dust mask. Years of accumulated lint, bathroom dust, and airborne particles will be coming down as you work.
Never submerge a fan cover with an integrated light in water — the light socket will not dry safely. Use a vacuum and damp cloth only for these covers.
Do not let water near the motor, wiring, or light socket at any point during cleaning.
Step-by-Step: Cleaning Your Bathroom Exhaust Fan
Step 1 — Kill the Power at the Breaker
Go to your home’s circuit breaker panel and flip off the breaker labeled for the bathroom or bathroom fan. Return to the bathroom and flip the fan’s wall switch to confirm it won’t turn on. Set up your step ladder underneath the fan so you can reach it comfortably without stretching.
Step 2 — Vacuum the Cover Before Removing It
Before you pull the cover down, vacuum the visible dust off the grille while it’s still in place. This prevents a cloud of dust from falling into your bathroom — and onto you — when you release the cover. Use the brush attachment on your vacuum and work over the entire grille surface.
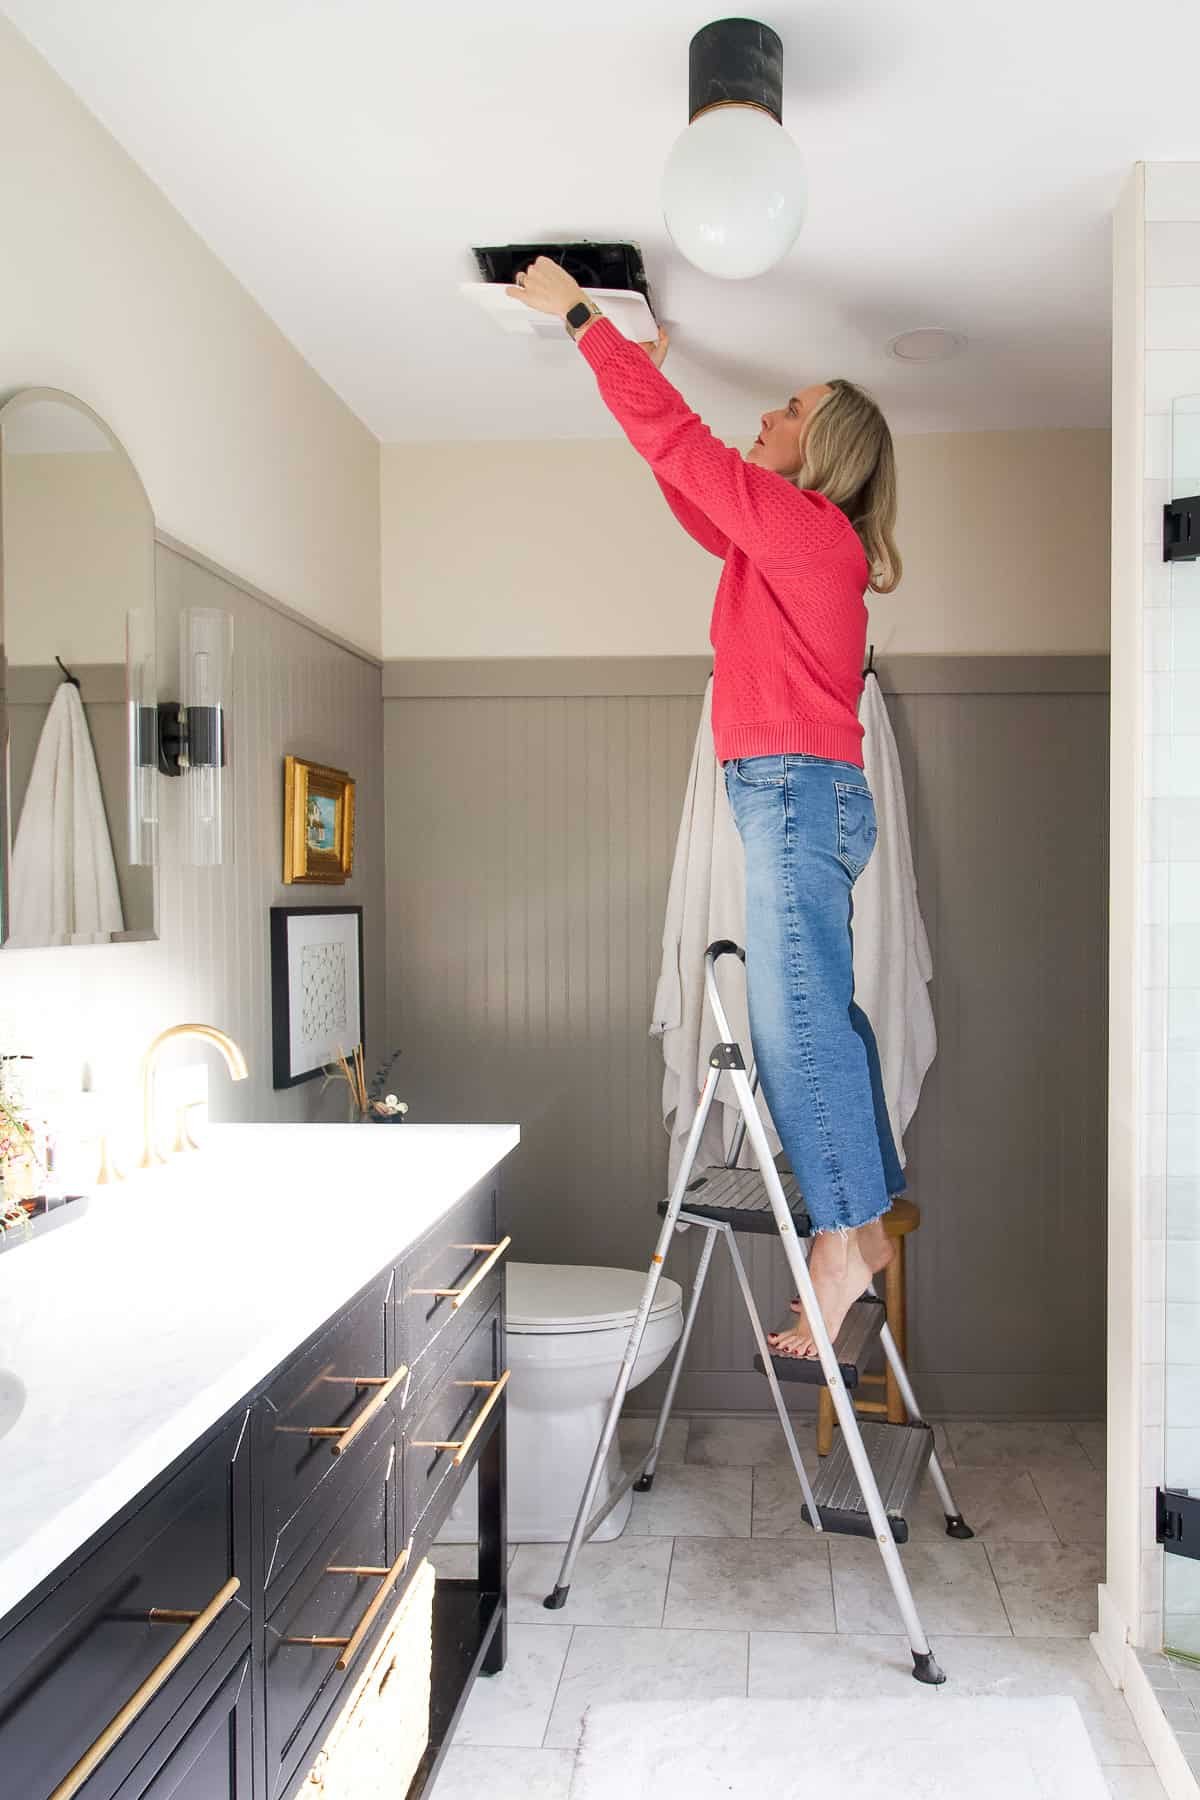
Step 3 — Remove the Fan Cover
Spring-clip covers (most common): Grasp the cover on both sides and pull it firmly downward — it will drop an inch or two before stopping. You’ll see two metal spring clips on either side. Squeeze both clips together simultaneously and the cover will release completely.Screw-mounted covers: Remove the single center screw or the two side screws, then lower the cover carefully.Covers with integrated lights: After lowering the cover as above, you’ll see wires connecting the light socket to the ceiling housing. Note the wire colors for reassembly, then disconnect the wire connector (it simply pulls apart) or unscrew the wire nuts. Set the cover aside carefully.
Step 4 — Clean the Fan Cover
Covers without lights: Fill your bathroom sink or a bowl with warm water and several drops of dish soap. Submerge the cover and let it soak for 3–5 minutes to loosen caked dust. Scrub with a soft sponge — the grille slots respond well to a toothbrush for getting into the narrow openings. Rinse thoroughly under running water and set aside to air dry completely before reinstalling. Do not reinstall a damp cover.Covers with lights: DO NOT submerge in water. Instead, use your vacuum’s crevice tool to remove loose dust from the grille, then wipe the cover down with a damp cloth. A cotton swab reaches into individual grille slots. Allow to air dry.
Step 5 — Vacuum the Fan Housing Interior
With the cover removed, you can now see the fan housing mounted in the ceiling. Use the brush attachment to vacuum as much of the housing interior, fan blades, and motor assembly as you can reach. Switch to the crevice tool for corners and tight spots around the motor mount.Follow the vacuum with a can of compressed air if you have one — short bursts directed at the fan blades and motor housing will dislodge dust the vacuum nozzle can’t reach. Take the fan outside or into the tub enclosure before using compressed air to avoid re-coating your bathroom in the dust you’re removing.
Step 6 — Remove and Clean the Motor Assembly (For a Deep Clean)
For a thorough cleaning — recommended once a year — remove the motor assembly from the housing. First, unplug the motor’s power connector (a small plastic plug — it simply pulls apart). Most motor assemblies are held in place by two or three small screws. Remove the screws while supporting the motor with your other hand so it doesn’t drop.Take the motor assembly to a well-ventilated area (outdoors or a garage). Vacuum the motor’s fins and fan blades with the brush attachment. Follow with compressed air for a thorough clean. Use a dry microfiber cloth — no water near the motor. Let any compressed air residue dissipate for a minute before reinstalling.
Step 7 — Wipe the Housing and Ceiling Surround
While everything is apart, wipe the inside of the ceiling housing with a slightly damp microfiber cloth to remove any remaining dust. Wipe the ceiling around the fan opening as well — this area accumulates grime from exhaust airflow that’s often overlooked.
Step 8 — Reassemble and Restore Power
Confirm the fan cover is completely dry before reinstalling. Reconnect the motor power plug and reinstall the motor assembly with its screws. Reconnect the light wiring if applicable. Snap the fan cover back into the spring clips or replace the screws.Return to the breaker panel and restore power. Back in the bathroom, flip the wall switch. The fan should run noticeably quieter and you should feel stronger airflow than before.Quick airflow test: Hold a single square of toilet paper near (but not touching) the running fan. It should be pulled visibly upward toward the grille. If it barely moves, you either have a dirty duct or a worn-out fan — see troubleshooting below.
Pro Tips and Common Mistakes
The wall switch is not enough — always use the breaker. This is the single most important safety step and the one most commonly skipped.
Never reinstall a damp cover or motor. Set a timer for 30 minutes and go do something else. Electrical components and moisture are not friends.
Clean every 6 months — set a calendar reminder today. Spring and fall work well because you’re already doing seasonal maintenance.
Don’t ignore a fan that’s suddenly loud. Increased noise usually means dust has thrown the fan blades off balance, or a bearing is wearing out. A cleaned fan that’s still loud after cleaning needs to be replaced.
Check the exterior vent cap while you’re at it. Every bathroom fan exhausts to the outside via a duct. Go outside and locate the vent cap on the wall or eave. Clear any lint, debris, or spider webs from the flap — a blocked exterior vent means the fan is moving no air at all regardless of how clean the grille is.
Troubleshooting: What If the Fan Still Has Problems After Cleaning?
Still loud after cleaning: Replace the fan. A clean fan that’s still loud typically has a worn bearing or an unbalanced motor. Most bathroom fans last 10–15 years; replacement units start around $25–$30 at any hardware store.
Still not removing steam effectively: Check the exterior duct cap first (blockage). Then check the duct run length — bathroom fans lose significant CFM over long duct runs. If the duct is clear and short and the fan still can’t clear steam, your fan may simply be undersized for the bathroom. A fan rated for 50 CFM in a 150 sq ft bathroom is always going to struggle.
Fan hums but blades don’t spin: The motor is likely seized from heat damage or bearing failure. Replace the fan — this is not a repairable condition in most consumer-grade units.
Flickering light in fan/light combo unit after reassembly: Reconnect the light wire connector carefully — it was likely not fully seated. If flickering continues, check for a loose wire nut at the junction box in the ceiling.
Frequently Asked Questions
How often should you clean a bathroom exhaust fan?
Clean the grille cover and vacuum the fan blades at minimum every 6 months. In bathrooms that see heavy use, are in a humid climate, or where you run the fan for long periods daily, every 3–4 months is better. A full deep clean including motor removal is appropriate once a year.
Can I clean a bathroom fan without turning off the breaker?
You should not. While turning off the wall switch does cut power to the fan and light, the wiring in the ceiling housing remains live. If you accidentally touch or disturb a wire, you risk electric shock. Killing the breaker takes 30 seconds and eliminates that risk entirely.
What happens if I never clean my bathroom fan?
A consistently dirty fan will progressively lose airflow efficiency — often by 50–70% compared to clean performance. The result: moisture stays in the bathroom longer, accelerating mold growth on grout and caulk, causing paint to peel, and eventually contributing to wood rot in the framing. The motor also runs hotter and fails sooner. A $0 cleaning job prevents what can become a $500–$2,000 mold remediation or carpentry repair.
My bathroom fan is really noisy — will cleaning fix it?
Noise from a dirty fan is usually caused by dust on the blades creating airflow imbalance, or debris rattling inside the housing. Cleaning often fixes or significantly reduces the noise. If the fan is still loud after a thorough cleaning, the motor bearing is likely worn — at that point, replacing the fan is more cost-effective than any repair attempt.
Should I clean or replace my bathroom fan?
Clean it first and evaluate. If the fan is less than 10 years old and was working adequately before it got noisy or weak, cleaning almost always restores full performance. If the fan is 15+ years old, still struggles after cleaning, makes grinding or squealing noises, or is consistently failing to clear steam from the bathroom, replacement is the smarter investment. A quality replacement fan with proper CFM rating for your bathroom size runs $30–$80 and takes about an hour to swap out.
Clean Fan, Clean Bathroom
A clean bathroom exhaust fan is one of the easiest and highest-impact maintenance tasks in your home. Thirty minutes twice a year keeps your bathroom protected from moisture damage, your fan running quietly, and your utility bill a little lower. The next time you walk into your bathroom and that fan just sounds tired — you now know exactly what to do about it.If you’re tackling bathroom maintenance, don’t stop at the fan. Check out our guide on how to clean grout in shower — the combination of a clean fan and clean grout is the most effective one-two punch against bathroom mold you can do yourself.
{
“@context”: “https://schema.org”,
“@type”: “HowTo”,
“name”: “How to Clean a Bathroom Fan”,
“description”: “Step-by-step guide to cleaning a bathroom exhaust fan cover, blades, and motor to improve airflow, reduce noise, and prevent mold.”,
“totalTime”: “PT30M”,
“tool”: [
{“@type”:”HowToTool”,”name”:”Vacuum with brush attachment”},
{“@type”:”HowToTool”,”name”:”Screwdriver”},
{“@type”:”HowToTool”,”name”:”Step ladder”},
{“@type”:”HowToTool”,”name”:”Compressed air can”}
],
“step”: [
{“@type”:”HowToStep”,”name”:”Kill Power at Breaker”,”text”:”Turn off circuit breaker controlling the bathroom fan. Confirm with wall switch.”},
{“@type”:”HowToStep”,”name”:”Vacuum Cover In-Place”,”text”:”Vacuum grille while still mounted to prevent dust fall.”},
{“@type”:”HowToStep”,”name”:”Remove Fan Cover”,”text”:”Squeeze spring clips or remove screws to lower cover. Disconnect wires if light-equipped.”},
{“@type”:”HowToStep”,”name”:”Clean the Cover”,”text”:”Soak plain covers in soapy water. Wipe light-equipped covers with damp cloth only.”},
{“@type”:”HowToStep”,”name”:”Vacuum Housing Interior”,”text”:”Vacuum fan blades, motor, and housing. Use compressed air for thorough cleaning.”},
{“@type”:”HowToStep”,”name”:”Remove and Clean Motor (Annual)”,”text”:”Unplug motor connector, remove screws, take outside to vacuum and compressed-air clean.”},
{“@type”:”HowToStep”,”name”:”Reassemble and Test”,”text”:”Reinstall dry cover. Restore breaker power. Test fan and airflow with toilet paper test.”}
]
}
About the Author
I'm Steve Davila, founder of GuideGrove. I started this site after years of running into home cleaning and DIY guides that skipped the important steps or assumed too much. Every guide here is written the way I wished I'd found it — with the full process, the common mistakes, and the details that actually make the difference.