Cleaning a box fan can be done two ways depending on how dirty it is and how much time you have. For a quick clean without disassembly: unplug it, vacuum both grilles with a brush attachment, and wipe the exterior. For a full deep clean: unplug it, remove the front and back grilles with a screwdriver, soak the grilles in soapy water, wipe the blades, and let everything dry before reassembling. Both methods are covered step by step here. Do either one every 2–4 weeks and your fan will move more air, run cooler, and last longer.
Why Your Box Fan Deserves a Proper Cleaning
A box fan with dust-coated blades can lose up to 30% of its rated airflow. Every revolution of a dirty blade is less efficient than a clean one — the dust alters the blade’s aerodynamic profile and increases drag on the motor. The motor then runs hotter to maintain the same RPM, which shortens its lifespan.For anyone with allergies or pets, the health case is even clearer: a dirty fan doesn’t just move less air, it actively circulates accumulated allergens, pet dander, and dust particles with every cycle. Regular cleaning is directly correlated with indoor air quality in the rooms where your fan runs.
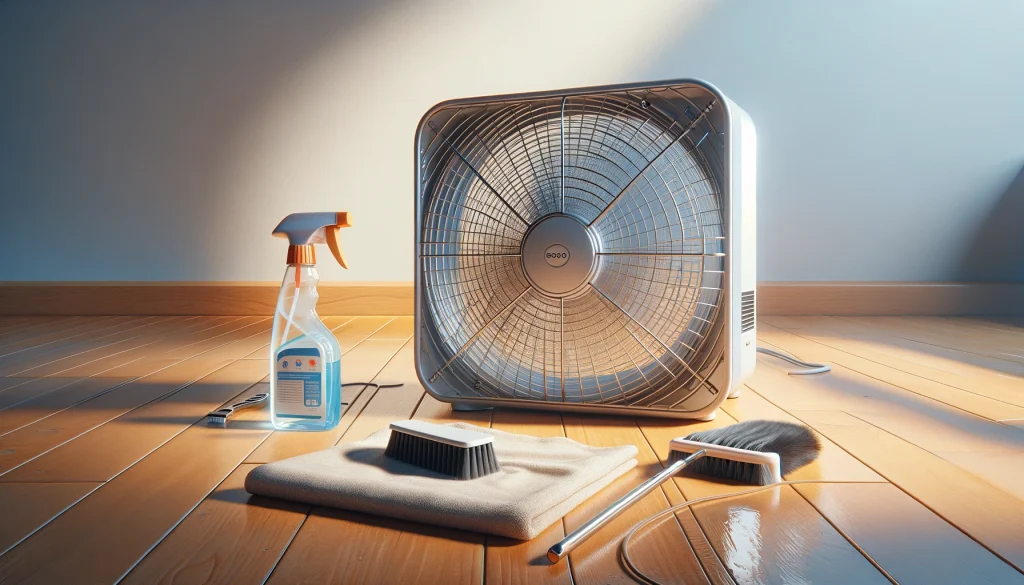
What You’ll Need
Item
Quick Clean
Full Deep Clean
Vacuum with brush attachment
✅ Required
✅ Required
Microfiber cloth (2–3)
✅ Required
✅ Required
Screwdriver (Phillips or flathead)
❌ Not needed
✅ Required
Mild dish soap
❌ Not needed
✅ Required
Bucket or bathtub
❌ Not needed
✅ Required
Soft sponge or brush
❌ Not needed
✅ Required
Can of compressed air (optional)
✅ Optional
✅ Optional
Large plastic bag (optional)
✅ Optional
❌ Not needed
Safety Precautions
Unplug the fan from the wall before doing anything. This is non-negotiable. A box fan running when your hands are near the grille is dangerous. Confirm it’s unplugged before touching the grille.
Never spray water directly onto the fan — spray onto a cloth first and wipe. Water inside the motor housing causes electrical failure and creates a shock hazard.
The motor housing must never be submerged or exposed to water. Only the grilles and blades (if removable and fully detached) should go near water.
Ensure all components are fully dry before reassembly and use. Plugging in a fan with any residual moisture in the motor housing or blade attachments is a fire and shock risk.
Method 1: Quick Clean Without Disassembly
Use this method for routine maintenance (every 2 weeks) or when you need the fan clean quickly without a full project.
Step 1 — Unplug and Position the Fan
Unplug from the wall. Take the fan outside or set it on an old towel — a significant amount of dust will be loosened during cleaning and you don’t want it redistributed inside your home.
Step 2 — The Plastic Bag Trick (Optional but Effective)
Here’s a tip that most cleaning guides don’t include: before vacuuming, slip a large plastic bag (a contractor bag or large garbage bag works well) over the front of the fan grille. When you vacuum from the back, the bag traps the dust that would otherwise blow forward into the room. Remove the bag carefully after vacuuming — the dust stays inside it.
Step 3 — Vacuum Both Grilles
Use the vacuum’s brush attachment on the front grille first, working the bristles into the grille slots to dislodge packed dust. Flip the fan and vacuum the back grille in the same way. The back grille (air intake side) is typically dirtier because it draws air — and dust — directly in.If you have compressed air, follow the vacuuming with short bursts through both grilles to dislodge any remaining embedded dust. Outdoors is strongly recommended for the compressed air step — indoors it creates a dust cloud.
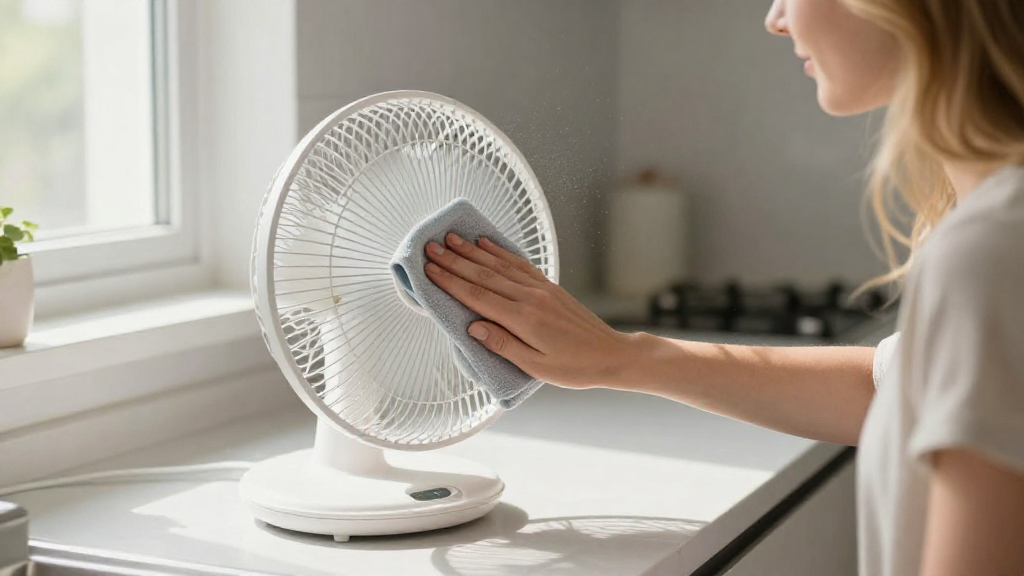
Step 4 — Wipe the Exterior
Dampen a microfiber cloth with plain water (wrung well) and wipe the entire exterior of the fan housing — top, sides, bottom, and the front grille face. Follow with a dry cloth. Do not let water run down into any vents on the housing. Cotton swabs work well for cleaning around the speed selector dial or oscillation button.
Step 5 — Allow to Dry and Reinstall
Allow 5–10 minutes before plugging back in. A fan cleaned with damp cloths only should be fine to use after a brief drying time in a well-ventilated spot.
Method 2: Full Deep Clean with Disassembly
Use this method at the start and end of fan season, or any time the fan has significant visible grime on the blades beyond the grille surface.
Step 1 — Unplug and Disassemble the Grilles
Most box fans are held together with 4–8 screws around the perimeter of the back grille — check all four sides and corners. Some also have clips. Remove all screws and set them in a small cup so they don’t roll away. Gently pry apart any clips, working around the perimeter. Separate the front grille from the back housing.Consult your owner’s manual if you’re unsure — the disassembly method varies slightly by brand (Lasko, Comfort Zone, Holmes all have slightly different clip configurations). Never force a stuck grille; look for a hidden screw before applying pressure.
Step 2 — Remove the Fan Blades (If Possible)
On many box fans, the blade assembly can be unscrewed from the motor shaft by removing a center retention nut or cap. Check your manual — it will tell you if the blades are designed to be user-removed and in which direction the center nut threads (many are reverse-threaded — loosen clockwise, tighten counterclockwise). If blades are not designed for removal, clean them in place after separating the grilles.
Step 3 — Soak and Scrub the Grilles
Fill your bathtub or a large bucket with warm water and several drops of dish soap. Submerge the grilles and let them soak for 5–10 minutes. The soak loosens caked dust that’s bonded to the plastic from heat and moisture over months of use.Scrub the grilles with a sponge — a toothbrush is useful for individual grille slots that won’t release their dust otherwise. Rinse thoroughly under running water. Set aside to air dry — the plastic grilles need to be completely dry before reassembly. Set them in a sunny spot or near a fan (not this fan, obviously) to speed drying.
Step 4 — Wipe the Fan Blades and Housing Interior
With the grilles off, you now have direct access to the fan blades. Wipe each blade individually with a damp microfiber cloth — front and back of each blade. This is where accumulated grime directly impacts airflow, and wiping each blade makes a measurable difference in performance and noise level.Wipe the interior of the back housing with a slightly damp cloth as well, being careful to avoid the motor housing. Use a dry cloth to follow and absorb any residual moisture. Vacuum the interior corners where lint collects around the motor mount — a small brush attachment works well here.
Step 5 — Reassemble Only When Fully Dry
This step has the most-often-ignored instruction in all of fan cleaning: wait until every component is completely and thoroughly dry. A grille that feels dry to the touch on the outside may still hold moisture in the plastic slots from soaking. Minimum 30 minutes air drying after the last drip; 1 hour is better.Reattach the blades to the motor shaft (tighten the center nut firmly — reverse-threaded if applicable). Seat the front grille against the back housing and replace all screws. Check that the grille fits snugly with no rattling — loose grille screws cause vibration noise during operation.
Step 6 — Test Before Returning to Service
Plug in and run the fan on low speed first. Listen for any new rattles (loose grille screw) or grinding (blade touching the grille from misalignment). After 30 seconds on low, cycle through all speed settings to confirm normal operation.
Pro Tips for Pet Owners and Allergy Sufferers
Clean more often if you have pets. Pet hair and dander pack into box fan blades and grilles at 2–3× the rate of a pet-free home. Every 2 weeks for a quick vacuum clean is appropriate if you have shedding dogs or cats.
Add a box fan filter to the back grille. Specially-made adhesive filter pads that stick to the back grille are available for about $8–$10 for a multi-pack. They capture pet hair and large dust particles before they reach the blades, dramatically reducing cleaning frequency. Replace the filter monthly.
Use an allergen-reducing spray on the blades after cleaning and before reassembly — products like Pledge Dust & Allergen applied to a cloth and wiped on the blades leave an anti-static treatment that resists dust re-accumulation for weeks.
Store fans in sealed bags during off-season. A contractor garbage bag sealed with tape keeps a stored fan dust-free through winter. Quick-cleaning a stored fan versus one that sat open in a dusty garage is a completely different task in spring.
Frequently Asked Questions
How often should I clean my box fan?
For routine maintenance: a quick vacuum of both grilles every 2–4 weeks during regular use. A full deep clean with disassembly and grille soaking at the beginning and end of fan season — or anytime you notice the fan running louder, moving less air, or visibly dirty blades when you look through the grille.
Can I put box fan grilles in the dishwasher?
Technically some plastic grilles can tolerate a gentle dishwasher cycle on the top rack, but it’s not recommended. Dishwasher detergent can discolor or degrade the plastic over time, and the heat cycle can warp thinner grilles. Hand-washing in warm soapy water takes the same amount of time and is gentler on the components.
My box fan is louder after cleaning — what happened?
The most common cause is a grille screw that wasn’t fully tightened during reassembly. Vibration from the motor amplifies any loose component into an annoying rattle. Check all perimeter screws and tighten them. If the noise is more of a whirring or grinding, the fan blades may have been reinstalled slightly out of alignment with the motor shaft — remove the center retention cap and re-seat the blades.
Is it safe to spray water on a box fan to clean it?
No. Spray water at a cloth first, then wipe the fan. Spraying directly onto the fan introduces water to the motor housing and wiring, which causes electrical short circuits, corrosion, and shock hazard. The grilles (fully detached and separated from the fan body) are the only components that can be safely submerged in water.
Clean Fan, Fresher Air
A clean box fan works better in every measurable way — more airflow, less motor heat, less noise, and less recirculated dust in your home’s air. The quick method takes 10 minutes; the full deep clean takes about 45. Either way, it’s one of the most impactful maintenance tasks you can do for your summer comfort.Looking for more fan maintenance guidance? Check out our pillar guide on how to clean a bathroom exhaust fan — a different type of fan with its own maintenance method that often gets ignored even longer than box fans.
{
“@context”: “https://schema.org”,
“@type”: “HowTo”,
“name”: “How to Clean a Box Fan”,
“description”: “Two-method guide to cleaning a box fan — quick no-disassembly method and full deep clean with grille removal. Includes pet hair tips and allergen reduction strategies.”,
“totalTime”: “PT45M”,
“step”: [
{“@type”:”HowToStep”,”name”:”Unplug the Fan”,”text”:”Disconnect from wall outlet. Take outside or place on old towel.”},
{“@type”:”HowToStep”,”name”:”Quick Method — Vacuum Both Grilles”,”text”:”Use brush vacuum attachment on front and back grilles. Use plastic bag trick to trap dust.”},
{“@type”:”HowToStep”,”name”:”Quick Method — Wipe Exterior”,”text”:”Wipe housing with barely damp microfiber cloth. Allow to dry before use.”},
{“@type”:”HowToStep”,”name”:”Deep Clean — Remove Grilles”,”text”:”Unscrew all perimeter screws. Separate front grille from back housing.”},
{“@type”:”HowToStep”,”name”:”Deep Clean — Soak Grilles”,”text”:”Soak in warm soapy water 5–10 minutes. Scrub with sponge. Rinse and air dry fully.”},
{“@type”:”HowToStep”,”name”:”Deep Clean — Clean Blades and Housing Interior”,”text”:”Wipe each blade front and back. Vacuum housing interior avoiding motor.”},
{“@type”:”HowToStep”,”name”:”Reassemble When Fully Dry”,”text”:”Wait minimum 30–60 minutes for all components to dry completely. Reassemble and tighten all screws.”}
]
}
About the Author
I'm Steve Davila, founder of GuideGrove. I started this site after years of running into home cleaning and DIY guides that skipped the important steps or assumed too much. Every guide here is written the way I wished I'd found it — with the full process, the common mistakes, and the details that actually make the difference.