Choosing Your Box Design: Standard vs. Long Box
There are two common washer game box designs, and picking the right one depends on how you plan to play and store the game:| Design | Dimensions | Best For | Cup Style |
|---|---|---|---|
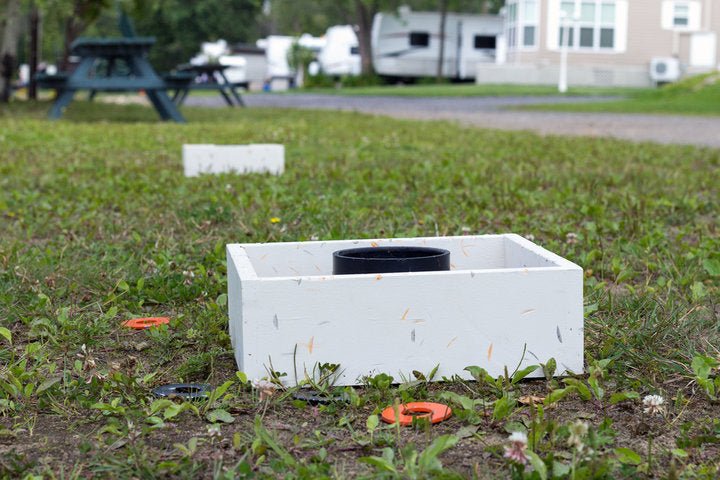
| Standard Square Box | 16×16 inches | Backyard, tailgating, easy transport | Single PVC coupler in center |
| Long Tournament Box | 18×48 inches | Tournament play, permanent yard setup | Three holes cut in a row |
Complete Materials and Cut List
| Material | Qty for 2 Boxes | Est. Cost | Notes |
|---|---|---|---|
| 1×4 pine board (8 ft) | 2 boards | $5–$8 ea | Choose straight boards — no warping |
| ½-inch plywood (2×4 ft) | 1 sheet | $10–$14 | Gives you two 16×16 base squares with scrap |
| 3-inch PVC pipe coupler | 2 | $2–$3 ea | Plumbing aisle — it’s a coupler, not an end cap |
| Indoor/outdoor carpet (18-inch roll) | 1 linear foot | $1–$4 | Or non-slip tool-box liner mat — see Step 5 |
| 3M Spray Adhesive (or similar) | 1 can | $8–$10 | For bonding carpet to plywood base |
| Construction adhesive | 1 tube | $5–$7 | For securing PVC coupler — Liquid Nails or similar |
| 1¼-inch exterior wood screws | ~28 | ~$3 | Exterior-grade if the game will live outside |
| Wood glue (water-resistant) | 1 bottle | $5 | Titebond III for outdoor durability |
| Exterior spray paint (2 colors) | 1 can each color | $5–$7 ea | Rust-Oleum 2X for best outdoor durability |
| Clear exterior sealant (optional) | 1 can | $7–$10 | Strongly recommended for outdoor storage |
| 1-inch flat washers | 8 (4 per team) | ~$0.25 ea | Hardware store; buy 10–12 — they roll into grass |
| Eye bolt screws + 21-ft chain (optional) | 1 pair | $5–$8 | For consistent distance setup — a worthwhile upgrade |
Tools Required
- Miter saw, circular saw, or jigsaw (or have the hardware store cut it)
- Drill with #2 Phillips bit and drill bits for pilot holes
- Tape measure and pencil
- Speed square or carpenter’s square
- Clamps (at least 2 bar clamps)
- Sandpaper (80-grit and 120-grit)
- Utility knife
- Safety glasses and work gloves
Safety Precautions
- Safety glasses are required any time a saw is running — wood chips travel fast and far.
- Pre-drill all pilot holes before driving screws. Pine boards split without pilot holes, especially within 1 inch of board ends.
- Use spray adhesive and construction adhesive outdoors or in a ventilated garage — both off-gas fumes that are unpleasant in enclosed spaces.
- Let all adhesives cure fully before playing — see Step 6 for why the PVC coupler specifically needs 24 full hours before taking washer hits.
- Sand all edges and corners of the finished boxes — sharp plywood edges and corners can cut skin, especially with kids playing.
Step-by-Step: Building the Washer Game Boxes
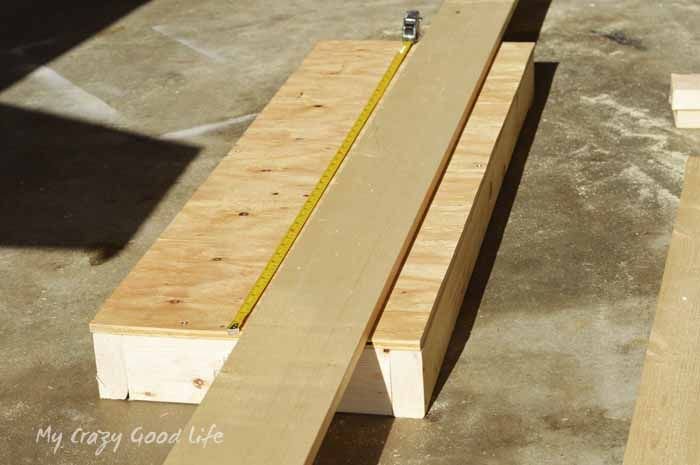
Step 1 — Cut All Lumber to Size
For each 16×16-inch box, cut from your 1×4 boards:- Two side pieces at 16 inches long
- Two end pieces at 13½ inches long (16 inches minus the thickness of two side boards: 1.5 inches × 2 = 3 inches)
Step 2 — Sand All Pieces
Run 80-grit sandpaper over any rough cut faces, then follow with 120-grit on all surfaces. Pay special attention to the top edges of the side boards where hands will grab the box, and the inside corners of the frame where the carpet will wrap. Smooth edges take paint better and look far more finished.Step 3 — Assemble the Box Frame
Lay two side pieces and two end pieces on a flat surface. Apply a thin bead of wood glue to the end grain of each end piece. Clamp an end piece flush between the two side pieces (the end pieces sit inside the sides, flush with the ends). Pre-drill two pilot holes per corner, then drive two screws per joint. Check the frame for square by measuring diagonally corner to corner — both measurements should be within ⅛ inch of each other.Once the frame is square, set it squarely on the plywood base. Trace the frame’s interior on the base. Apply wood glue around the bottom edge of the frame, set it on the base, confirm square, and screw through the plywood into the bottom of the frame every 4 inches. Let the glue set for at least 1 hour before continuing.Step 4 — Find and Mark the Exact Center
On the inside base of each box, draw an X from corner to corner — pencil lines connecting opposite corners intersect at the exact geometric center of the square. Set your PVC coupler over this intersection and trace around it to confirm it sits centered with equal space on all four sides. Mark the center point clearly.This is the step most people rush. An off-center cup is immediately obvious during play — one team is consistently throwing to a cup that’s closer to their side of the box. Takes 60 seconds to do right.Step 5 — Cut and Install the Carpet or Liner
Cut two carpet squares to 15×15 inches — slightly smaller than the 16×16 box interior so the carpet lays flat without bunching at corners. Flip the carpet face-down and use your utility knife to cut a circle from the center of each square. The circle should match the outer diameter of your PVC coupler so the coupler will sit flush in the carpet or slightly raised above it.Apply spray adhesive to both the back of the carpet and the plywood base interior, following the can’s instructions (usually a 30-second wait before contact). Press the carpet firmly in place from center to edges, then weight it down with books or scrap wood for 30 minutes.Alternative — non-slip tool-box drawer liner: The rubbery mesh liner available in any hardware store for about $8 works excellently in washer game boxes, grips the washers better than thin carpet, requires no adhesive (it’s self-gripping), and is easier to replace if damaged. Cut it to 15×15 and drop it in. Many experienced builders prefer it to carpet.Step 6 — Install the PVC Coupler (Give It a Full 24 Hours)
Center the PVC coupler over the carpet hole and center mark. Apply a generous bead of construction adhesive around the entire base perimeter of the coupler, pressing it firmly into the carpet and plywood. Wipe any squeeze-out from the carpet surface immediately.For additional reinforcement — which I strongly recommend — drive 3–4 short screws through the plywood base from underneath, angled upward into the base of the coupler. This is the difference between a PVC cup that pops loose after two games and one that lasts for years of direct hits from flying metal washers.The most common mistake in this whole build: Playing with the boxes the same day the coupler is glued. Construction adhesive feels set in 2 hours but is not structurally cured for 24. A coupler that gets direct washer hits before it’s cured will eventually twist loose no matter how much adhesive you used. Build it today, play tomorrow.Step 7 — Paint and Finish the Exterior
Sand the exterior of each box with 120-grit, then apply a coat of spray primer. Once the primer dries (30–60 minutes), apply two coats of exterior spray paint in your chosen colors. Let each coat dry fully before applying the next. Paint the exterior only — leave the carpet interior unpainted.For outdoor storage durability: Follow the color coats with a coat of Rust-Oleum Clear Enamel or a similar exterior clear coat. This is the difference between paint that lasts two seasons and paint that lasts six. If the game is going to live in a covered patio or be brought inside after each use, the clear coat is optional. If it’s staying outside, it’s essential.Step 8 — Prep the Washers and Add the Distance Chain
Paint 4 washers in one color and 4 in another — one quick shot of spray paint per side works fine, or use colored nail polish for indoor sets. Buy 10–12 washers total and mark all of them before sorting — you’ll need the extras when some inevitably roll into deep grass and become permanent residents of your lawn.For the distance chain: screw an eye bolt into the center of each box on one of the short ends. Attach a chain of exactly 21 feet between them. Games that need measuring tape every time don’t get played as often — the chain makes setup a 10-second job.
Washer Toss Game Rules
- Tossing order: Both players toss one washer to determine who goes first — nearest to the cup wins the toss. Closest box to that player is their throwing position.
- Scoring — Box Version: Washer in the PVC cup = 3 points. Washer in the box but not in the cup = 1 point. Washer on the box edge and staying = automatic win (most house rules).
- Cancellation scoring: Only one player/team scores per round. Subtract the lower score from the higher — if Player A scores 4 and Player B scores 2, Player A nets 2 points that round.
- Target score: First to exactly 21 wins. Going over 21 sends your score back to 15 (standard house rule) or back to your previous score.
- Each player throws: 4 washers per round (for 2-player games) or 3 washers per player in some tournament formats.
Pro Tips and Common Mistakes
- Wrong PVC size: Use a 3-inch coupler, not a 4-inch. The 4-inch version is too easy to score in and makes the game boring within 20 minutes.
- Skipping pilot holes: Pine end grain splits when you drive screws without pre-drilling. Every joint needs a pilot hole slightly narrower than your screw shaft.
- Rushing the PVC glue cure: I know I already said it — but this is genuinely the #1 first-build regret. Build day 1, play day 2.
- Storage hack: One box face-down on top of the other — the frames nest perfectly and the stack is compact enough for a car trunk or shelf.
