Removing a tub drain stopper typically involves identifying its specific type, such as a pop-up, lift-and-turn, push-pull, or toe-touch model. Once identified, the process usually requires unscrewing, unthreading, or detaching the stopper from the drain assembly, often with basic tools like a screwdriver or pliers. This guide provides detailed instructions for each common type, helping you clear clogs or perform maintenance.
- Identify your tub drain stopper’s mechanism before starting.
- Gather appropriate tools like screwdrivers, pliers, or a flashlight.
- Follow specific steps for pop-up, lift-and-turn, push-pull, or toe-touch stoppers.
- Always prioritize safety by wearing gloves and avoiding harsh chemicals.
- Clean the stopper and drain thoroughly once removed to prevent future issues.
- Know when to seek professional help for complex or persistent problems.
Prioritizing Safety: Important Warnings Before You Start
Before you begin any plumbing work, including removing a tub drain stopper, safety should be your top concern. Working with drains can expose you to grime, bacteria, and potentially harsh cleaning chemicals if they’ve been used previously. Always take precautions to protect yourself and your bathroom.
Ensure you have adequate ventilation, especially if you anticipate encountering strong odors or using any cleaning agents. Wear protective gloves to shield your hands from dirt, grime, and any sharp edges within the drain. A flashlight can be invaluable for illuminating dark drain areas, helping you see small components and avoid accidental damage or injury.
Gathering Your Gear: Tools and Materials Required
Having the right tools on hand will make the process of removing your tub drain stopper much smoother and more efficient. While the exact tools may vary slightly depending on your stopper type, a basic kit will cover most scenarios. Prepare your workspace by laying down old towels or rags to catch any drips or debris.
- Screwdrivers: Both Phillips-head and flat-head screwdrivers are commonly needed for various stopper types.
- Pliers: Adjustable pliers or needle-nose pliers can help grip and turn stubborn components.
- Flashlight: Essential for illuminating the dark interior of the drain.
- Rags or Old Towels: For cleanup and protecting surfaces.
- Protective Gloves: To keep your hands clean and safe.
- Lubricant (optional): Penetrating oil can help loosen rusted or stuck parts.
- Drain Snake or Hair Catcher (optional): Useful for clearing clogs once the stopper is removed.
- Small Container: To hold small parts like screws, preventing them from getting lost.
How to Remove A Tub Drain Stopper: A Guide for Each Type
The method for removing a tub drain stopper largely depends on its design. Each type has a unique mechanism that requires a specific approach. Carefully identify your stopper before proceeding to ensure you use the correct removal technique.
Removing a Pop-Up Tub Drain Stopper (with Trip Lever)
Pop-up stoppers are often connected to a trip lever on the overflow plate. When you flip the lever, a linkage inside the overflow pipe moves a plunger or rocker arm, which then lifts or lowers the stopper in the drain opening.
- Remove the Overflow Plate: Use a screwdriver to unscrew the two screws holding the overflow plate to the tub. Carefully pull the plate away from the tub.
- Extract the Linkage Assembly: As you pull the overflow plate, the entire linkage assembly, including the rocker arm and plunger, should come out with it.
- Remove the Stopper: The stopper itself might be separate or attached to the rocker arm. If it’s separate, simply lift it out of the drain opening. If attached, you may need to gently wiggle it free from the rocker arm or detach it by hand.
- Clean and Inspect: Once removed, clean any hair or debris from the stopper and linkage.
Removing a Lift-and-Turn Tub Drain Stopper
A lift-and-turn stopper is characterized by a small knob on top that you lift and then turn to lock or unlock the stopper in place. This type is usually threaded directly into the drain’s crossbar.
- Unscrew the Knob: Grasp the stopper firmly. Turn the knob counter-clockwise until it loosens and can be unscrewed from the shaft.
- Lift Out the Stopper: Once the knob is removed, the stopper assembly can typically be lifted straight out of the drain.
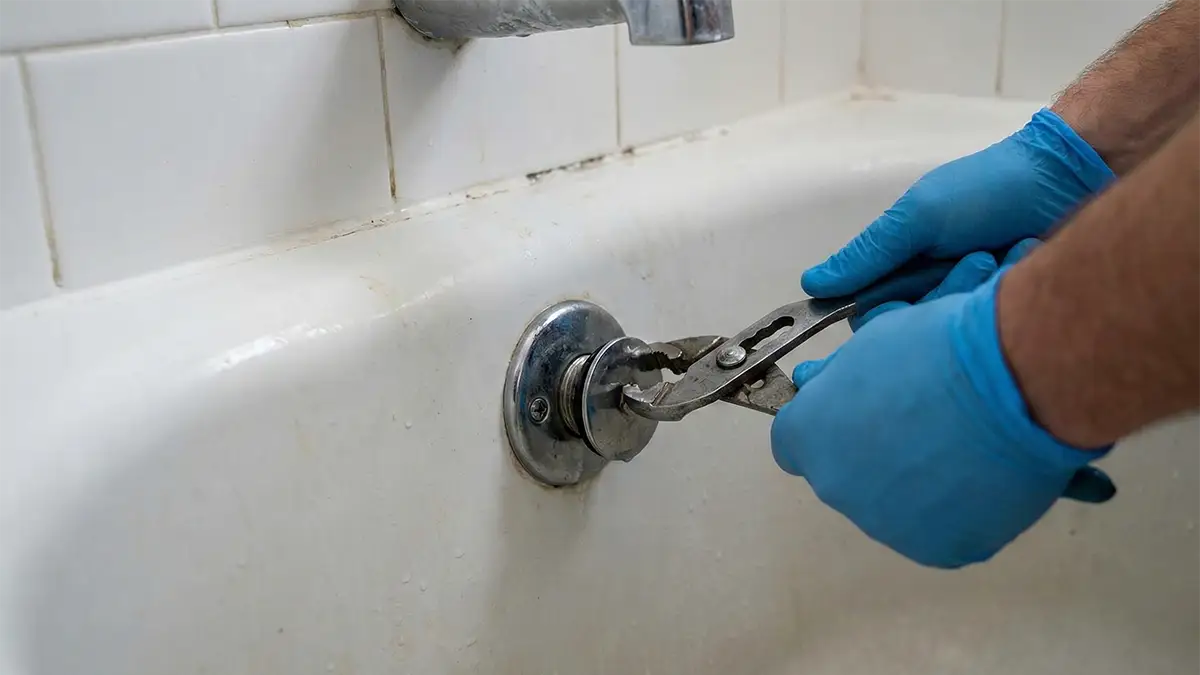
- Alternative Method (if knob is stuck): If the knob is stuck, you might need to use pliers to gently grip the base of the stopper and turn the entire assembly counter-clockwise to unthread it from the drain’s crossbar. Be careful not to damage the finish.
Removing a Push-Pull Tub Drain Stopper
Similar to the lift-and-turn, a push-pull stopper has a knob on top, but instead of turning, you push it down to close the drain and pull it up to open it. It’s usually threaded onto a post that extends from the drain’s crossbar.
- Unscrew the Knob: Hold the stopper body steady and turn the knob counter-clockwise. It should unthread from the post.
- Lift Out the Stopper: Once the knob is off, the stopper body can be lifted out.
- If the Post Remains: Sometimes the post itself is threaded into the drain. If you need to remove the post, you might need a pair of needle-nose pliers to grip it and turn it counter-clockwise.
Removing a Toe-Touch Tub Drain Stopper
A toe-touch stopper operates by pressing down on the top with your foot to open or close the drain. It has a spring-loaded mechanism and is typically threaded into the drain’s crossbar.
- Unscrew the Top Cap: Press the stopper down to the open position. Grasp the top cap firmly and turn it counter-clockwise. It should unthread from the internal shaft.
- Remove the Internal Mechanism: Once the cap is off, the internal spring-loaded mechanism can usually be lifted out.
- Unthread the Base (if necessary): If the entire stopper needs to be removed, you might need to use pliers to grip the base of the stopper (where it meets the drain opening) and turn it counter-clockwise to unthread it from the drain’s crossbar.
Removing a Flip-It or Strainer-Style Tub Drain Stopper
Some simpler stoppers, like a Flip-It, are universal and simply sit in the drain, held by friction or a small rubber gasket. Strainer-style stoppers are often just a metal grid.
- Simply Lift Out: For these types, you can usually just grasp the stopper and lift it straight out of the drain opening. There are no screws or threads involved.
- Clean: Once removed, clean any hair or debris from the stopper and the drain opening.
Troubleshooting Stubborn Drain Stoppers
Sometimes, a tub drain stopper can be stubborn and resist removal. This is often due to corrosion, accumulated grime, or stripped components. Patience and the right technique are key.
- Corrosion or Rust: If the stopper is metal and appears rusted, apply a penetrating oil to the threaded areas. Allow it to sit for 15-30 minutes to work its way in before attempting to unscrew again.
- Stripped Screws: If a screw head is stripped, try using a screw extractor kit. Alternatively, a rubber band placed over the screw head before inserting the screwdriver can sometimes provide enough grip.
- Stuck Linkage: For pop-up stoppers, the linkage can become jammed with hair and soap scum. Gently wiggle the overflow plate and linkage while pulling to free it. You might need to use needle-nose pliers to help clear debris from the overflow pipe opening.
- Over-tightened Stopper: If a stopper was installed too tightly, it might be difficult to unthread. Use a pair of adjustable pliers with a cloth wrapped around the stopper to get a better grip without damaging the finish, then turn counter-clockwise.
Common Mistakes to Avoid During Removal
Avoiding common pitfalls can save you time, frustration, and potential damage to your plumbing. Be mindful of these mistakes when removing your tub drain stopper.
- Forcing It: Never apply excessive force. If a stopper isn’t budging, re-evaluate the type of stopper and ensure you’re using the correct removal method. Forcing it can strip screws, break plastic parts, or damage the drain assembly.
- Using the Wrong Tools: Using pliers on a screw head meant for a screwdriver, or vice versa, can strip components. Always use the appropriate tool for the job.
- Losing Small Parts: Screws, washers, and small springs can easily fall into the drain. Keep a small container nearby for these components and work carefully over a towel.
- Ignoring Safety Gear: Skipping gloves can expose your hands to unsanitary conditions and potential cuts from sharp edges.
- Not Cleaning Thoroughly: Removing the stopper is an excellent opportunity to clean the drain. Neglecting this step means clogs are likely to return quickly.
Keeping Your Drain Stopper Functional: Maintenance Tips
Regular maintenance can significantly extend the life of your tub drain stopper and prevent future clogs and removal headaches. A little proactive care goes a long way in keeping your plumbing running smoothly.
- Regular Cleaning: Periodically remove your stopper (every few months) and clean off accumulated hair, soap scum, and grime. A brush and some warm, soapy water are usually sufficient.
- Lubrication: For stoppers with moving parts or threads, a small amount of plumber’s grease or silicone lubricant applied to the threads or pivot points can keep them operating smoothly and prevent corrosion.
- Check for Damage: While cleaning, inspect the stopper for any signs of wear, cracks, or corrosion. Replace worn-out gaskets or stoppers to maintain a good seal and prevent leaks.
- Avoid Harsh Chemicals: Chemical drain cleaners can be corrosive and damage plastic or metal components over time. Opt for enzymatic cleaners or manual removal of clogs whenever possible.
Expert Help: When to Contact a Plumber
While removing a tub drain stopper is often a straightforward DIY task, there are situations where calling a professional plumber is the wisest course of action. Knowing your limits can prevent further damage and ensure the problem is resolved correctly.
If you encounter a severely stuck stopper that won’t budge despite your best efforts, or if you suspect a deeper issue within your plumbing system, it’s time to call an expert. This includes situations where you’ve accidentally damaged a pipe, if water isn’t draining even after stopper removal, or if you’re uncomfortable working with plumbing components. Plumbers have specialized tools and expertise to handle complex clogs, broken parts, or underlying pipe issues safely and efficiently.
Your Questions Answered: FAQs
Why is my tub drain stopper stuck?
A tub drain stopper can become stuck for several reasons, including a buildup of hair and soap scum around its mechanism, corrosion or rust on metal parts, or an internal component that has broken or jammed. Sometimes, it might simply be overtightened, making it difficult to unthread.
Can I remove a tub drain stopper without special tools?
Many tub drain stoppers, especially simpler lift-and-turn or push-pull types, can often be removed with common household tools like a flat-head or Phillips-head screwdriver, or a pair of pliers. Some basic strainer stoppers can even be lifted out by hand. However, specific types like pop-up stoppers might require a bit more effort to detach the linkage.
How do I clean a tub drain stopper after removing it?
After removing your tub drain stopper, clean it thoroughly by rinsing off loose debris under warm running water. Use an old toothbrush or a small brush with some dish soap to scrub away hair, soap scum, and grime from all surfaces and moving parts. For stubborn buildup, a mixture of vinegar and baking soda can help loosen residue.
What are the different types of tub drain stoppers?
Common types of tub drain stoppers include pop-up stoppers (operated by an overflow trip lever), lift-and-turn stoppers (lift and twist a knob), push-pull stoppers (push down or pull up a knob), and toe-touch stoppers (press with your foot). Simpler types also include flip-it stoppers and basic strainer-style stoppers that just sit in the drain.
How often should I remove and clean my tub drain stopper?
It’s generally recommended to remove and clean your tub drain stopper every 2-3 months, or more frequently if you notice slower drainage or have long-haired individuals using the tub. Regular cleaning prevents significant hair and soap scum buildup, which can lead to stubborn clogs and make future removal more challenging.
Is it difficult to reinstall a tub drain stopper?
Reinstalling a tub drain stopper is typically as straightforward as its removal, often involving reversing the steps. Ensure all parts are clean, threads are aligned, and don’t overtighten any screws or components. For pop-up stoppers, correctly re-aligning the linkage with the overflow plate is the most crucial step.
Conclusion
Successfully removing a tub drain stopper is a manageable DIY task that can help you clear minor clogs, perform routine maintenance, and keep your bathtub draining efficiently. By correctly identifying your stopper type and following the appropriate step-by-step instructions, you can tackle this common household chore with confidence. Remember to prioritize safety, use the right tools, and avoid forcing any components to prevent damage.
Regular cleaning and maintenance of your drain stopper will significantly reduce the likelihood of future issues. If you encounter persistent problems or feel uncomfortable at any point, don’t hesitate to consult a professional plumber for expert assistance.
