Planning tile layout in a bathroom involves careful measurement, strategic pattern selection, and determining an optimal starting point to minimize cuts and maximize the use of full tiles. This meticulous preparation, often including a dry-lay, ensures a professional and visually appealing final installation. Proper planning prevents common mistakes and saves time during the actual tiling process.
- Measure accurately to avoid waste.
- Choose a tile pattern that suits your bathroom’s size and style.
- Determine the best starting point to maximize full tiles.
- Perform a dry layout to visualize the final look.
- Account for grout lines in all measurements.
Your Bathroom Tile Layout Quick-Start Checklist
Before you dive into the details, here’s a quick rundown of the essential steps to get your bathroom tile layout off to a great start. Following this checklist will help you maintain focus and ensure you cover all critical planning aspects.
- Measure Your Space: Accurately record the dimensions of all areas to be tiled (floor, walls, shower).
- Choose Your Tiles: Select your desired tile type, size, and quantity, remembering to account for waste.
- Sketch Your Layout: Draw a rough diagram of your bathroom and experiment with different tile patterns.
- Find the Center: Determine the true center of your room or the most prominent wall.
- Dry-Lay Tiles: Place tiles without adhesive to visualize the pattern and identify potential issues.
- Mark Cuts: Clearly mark where tiles will need to be cut, aiming to minimize small, awkward pieces.
- Review and Adjust: Step back and assess your plan, making any necessary modifications before installation begins.
What You’ll Need for Bathroom Tile Planning
Gathering the right tools and materials before you begin planning will streamline the process and help you achieve accurate results. Most of these items are readily available at hardware stores.
- Measuring tape
- Pencil or marker
- Straightedge or long level
- Chalk line
- Graph paper or design software
- Calculator
- Your chosen tiles (a few extra for dry-laying)
- Tile spacers (to simulate grout lines)
- Utility knife or scoring tool (for marking, not cutting)
- Safety glasses
How to Plan Tile Layout in Bathroom: A Step-by-Step Guide
Executing a well-thought-out tile layout plan is crucial for a professional-looking bathroom. This detailed guide will walk you through each stage, from initial measurements to the final dry-lay.
Measure Your Space Accurately
Begin by measuring the length and width of the entire area you intend to tile. For floors, measure wall to wall. For walls, measure the height and length of each section. Note any irregularities, such as uneven walls or corners that aren’t perfectly square. These details are vital for anticipating cuts and adjustments.
Choose Your Tile Pattern
The pattern you select significantly impacts the final look. Common patterns include straight lay, diagonal, brick/offset, and herringbone. Consider the size of your bathroom and the tile size when making this decision. Larger tiles can make a small bathroom feel more expansive, while intricate patterns might be better suited for larger areas.
Determine Your Starting Point
This is one of the most critical decisions. A good starting point minimizes visible cuts and ensures symmetry. For floors, often the center of the room or the most prominent doorway is a good starting point. For walls, consider starting with a full tile at eye level or from the center of a feature wall. The goal is to avoid tiny slivers of tile in highly visible areas.
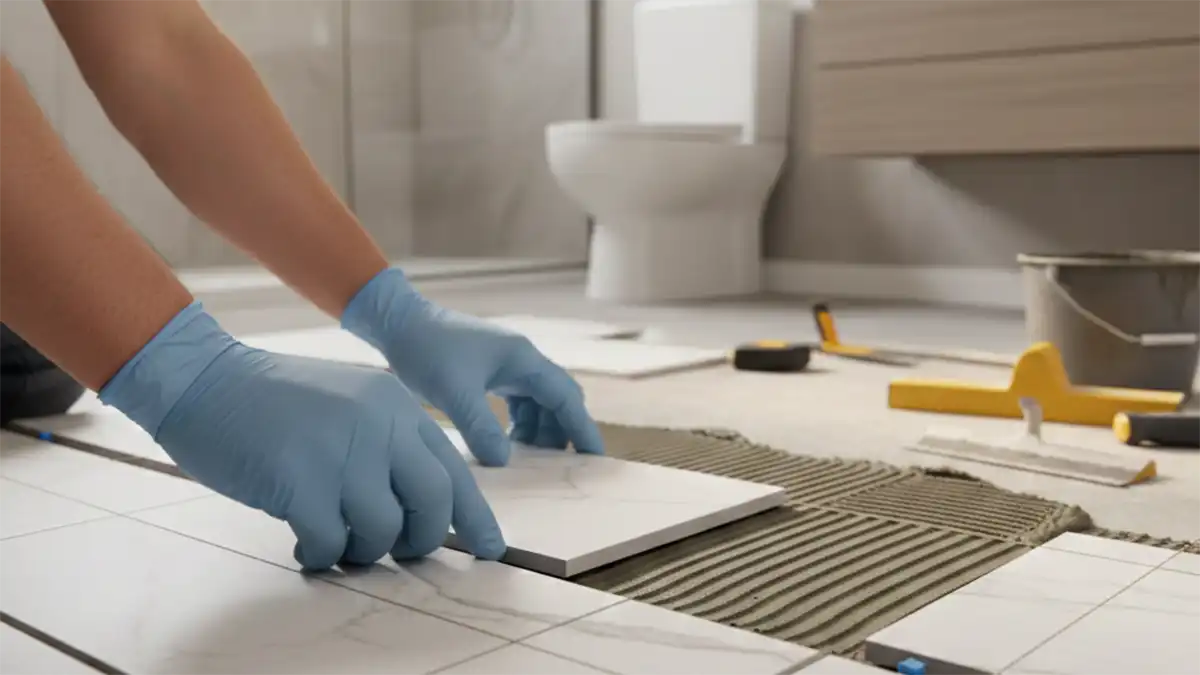
Perform a Dry Layout
Once you have your starting point, begin laying out your tiles without adhesive. Use tile spacers to simulate grout lines. This step allows you to visualize the pattern, identify where cuts will be needed, and adjust your starting point if necessary. Pay close attention to how tiles meet walls, corners, and fixtures.
Mark All Cuts Clearly
As you dry-lay, use your pencil or marker to indicate where each tile needs to be cut. Number the tiles and their corresponding positions on your floor plan to avoid confusion. Aim to have larger cuts at the edges rather than tiny, difficult-to-cut pieces. This also helps in minimizing waste.
Adjust and Refine Your Plan
After the initial dry-lay, review your entire layout. Are there any areas with very small cuts that could be avoided by shifting the entire layout slightly? Can you use larger pieces in more visible areas? Make these adjustments now, as they are much harder to change once the adhesive is applied.
Tile Layout: Best Practices and Mistakes to Avoid
Careful planning can prevent many headaches during the tiling process. Adhering to best practices and being aware of common pitfalls will help ensure a smooth installation and a beautiful finished product.
| Do’s | Don’ts |
|---|---|
| Measure multiple times for accuracy. | Rush the planning phase. |
| Sketch out several layout options. | Assume walls are perfectly square. |
| Always perform a dry layout. | Forget to account for grout lines. |
| Start with full tiles in prominent areas. | Place tiny tile slivers in highly visible spots. |
| Purchase extra tiles for cuts and mistakes. | Underestimate the amount of waste. |
| Consider the visual flow of the pattern. | Ignore the impact of light and shadows. |
Common Issues When Planning Tile Layouts
Even with careful planning, you might encounter some challenges. Knowing what to look for and how to address it can save you time and frustration.
- Uneven Walls or Floors: Older homes often have surfaces that aren’t perfectly flat or square. Account for this by making slight adjustments during your dry-lay, ensuring cuts are made to fit the actual space rather than theoretical perfect dimensions.
- Awkward Fixtures or Obstacles: Toilets, vanity bases, and shower curbs can complicate layouts. Plan cuts around these elements carefully, aiming for clean lines and minimal visible seams. Sometimes, starting a layout from a fixture can simplify surrounding cuts.
- Too Many Small Cuts: If your dry-lay reveals numerous tiny tile pieces at the edges, try shifting your entire layout by a few inches. Often, a small adjustment can turn several small cuts into fewer, larger, and more manageable ones.
- Pattern Misalignment: Ensure your chosen pattern flows correctly across the entire area, especially if transitioning between different sections or rooms. Use a chalk line to maintain straight lines and consistent spacing.
Safety First: Important Considerations for Tiling
While planning tile layout is primarily a mental exercise, the subsequent installation involves tools and materials that require attention to safety. Always prioritize your well-being.
- Eye Protection: When cutting tiles, small fragments can fly. Always wear safety glasses to protect your eyes.
- Gloves: Protect your hands from rough tile edges and potential cuts, especially during the dry-lay and handling of cut pieces.
- Knee Pads: Tiling involves a lot of kneeling. Knee pads will provide comfort and prevent injury during the dry-lay and actual installation.
- Ventilation: When you eventually apply adhesives and grout, ensure adequate ventilation to avoid inhaling fumes.
- Proper Lifting: Tiles can be heavy. Lift boxes and individual tiles correctly to prevent back strain.
Frequently Asked Questions About Bathroom Tile Layout
What is the best way to start planning a tile layout in a small bathroom?
For a small bathroom, it’s often best to start by finding the center of the most prominent wall or the room itself. This approach helps to ensure that any necessary cuts are distributed evenly and that full tiles are maximized in the most visible areas, making the space feel more balanced.
How do I determine the best starting point when I plan tile layout in bathroom?
The best starting point typically minimizes small, awkward cuts in highly visible areas. For floors, consider starting from the room’s center or the main doorway. For walls, a full tile at eye level or centered on a feature wall often yields the most aesthetically pleasing result.
Should I account for grout lines when I plan tile layout in bathroom?
Yes, absolutely. Grout lines add to the overall dimension of your tiled surface. When performing a dry-lay or sketching your plan, always use tile spacers to accurately represent the width of your intended grout lines. Failing to do so will result in an inaccurate final measurement and layout.
What are common mistakes to avoid when planning a bathroom tile layout?
Common mistakes include not measuring accurately, failing to perform a dry layout, neglecting to account for grout lines, and placing very small tile cuts in highly visible areas. Also, avoid assuming walls are perfectly square, as this can lead to frustrating surprises during installation.
How can I ensure a professional look when I plan tile layout in bathroom?
To achieve a professional look, focus on symmetry, minimize small cuts, and ensure consistent grout lines. A thorough dry-lay, careful measurement, and a strategic starting point are key. Don’t be afraid to adjust your plan multiple times until you are satisfied with the visual balance.
Is it necessary to use a grid when planning tile layout in bathroom?
While not strictly mandatory for every single tile, using a grid, often established with chalk lines from your center point, is highly recommended. A grid provides clear reference lines for maintaining straightness and consistency throughout your layout, which is essential for a professional finish.
Conclusion
Planning your bathroom tile layout is a foundational step that dictates the success and aesthetic appeal of your entire tiling project. By meticulously measuring, thoughtfully selecting your pattern, strategically determining your starting point, and performing a thorough dry-lay, you can avoid common pitfalls and ensure a beautiful, professional result. Take your time with this crucial phase, as careful preparation will undoubtedly lead to a more satisfying and enduring finish. For further guidance, consider consulting a professional tiler or exploring more advanced tiling techniques.
