To make a shower cap with a plastic bag, you will need a clean plastic bag, scissors, and a rubber band or elastic. The process involves carefully trimming the bag to a suitable size, shaping it to fit your head, and then securing it firmly with the elastic to create a temporary, waterproof barrier for your hair.
- Gather a clean plastic bag, scissors, and an elastic band.
- Trim the bag to remove handles and excess material.
- Shape the bag to comfortably cover your hair.
- Secure the bag tightly around your head with the elastic.
- Ensure a snug fit to prevent water from entering.
Important Safety Considerations Before You Start
While crafting a DIY shower cap from a plastic bag can be a quick fix, it’s crucial to prioritize safety. Always use a clean, dry plastic bag to avoid transferring dirt, germs, or chemicals to your hair and scalp. Never use bags that have contained food waste, cleaning products, or any hazardous materials.
Be mindful of suffocation risks, especially if children are present. Plastic bags can pose a serious hazard. Ensure the bag is large enough to cover your head comfortably without restricting breathing, and never leave it unattended with young children or pets. When trimming the bag, use scissors carefully to avoid accidental cuts to yourself or the bag itself, which could compromise its waterproof integrity.
Gather Your Supplies: What You’ll Need
Before you begin, collect these simple items. Most are readily available around the house, making this a convenient solution when a traditional shower cap isn’t at hand.
- Clean Plastic Bag: A standard grocery bag, produce bag, or even a dry cleaning bag can work. Choose one that is free from holes, tears, and any residue. The size should be ample enough to cover your entire head and hair.
- Scissors: Any pair of household scissors will do for trimming the plastic bag. Ensure they are sharp enough to make clean cuts without tearing the plastic.
- Rubber Band or Hair Elastic: This is essential for securing the plastic bag firmly around your head. A strong, wide rubber band or a sturdy hair elastic will provide the best grip and prevent water from seeping in.
Step-by-Step Guide: How to Make A Shower Cap With A Plastic Bag
Follow these instructions carefully to create your temporary shower cap. The goal is a secure, waterproof fit that protects your hair.
- Prepare Your Plastic Bag: Lay your chosen plastic bag flat on a clean surface. If it has handles, carefully cut them off using your scissors. You want a single, open sheet or a large pouch without any protruding parts that could snag or make it difficult to fit.
- Determine the Right Size: Hold the bag up to your head to estimate how much material you need. You want it large enough to cover all your hair, including any long strands, but not so large that there’s excessive, bulky plastic. Trim any significant excess plastic from the open end, leaving enough to gather and secure.
- Shape the Bag Over Your Head: Gently place the open end of the plastic bag over your head, ensuring all your hair is tucked inside. Position it so the plastic covers your hairline and extends slightly down your forehead, temples, and neck. Smooth out any major wrinkles or air pockets.
- Gather and Secure the Edges: With one hand holding the bag in place on your head, use your other hand to gather the loose edges of the plastic bag around the base of your head, just above your ears and at the nape of your neck. Try to create a relatively even gather.
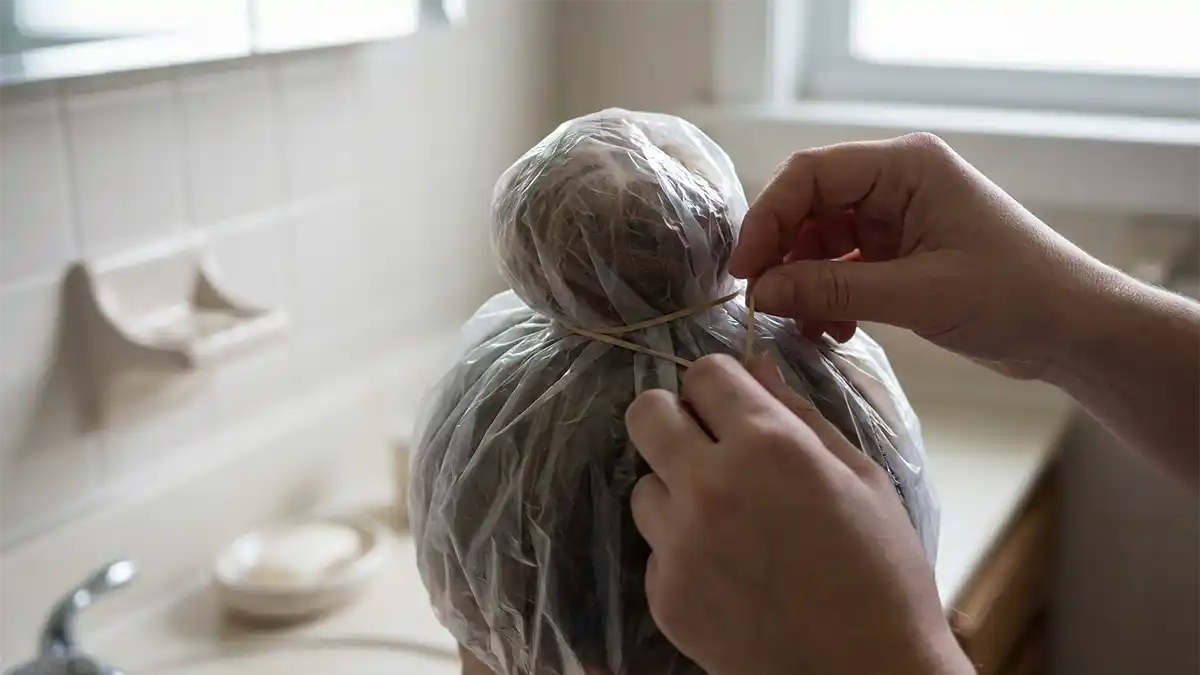
- Apply the Elastic Band: While still holding the gathered plastic firmly, take your rubber band or hair elastic. Carefully stretch it and place it over the gathered plastic, securing it around your head. The elastic should sit comfortably but snugly, holding the plastic in place against your scalp.
- Check for Security and Fit: Once the elastic is in place, gently tug on the edges of the plastic to ensure it’s securely held. Perform a quick check in front of a mirror to confirm all your hair is covered and there are no obvious gaps where water could enter. Adjust the elastic or the plastic as needed for a snug, waterproof seal.
Common Mistakes to Avoid When Crafting Your DIY Shower Cap
Even a simple DIY project can have pitfalls. Being aware of these common errors can help you create a more effective and comfortable temporary shower cap.
- Using a Damaged or Dirty Bag: A bag with holes will defeat the purpose of waterproofing. A dirty bag can transfer grime or bacteria to your hair. Always inspect the bag thoroughly before use.
- Making it Too Loose: If the elastic isn’t snug enough, water will easily seep in, rendering the cap ineffective. Ensure a firm, but not uncomfortably tight, seal around your hairline.
- Making it Too Tight: An overly tight elastic can be uncomfortable, leave marks on your skin, or even restrict circulation. Adjust for a balance between security and comfort.
- Not Covering All Hair: Long hair, especially, can easily escape the confines of the bag if not properly tucked in. Take an extra moment to ensure all strands are inside before securing the elastic.
- Ignoring Sharp Edges: If you’ve cut the plastic, ensure there are no sharp or jagged edges that could scratch your skin or tear the bag during use. Smooth out any rough cuts.
If Something Goes Wrong: Troubleshooting Your DIY Shower Cap
Encountering issues with your homemade shower cap is common, especially on the first try. Here are some solutions to typical problems:
- Problem: Water is leaking in.
- Cause: The elastic isn’t tight enough, the bag has a small hole, or hair isn’t fully covered.
- Fix: Re-adjust the elastic for a tighter fit. Inspect the bag for tears and replace if necessary. Ensure all hair is tucked inside and the plastic covers your hairline completely.
- Problem: The cap keeps slipping off.
- Cause: The elastic is too loose, or the bag material is too slick against your hair.
- Fix: Use a stronger or tighter elastic. You can also try twisting the gathered plastic slightly before applying the elastic to create more friction.
- Problem: It feels uncomfortable or too tight.
- Cause: The elastic is too restrictive, or the plastic is pulling on your hair.
- Fix: Loosen the elastic slightly. If the plastic is pulling, try repositioning the bag to distribute the pressure more evenly, or use a wider elastic band.
Tips for Maximizing Your DIY Shower Cap’s Use
While a plastic bag shower cap is a temporary solution, a few tips can help you get the most out of it when you’re in a pinch.
- Temporary Use Only: Remember, this is a makeshift solution. It’s not designed for long-term or repeated use. It’s best for a single shower when you’ve forgotten or run out of your regular shower cap.
- Handle with Care: Plastic bags are delicate. Avoid sharp objects or rough handling that could tear the bag and compromise its waterproof ability.
- Proper Disposal: After use, dispose of the plastic bag responsibly. If it’s clean and dry, check local recycling guidelines, though many plastic bags are not curbside recyclable. Otherwise, place it in the general waste.
- Consider a Double Layer: For extra security, especially with very long or thick hair, you can use two plastic bags, one inside the other, before securing with the elastic. This provides an additional barrier against water.
Quick Checklist for Your DIY Shower Cap Project
Before you step into the shower, run through this quick checklist to ensure your homemade shower cap is ready for action:
- Is the plastic bag clean and free of holes?
- Are the handles (if any) trimmed off?
- Is the bag large enough to cover all your hair?
- Is the elastic band strong and secure?
- Is the cap snug but not uncomfortably tight?
- Are all hair strands tucked inside the bag?
- Have you checked for any potential leaks or gaps?
Frequently Asked Questions About DIY Shower Caps
Is it safe to make a shower cap with a plastic bag?
Yes, it can be safe for temporary use, provided you use a clean, undamaged plastic bag and ensure it fits securely without restricting breathing. Always supervise children if they are near plastic bags due to suffocation risks. Dispose of it properly after use.
What kind of plastic bag works best for a DIY shower cap?
A clean, thin, and flexible plastic bag like a grocery bag, produce bag, or dry cleaning bag is ideal. Choose one without holes or tears, and ensure it’s large enough to comfortably cover all your hair without excessive bulk.
How do I make a shower cap with a plastic bag that fits securely?
To ensure a secure fit, trim the bag to a manageable size, gather the edges tightly around your hairline, and use a strong rubber band or hair elastic to hold it firmly in place. The elastic should be snug enough to prevent water entry but not uncomfortably tight.
Can I reuse a shower cap made from a plastic bag?
It is generally not recommended to reuse a plastic bag shower cap. Plastic bags are not designed for durability or hygiene in this context. Reusing them can lead to tears, reduced waterproofing, and potential bacterial growth from moisture.
Are there alternatives to making a shower cap with a plastic bag?
Yes, if you don’t have a plastic bag, a clean, dry towel wrapped securely around your head can offer some protection, though it won’t be fully waterproof. For a more permanent solution, consider purchasing a reusable shower cap.
What are the benefits of making a shower cap with a plastic bag in an emergency?
The primary benefit is convenience and immediate availability. In an emergency or when traveling and you’ve forgotten your regular cap, a plastic bag provides a quick, temporary, and effective waterproof barrier to keep your hair dry during a shower.
Conclusion
Crafting a temporary shower cap from a plastic bag is a simple and effective DIY solution when you find yourself without a conventional one. By following a few straightforward steps—preparing a clean bag, trimming it to size, shaping it over your head, and securing it with an elastic—you can easily protect your hair from water. Remember to prioritize safety by using a clean bag and ensuring a comfortable, secure fit. This quick hack can be a lifesaver in a pinch, offering a practical way to keep your hair dry.
