To clean an RV shower, begin by removing all items and rinsing surfaces. Apply a mild, RV-safe cleaner or a mixture of vinegar and water, allowing it to sit. Scrub all surfaces, including walls, floor, and fixtures, with a soft brush or sponge. Rinse thoroughly with clean water and dry to prevent water spots and mildew. Regular cleaning prevents buildup and maintains hygiene.
Why RV Shower Maintenance Matters
Maintaining a clean RV shower is more than just about aesthetics; it’s crucial for hygiene, longevity, and overall comfort. RV showers, often smaller and more enclosed than residential ones, are prone to rapid buildup of soap scum, hard water stains, and mildew due to limited ventilation and constant use in varying environments. Neglecting regular cleaning can lead to unpleasant odors, unsightly stains, and even damage to the shower’s surfaces, potentially requiring costly repairs.
Proper cleaning also extends the life of your RV’s plumbing system. Harsh chemicals or abrasive tools can scratch delicate surfaces or corrode pipes, leading to leaks or blockages. By using appropriate methods and products, you ensure your RV shower remains a functional and pleasant space throughout your travels.
Supplies Checklist for a Sparkling RV Shower
Before you begin cleaning, gather all necessary supplies. Having everything on hand will make the process more efficient and effective.
- RV-safe shower cleaner (mild, non-abrasive)
- White vinegar
- Baking soda
- Spray bottle
- Soft-bristle brush or sponge
- Microfiber cloths or old towels
- Rubber gloves
- Bucket
- Squeegee (optional, for drying)
Always opt for cleaners specifically designed for RV use or gentle household alternatives like vinegar and baking soda. These are less likely to damage the unique materials found in RV showers, such as fiberglass, acrylic, or plastic.
How to Clean An RV Shower: A Step-by-Step Method
Follow these steps for a thorough and effective RV shower cleaning. Remember to always work in a well-ventilated area.
Clear the Area
Remove all personal items from the shower, including shampoo bottles, soaps, and loofahs. This ensures you have full access to all surfaces and prevents products from getting in the way or being damaged by cleaning solutions.
Rinse Surfaces
Use your RV showerhead or a bucket of water to thoroughly rinse all interior surfaces of the shower. This helps to remove loose dirt, hair, and initial soap residue, preparing the surfaces for cleaning solutions.
Apply Cleaning Solution
For general cleaning, mix equal parts white vinegar and water in a spray bottle. For tougher stains or mildew, create a paste with baking soda and a small amount of water. Spray the vinegar solution or apply the baking soda paste generously over all shower surfaces, including walls, floor, and fixtures. Allow the solution to sit for 10-15 minutes to break down soap scum and grime.
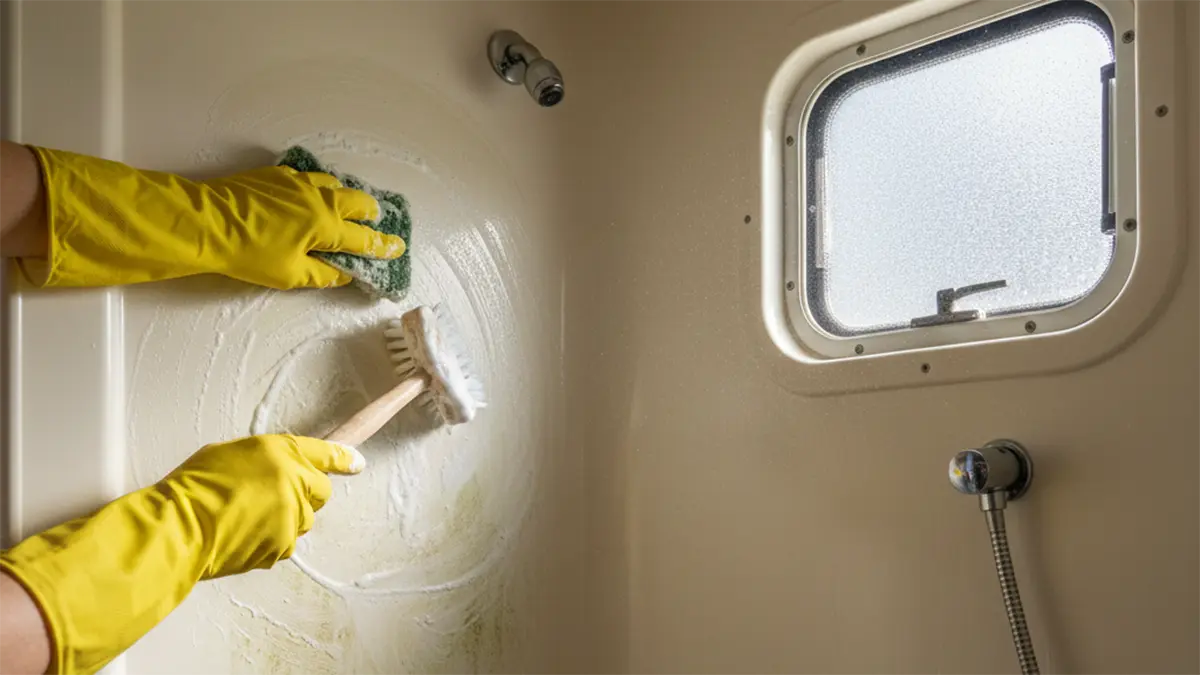
Scrub All Surfaces
Wearing rubber gloves, use a soft-bristle brush or sponge to scrub the entire shower. Pay close attention to corners, grout lines, and areas with visible buildup. For stubborn spots, reapply the cleaner and let it sit for a few more minutes before scrubbing again. Be gentle on acrylic or plastic surfaces to avoid scratching.
Clean Fixtures and Hardware
Don’t forget the showerhead, faucet, and handles. Use a smaller brush or an old toothbrush to clean around these areas. For hard water spots on chrome fixtures, a vinegar-soaked cloth wrapped around the fixture for a short period can be very effective before scrubbing.
Rinse Thoroughly
Once scrubbing is complete, rinse all surfaces thoroughly with clean water. Ensure all cleaning solution and loosened grime are washed away. Start from the top and work your way down to ensure no residue is left behind.
Dry the Shower
Use a clean microfiber cloth or a squeegee to dry all surfaces. This step is crucial for preventing water spots and inhibiting the growth of mold and mildew. Proper drying also leaves your shower sparkling clean.
Cleaning Specific RV Shower Materials
RV showers can be made from various materials, each requiring a slightly different approach to cleaning to prevent damage.
Fiberglass and Acrylic Showers
These are common in RVs due to their lightweight and durability. They are generally non-porous but can scratch easily. Always use non-abrasive cleaners and soft sponges or cloths. Avoid harsh chemicals like bleach or ammonia, which can dull the finish or cause discoloration. Vinegar and water solutions are ideal.
Plastic Showers
Similar to acrylic, plastic showers are lightweight and prone to scratching. Use only mild, RV-safe cleaners. A baking soda paste can be effective for stains without being too abrasive. Always test any new cleaner in an inconspicuous area first.
Tile and Grout
Some higher-end RVs may feature tile. For tile and grout, a dedicated grout cleaner or a baking soda paste can be used. A stiff-bristle brush is suitable for grout lines, but ensure it’s not too harsh for the surrounding tile. Rinse thoroughly to prevent residue buildup in porous grout.
Common Mistakes to Avoid When Cleaning Your RV Shower
Steering clear of these common pitfalls will help protect your RV shower and ensure effective cleaning.
- Using Abrasive Cleaners or Tools: Steel wool, harsh scrubbing pads, or gritty cleansers can scratch and damage delicate RV shower surfaces like acrylic or fiberglass.
- Ignoring Ventilation: Cleaning in a closed RV shower can lead to inhaling fumes and allows moisture to linger, promoting mildew. Always open windows or use a fan.
- Letting Cleaners Sit Too Long: While some dwell time is good, leaving strong cleaners on surfaces for excessive periods can cause discoloration or damage, especially on plastics.
- Not Rinsing Thoroughly: Any cleaning solution residue left behind can attract more dirt, create streaks, or even damage surfaces over time.
- Using Non-RV-Safe Products: Household cleaners often contain chemicals that are too harsh for RV materials and plumbing systems, potentially causing corrosion or damage to tanks.
Tips for Preventing Mold and Mildew
Prevention is key to keeping your RV shower fresh and clean between deep cleans.
- Dry After Every Use: Use a squeegee or a microfiber towel to wipe down walls and the shower pan after each shower. This is the single most effective way to prevent mold and mildew.
- Ensure Good Ventilation: Always run your RV’s exhaust fan during and after showering. Open windows or roof vents to allow moisture to escape.
- Use a Shower Curtain Liner: If you have a shower curtain, ensure it’s made of a quick-drying material and allow it to fully extend and dry after use.
- Regular Light Cleaning: A quick spray of a vinegar-water solution and a wipe-down every few days can prevent buildup from becoming a major problem.
- Consider a Dehumidifier: In very humid climates, a small dehumidifier in your RV can help control overall moisture levels.
Maintaining Your RV Shower Between Deep Cleans
Consistent, light maintenance will significantly reduce the effort required for deep cleaning.
- Daily Wipe-Down: A quick wipe of surfaces after each shower helps remove water droplets and soap film before they dry and harden.
- Weekly Spray and Rinse: Keep a spray bottle with a diluted vinegar solution handy. A quick spray and rinse once a week can keep surfaces fresh.
- Check Drains: Periodically check your shower drain for hair and debris. Clear any blockages promptly to ensure proper drainage and prevent odors.
- Inspect Seals: Regularly inspect the caulk and seals around your shower for any signs of cracking or deterioration. Repairing these promptly prevents water leaks and potential damage to your RV’s structure.
Frequently Asked Questions About RV Shower Cleaning
How often should an RV shower be cleaned?
An RV shower should ideally be cleaned after every few uses or at least once a week, depending on how frequently it’s used. A deep clean is recommended monthly or before storing the RV for an extended period to prevent mold and mildew buildup.
What are the best RV-safe cleaners for a shower?
The best RV-safe cleaners are typically mild, non-abrasive, and biodegradable. Many RV supply stores offer specialized shower cleaners. Alternatively, a simple solution of equal parts white vinegar and water, or a baking soda paste, are excellent and safe household alternatives.
Can I use bleach to clean my RV shower?
It is generally not recommended to use bleach in an RV shower. Bleach can be too harsh for many RV shower materials like acrylic or fiberglass, potentially causing discoloration, dulling the finish, or damaging seals and plumbing components. Stick to milder, RV-safe alternatives.
How do I remove hard water stains from my RV shower?
To remove hard water stains, spray the affected areas with a solution of equal parts white vinegar and water. Let it sit for 15-30 minutes, then scrub with a soft brush or sponge. For stubborn stains, you can make a paste of baking soda and vinegar, apply it, let it sit, and then scrub.
What is the best way to prevent mold and mildew in an RV shower?
The best way to prevent mold and mildew is to dry the shower thoroughly after every use with a squeegee or towel, ensure good ventilation by using the exhaust fan, and perform regular light cleanings with a vinegar-water solution. Keeping the RV’s interior humidity low also helps.
Are there specific considerations for cleaning an RV shower with a black tank?
When cleaning an RV shower, the primary concern related to tanks is ensuring that any cleaning solutions used are safe for your gray tank (which collects shower water). Avoid harsh chemicals that could damage the tank’s sensors or beneficial bacteria in septic systems if you’re using a holding tank treatment. Always use biodegradable and RV-safe products.
Conclusion
Keeping your RV shower clean is an essential part of RV maintenance, contributing to both hygiene and the longevity of your vehicle. By following a regular cleaning routine, using RV-safe products, and implementing preventative measures like drying surfaces after each use, you can easily maintain a sparkling and fresh shower space. A little effort goes a long way in ensuring your RV remains a comfortable and enjoyable home on wheels.
